Telegraph poles for the Calder Valley
I suspect like many people, I had a couple of the Airfix/Dapol telegraph pole kits in the modelling draw waiting for the moment they would be called to duty.
Now that day has arrived, and, err, they are too small!
In the section from Millwood Tunnel to the Hall Royd Junction signal box their are six posts; five of which has 15 cross-bars, each with 4 insulators. The one nearest the tunnel has two posts, and 12 particularly long cross-bars, also with 4 insulators per bar. Beyond the Hallroyd Road bridge, the poles following the Calder Valley main line towards Todmorden have just 10 cross-bars. They also rise in height as they progress westwards (towards Todmorden) from the tunnel towards Hallroyd Road bridge.
The Airfix kit had four fixed cross-bars, with the option to add two more. For this project there were therefore a need to both double the number of cross-bars, and also significantly increase the height of the post.
Although the poles would be an awkward item to 3D print, this seemed the most straightforward route.
One interesting aspect of 3D printing is the ability to form a hole through any object, such as through a telegraph pole vertically. This facility has been used to here, so that a piece of Gibson straight wire could be inserted up the centre of the post to make it more resilient to sideways knocks.
It also crossed my mind that should a post be broken, it would be possible to use a dowel inserted up this hole to provide a means of connecting the top of the pole with its cross-bars to a piece of brass tubing. So a degree of future proofing.
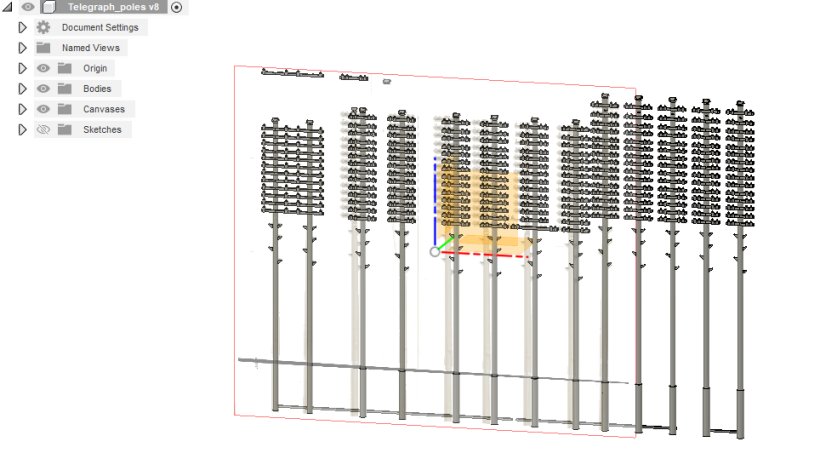
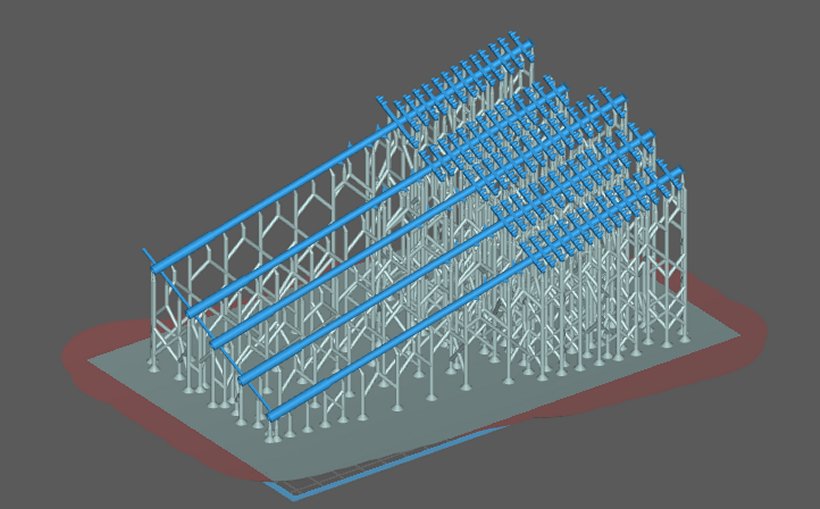
Here is a screen grab of the initial batch of poles sketched out in Fusion 360.
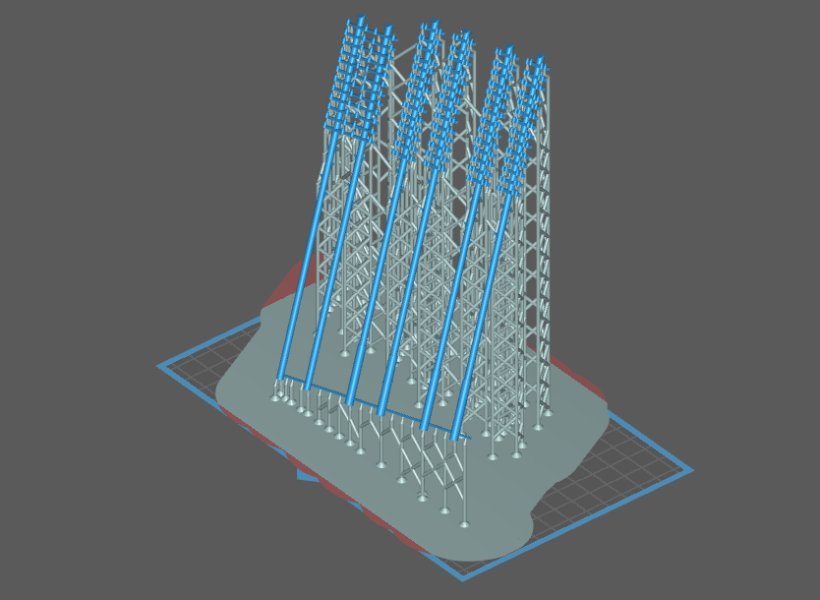
The resulting Fusion 360 file was too large to fit the Elegoo Saturn printing plate. It was therefore broken into two files, and then the first file orientated printed. This is how it looked in the Chitubox slicer.
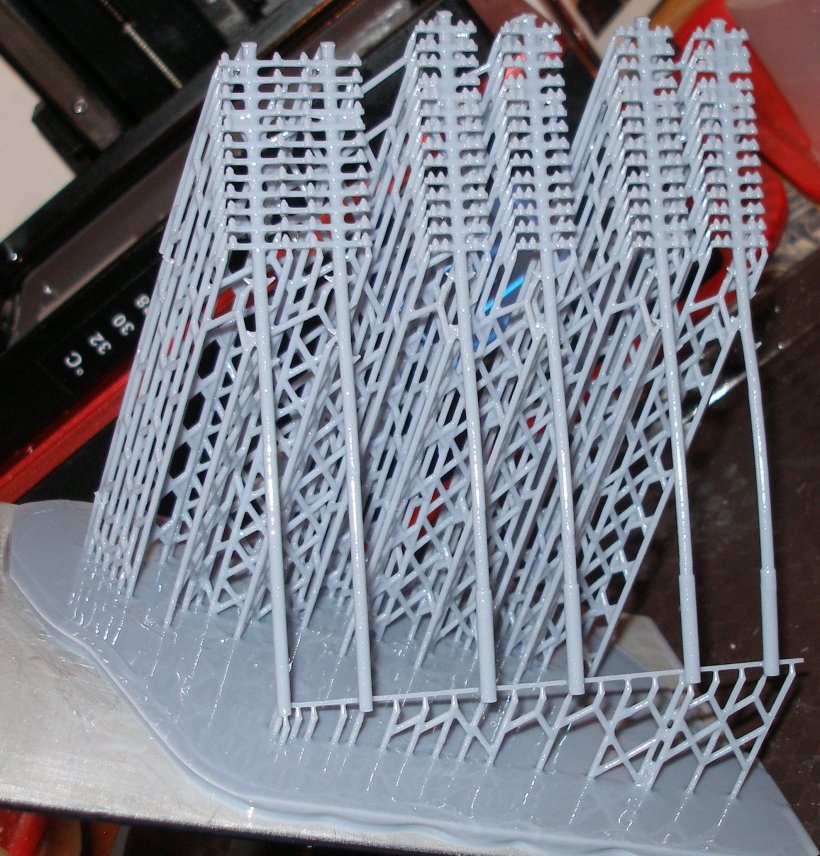
This particular orientation took some 9 hours to print. All printed well, except for the pole on the far right, which has a slightly wobbly pole.
And here is the finished print, still attached to the printing plate and with the scaffolding still intact.
The model was washed with IPA, and the scaffolding was carefully removed.
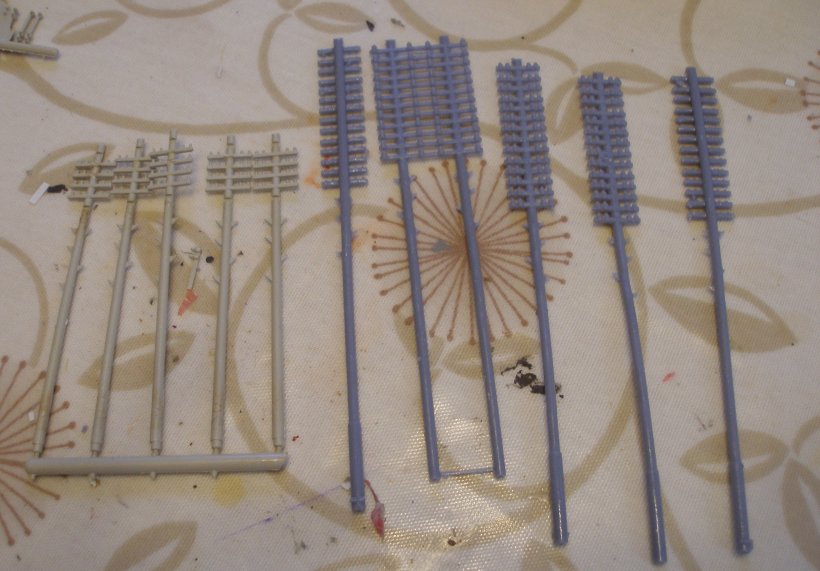
Before curing the poles in the Curing (UV light) station, Gibson straight rod was inserted into the hole up through the middle of the pole. This was perfectly formed, on the hole was widened on the second batch. It was found best to feed it in by gripping the wire close to the bottom of the post with a pair of pliers.
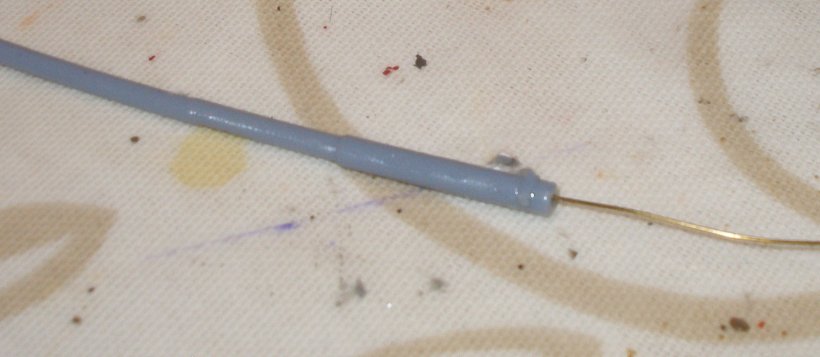
Here is the job about 40 minutes after coming out of the printer with a coat of still-wet Precision Weathered sleeper brown. Note the reinforcing rod sticking out of the bottom of the poles.
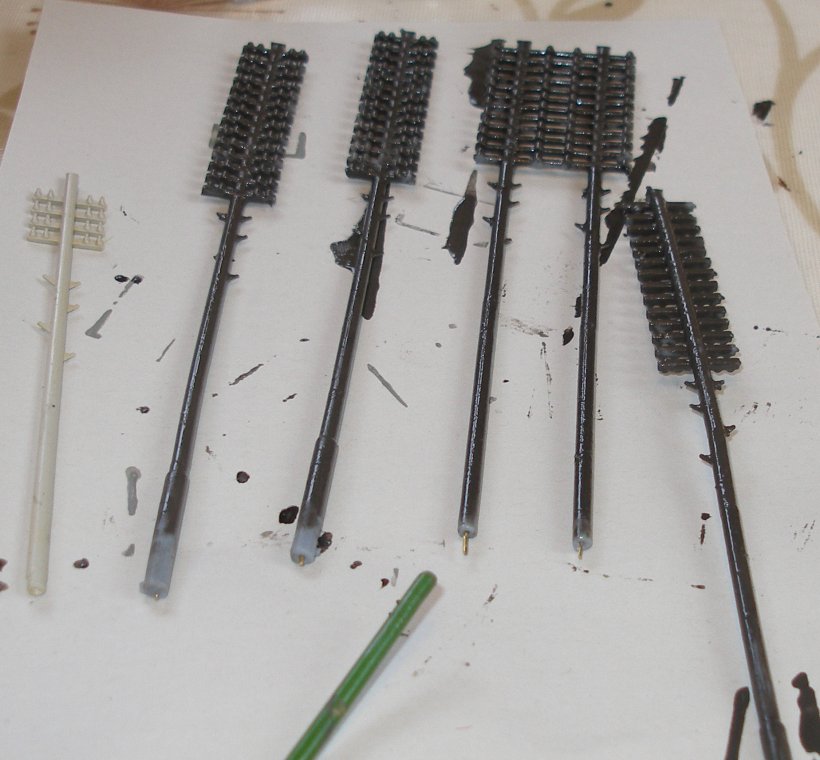
For the second batch, the diameter of the hole through the centre of the post was increased, and a lower orientation adopted in the slicer.
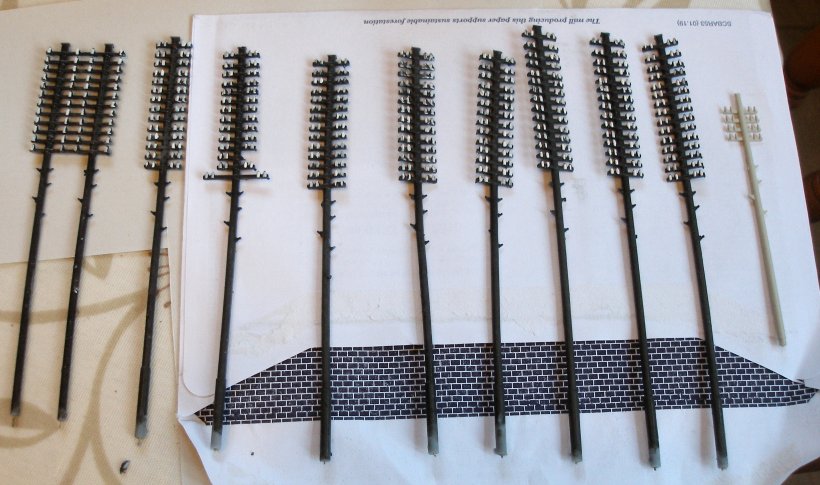
Note the extending cross-bar on the pole on the far left. Previous layouts had the telegraph poles dotted around the landscape for artistic effect, and seems very strange to be modelling specific poles, which have a clearly identified position on the layout!.
Here is the full set, painted, and almost ready for planting. The Precision Weather Track paint having been left now for just over 18 hours is still slightly tacky, and there is a slightly shiny quality to the dried paint sp they will need a coat of matt varnish before being set out. The greater height of these compared to the standard Airfix/Dapol type is striking.
30 August 2022
