
'Calderwood', L&YR c. 1900
'Calderwood' was one of the star exhibits at Alexandra Palace on Sunday 29 March 2015... This is a beautifully executed 'slice' of the Lancashire & Yorkshire Railway 'somewhere' on the Calder Valley mainline. The signalling suggests sometime after 1900, as the distants are painted red with white chevrons.
Early viewing of David Kirby and John Dilnot's layout is highly recommended. Opportunities in early 2017 are:
Epsom & Ewell: Saturday 22 April 2017 - Sunday 23 April 2017; North East Surrey College of Technology (NESCOT), Reigate Road, Ewell, Surrey KT17 3DS.
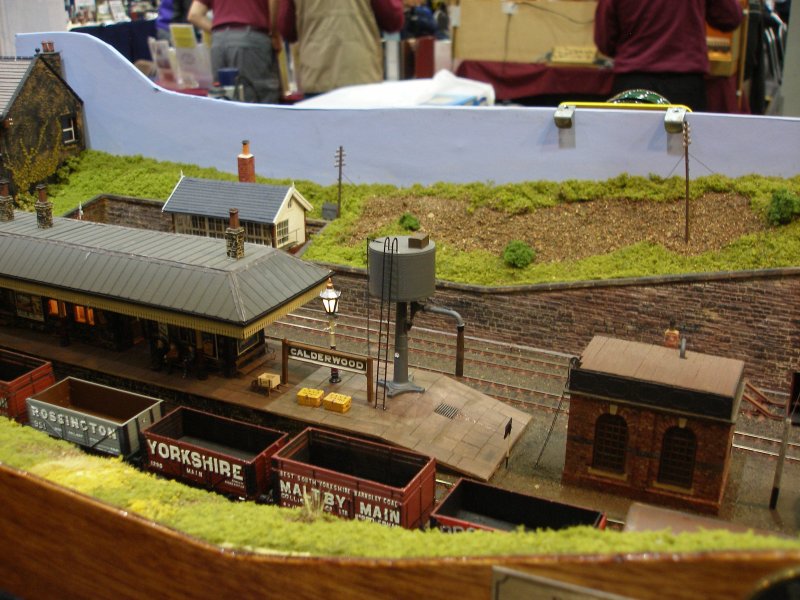
Calderwood Station. If one had to 'choose' a prototype, there is a strong resemblance to 'Thornhill for Dewsbury'. The real station had an east and a west facing bay platform, and closed to passengers on 1 January 1962, or Elland which closed 10 September 1962. Other Calder Valley stations with island platforms were Mirfield and Cooper Bridge (closed February 1950).
, 
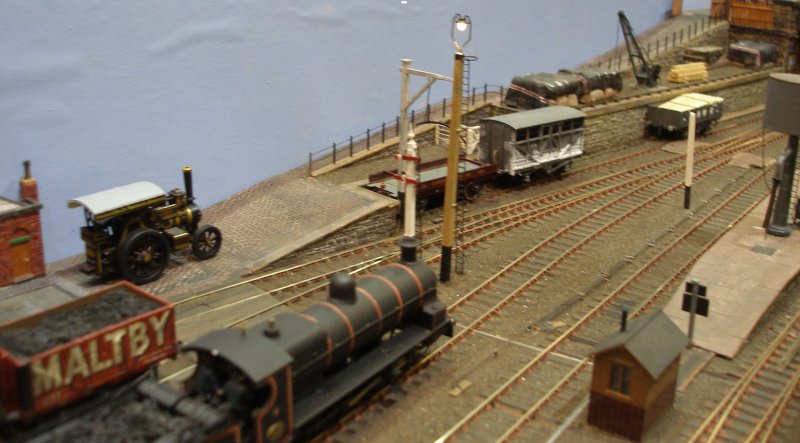
A 'big' L&YR 0-8-0 goods loco and train sits in the Calderwood Up loop - a scene which was replicated up and down the Calder Valley at the end of the 19th Century. This is a particularly well observed model; note that the distant arm now has a chevron, but the other side is still painted red. The telegraph poles feature the long-short cross bar configuration adopted by the L&YR. Calderwood also features two signal boxes - a reminder of how labour intensive the Victorian railway actually was. In the distance can be seen an island platform. Elland had such an arrangement: L&YR thinking evolved over the years, and the island platform suggests a later period rebuild, as the L&YR struggled to create additional capacity on its main artery.
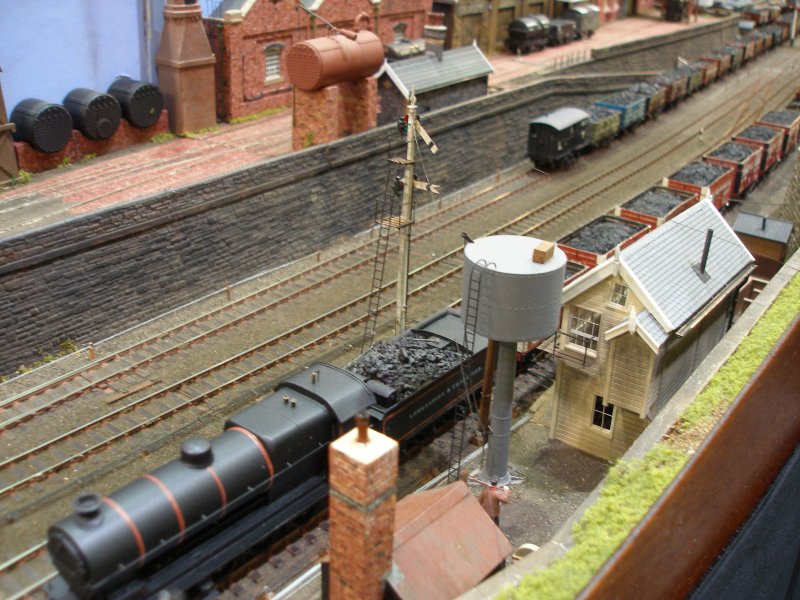
Calderwood L&YR signal box in detail. Note the placing of the water tank at the end of the loop, a very common L&YR feature. The box is all wooden - normally this type of box would have been on an embankment or on less stable ground - so its use in a cutting like this is unusual. Possible it was a spare structure from somewhere else, which was convenient to use when the loops were added here in the 1890s. Note the lavatory at the non-step end - normally they were placed next to the main door to the cabin, at the top of the steps. Incidentally, the steps from a signal box generally face the on-coming traffic, so that signallers leaving the box would not inadvertently step out in front of an approaching train, as indeed, is the case here. This particular loco hasn't gone far, as it's tender still has a reasonable load, although the L&YR crews could build quite a heap on the top of their tenders. Note that a freight has also been looped in the opposite direction.
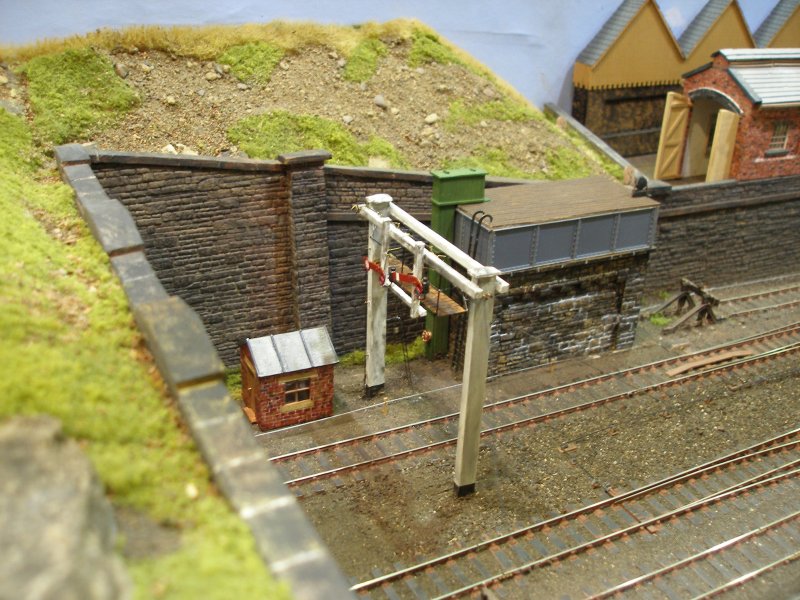
The Calderwood gallows signal was a typical L&YR feature at tunnel mouths and elsewhere where structures such as bridges hindered the driver's view. Of course, their major problem was that as the tunnel filled with smoke from up hill trains, their sighting became quite tricky from within the tunnel. This is a typical structure. The odd-ball was Hall Royd Junction which had a metal structure rather like the overhead portals created for the Holcombe Brook experimental electrification. As modelled in 1910, the signal has L&YR arms. A surprise discovery was that the Hall Royd example was upgraded by the LMS with L&NWR arms in the early 1920s, suggesting that arms that were lined up with the chimneys of hard working locos suffered more than their contemporaries located on posts at the line side. In due course these structures were replaced with steel brackets, although at Hall Royd a colour light signal with two feathers was placed at the other end of Millwood Tunnel, so replacing both the gallows and a bracket signal guarding the Up loop at Todmorden. Note the water tank neatly fitted in by the end of the loop.
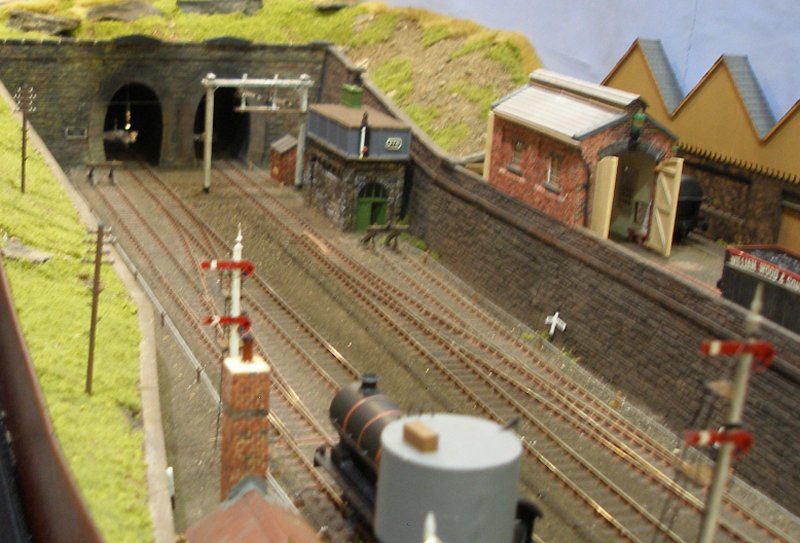
Calderwood L&YR 4mm scale model railway showing tunnel mouths. This particular configuration, with two separate mouths, is unusual on the Calder Valley main line, suggesting that a second bore has been added at a later date. Examples on the LYR include Bacup. However, they do appear to have plenty of clearance for the overhead line (OHL) electric wires that will start appearing here sometime after 2020...
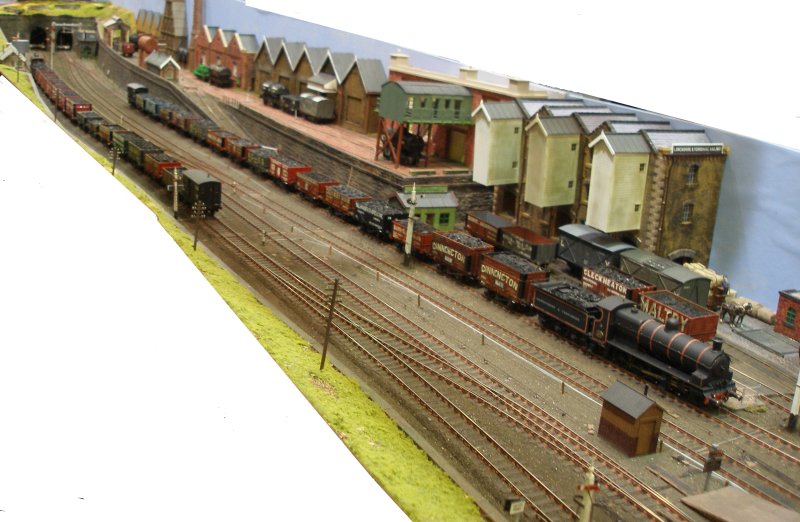
Freights have been looped in both Up and Down loops in this view. Its surprising how much room is actually required to model a train, but at 15 wagons, its long enough to create a convincing looking train. Now all we need is an Atlantic to come speeding down the through lines... What is also apparent in this view is how complete the signalling is, with shunting arms for both directions apparent on the nearer loop.
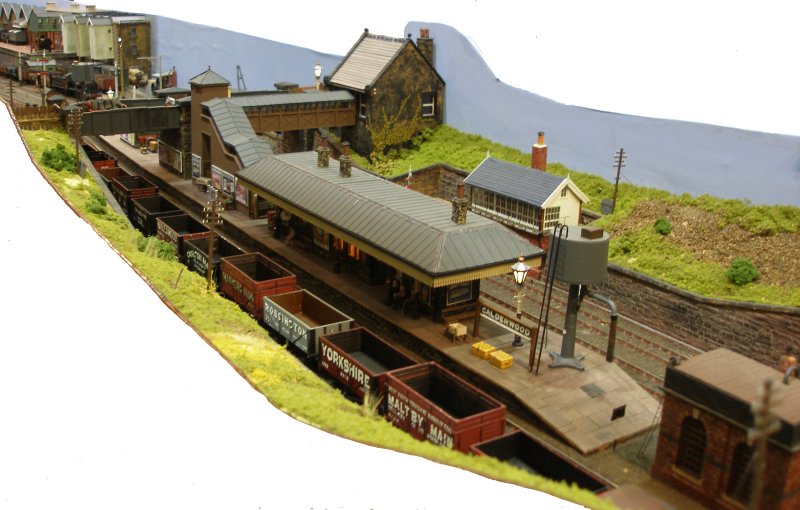
Calderwood Station also has its own signal box - this time with a brick base. It controls entry and exit to the goods loops at this end of the layout, and again a water tank and tower feature. Note how the station building is on the top of the embankment, with access to the island platform via a footbridge spanning both the loop and main running line. The gas lamps burn dimply within the station building. Clearly a freight train has been backed into the refuge siding in the foreground, with the second one having entered under permissive block regulations, so allowing goods trains to stand nose-to-tail in a section. I should have asked in which direction Manchester was, but note that the wagons are empty, so suggesting this is a train returning from Lancashire to Yorkshire. Dave Kirby has pointed out that at this part of the Calder Valley loaded coal trains ran in both directions, as the Lanky served collieries both east and west of here, and also accessed docks on both coasts. It may well have been assembled in the Grid at Rose Grove before passing over Copy Pit and down to Hall Royd Junction when it would have joined the Calder Valley main line. There were numerous assembly and marshalling points heading towards Yorkshire, and in the 60s a brand-new yard was created at Healey Mills, although it had relatively few years performing its intended role before traffic levels fell away as both the pits in Yorkshire and the power stations in Lancashire were all closed down.

Calderwood is typically Lanky in that tunnels abound. The other end of the layout also features mouths with good clearances. May be Class 319s will run through here yet... Note the home and distant signals by the tunnel mouth. These are Raynar Wilson arms, both painted red. The distant arm has yet to have a chevron, so has not been updated from the original white vertical band. Yellow distant arms would have to await the arrival of the LM & SR, and even then there would be a delayed start. It was Derby that - for once - was the leader in this respect, and were the first LMS 'division' to start installing upper quadrant arms on the existing posts from around 1926. The other signalling workshops only fell into line when a central LMS signal department was established in 1929. Interestingly, when the L&YR and L&NWR merged in 1922, one of the very first moves was to relocate the Horwich signalling department to Crewe.
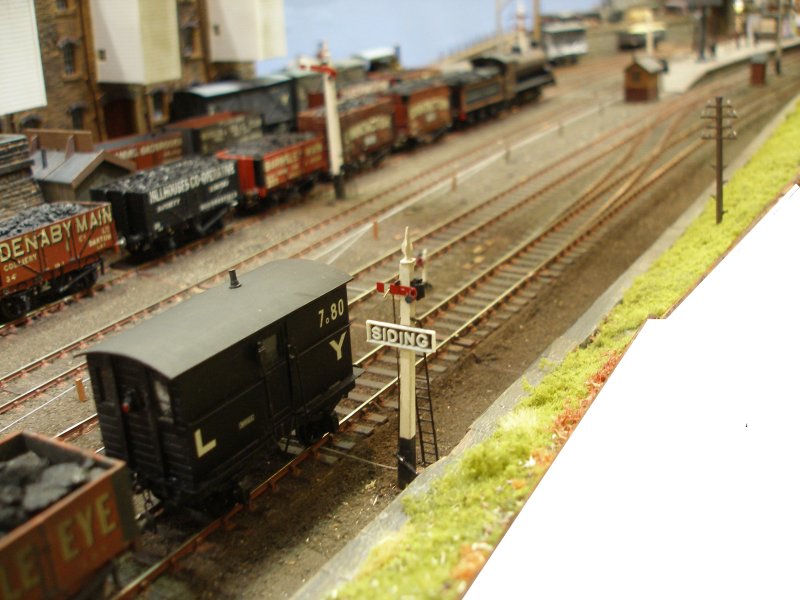
This is the signal that controls access to the refuge siding. Note how the operating wire is fixed in front of the post, rather than behind it. Dave tells me that at this show the signals were all worked with memory wire. Subsequently the drives have now all been upgraded with servos, so allowing the characteristic 'bouce' to be replicated.
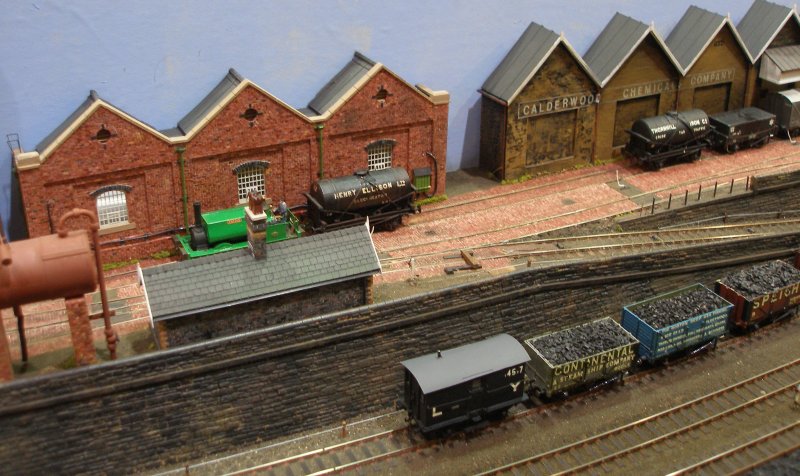
Calderwood also features a private siding. There were a lot of these on the L&YR system, serving, as it did, the industrial heart lands of the two counties. The Lanky had a Private Siding book which carefully recorded who was responsible for which pieces of line, and also any conveyancing that had occurred.
A shot showing the exit from the Goods Yard. Again, the shunting signals are a delight. It can be assumed that the Goods Loop is 'permissive', but should there still be a catch point from the goods yard exit? Certainty, there were catch points protecting the Down Permissive Goods Loop, where the erstwhile Engineering Sidings joined it, at Hall Royd, so maybe an expert can provide input on whether there could be exceptions! Notice the cattle wagon has been well limed.
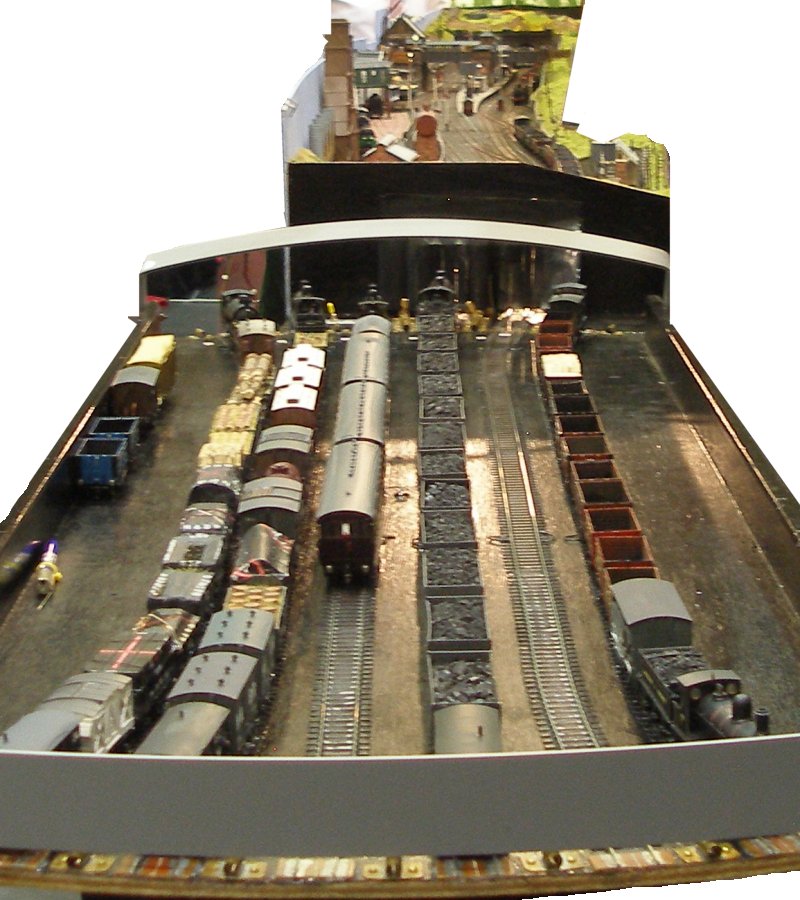
What was very impressive about Calderwood was how trains were regularly appearing from the storage yards and entered and leaving at realistic 'express' speeds. The 'trick' were the two rotating stock turntables at either end, which were deftly operated by the team. This is a beautifully crafted layout, with a huge amount of carefully observed detail.
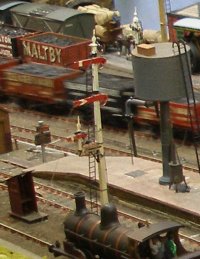
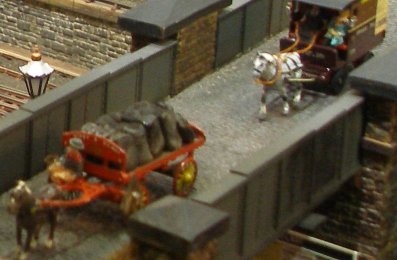
In the middle of the layout the loops start and finish, and there is a very nicely executed group of signals here. The first shot shows the shunting signal controlling access to the loop from the refuge sidings, whilst the second shot shows the bracket signal with its Raynar Wilson arms painted in the post-1900 style with red distant arms and white chevron. Finally, horses and carts still rule at Calderwood.
And finally, a suitable tail piece.
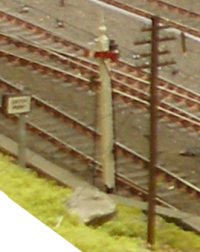
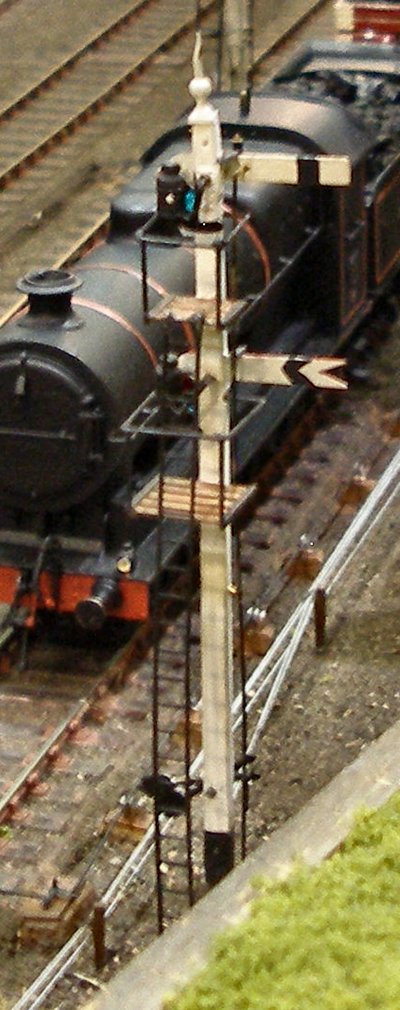
Very few people photograph the backs of signals: possibly the fronts are seen as the more colourful and therefore the more interesting. But Calderwood is a 'complete' model in that details are well observed in full, and so it is with the rear of the Loop signal.
These are the earlier Raynar Wilson arms with the later black chevron on the distant arm, but both home and distant are painted red on the front. This ws a change that would have started to be implemented on the L&YR from around 1900.
You can imagine the lamp man stumping up the ladder as evening approaches to check the lamp in the distant, and then up again to attend to the home signal lamp. Some of these signals were high: the Lanky was a bit more sensible and didn't have posts as tall as the LNWR or on the East Coast, Nonetheless, reports suggests there could be a fair bit of sway on some of them despite the extensive guying that the L&YR applied. Some posts were not so much exceptionally high, but were placed in particularly lofty locations. On the viaduct at Todmorden in the Down direction there was a trident bracket signal and in the Up a Home and Distant. The height from the top lamp to street level would have been considerable - and a very exposed location to boot. A job for which ex-sailors from the age of sail might be well qualified for!
There's a full set of signal wires and point rodding. Note also the ash ballast; it took the L&Y some time to take on the ideal of using granite. It was the Great Central Railway that really invented the modern distant signal, first installing yellow lenses and then painting the fronts of the arms yellow in or around 1917-19. Click here tor details of the development of the L&Y distant signal.

Copyright J K Wallace, t/a 'Hall Royd Junction' 2013-2023 email: Hall Royd Junction
7 Portobello Close, Chesham, Bucks. HP5 2PL, UK
tel: +44 (0)7513 412880