
Track Ballasting: track laid on bed of glue
Photo 1:
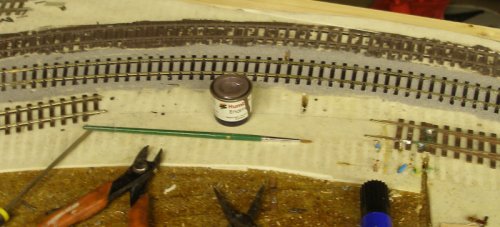
Photo 2:
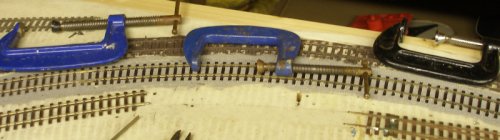
Photo 3:
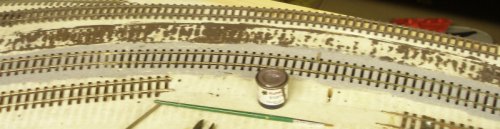
Photo 4:
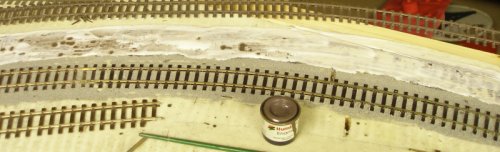
Photo 5:
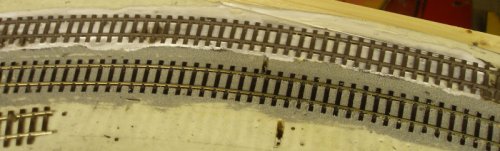
Photo 6:

Photo 7:
There are two ways of laying ballast. In the first the track is laid, wired and tested, and then the ballast gentle shaken onto it, and brushed into place before the glue is applied. There is a handy dispenser which can aid this process, although there is no way of adjusting it for different sized ballast and depth of track, so it can be a bit of a mixed blessing.
This method allows complex sections to be laid and tested before the ballast is laid, and the correct depth of ballast applied to cover the webbing between the sleepers. However, it is very time consuming.
However there is a quicker way of ballasting. This involves setting up the track, and then laying it directly onto PVA glue applied directly to the track base before ballast is sprinkled onto the wet glue.
As before, a sub-base such as cork or cushioned lino (as sold for bathroom floors) is first laid onto the baseboard. This is glued, and I use one of the 'time bond' products where the two sides to be glued together are coated with the glue, and then brought together when the glue has had 5 or so minutes to dry.
This sub-base helps to muffle the unrealistic drumming generated by the trains when running, particularly important if operating in the loft. Although not shown in the photos below, it can be cut with a chamfered edge to create the ballast shoulders that run parallel to the sleeper ends.
First, pick the finest grade of ballast available. If ballasting in '00' gauge, use N scale ballast; if N, use fine sand.
Remember that real granite discolours when the glue is applied. I use Woodland Scenics Fine Grey Ballast.
First, the track is laid in place and checked for alignment. In Photo 1 the track being laid (the further one) has been curved so that it is consistently spaced throughout the curve from the track in the foreground. And then to 'lock' the track in the desired curve, it has been painted. I use Humbrol 98 and coat both the rail and sleepers with it. Once the paint has dried, the track keeps its curvature.
The track is lying lightly on the sub-base, and in my case, was rising slightly as it had been previously laid and then lifted (for this demonstration!). The ensure the track was flat as the paint dried, weights in the form of some handy clients were placed on top of it, as shown in Photo 2.
In stage 2 the painted and now dry track is lifted from the sub-base. Although not clear in Photo 3, a chunky felt tip pen has been run down the outer ends of both sets of sleepers to mark the correct location. The outline of the painted sleepers is also a guide.
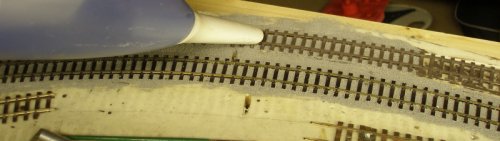
A thin layer of PVA glue is applied with a brush, taking care to keep the glue parallel to where the ballast shoulder will be, as shown in Photo 4.
The track is placed on the glue, checking the alignment against the previous marks, and also using the gauging tool previously created. Carefully holding each section of track down in the glue, the ballast is lightly sprinkled over until all the glue is covered. As each length is completed, a weight is laid on the track to keep everything in place.
The PVA dries quickly and it was possible to vacuum up the surplus ballast within a few hours. I use a car vacuum cleaner as it is easy to remove the contents for further use.
This whole process took about 40 minutes. I painted the track first thing in the morning and went out; returned at lunch time and applied the glue and ballast, and then in the evening was able to vacuum up the excess ballast. This is a very fast method, although you do need to check that the track is correctly aligned before sprinkling the ballast on.
28 September 2015

Copyright J K Wallace, t/a 'Hall Royd Junction' 2013-2023 email: Hall Royd Junction
7 Portobello Close, Chesham, Bucks. HP5 2PL, UK
tel: +44 (0)7513 412880