
Locomotive Wheel Cleaning Track
Anyone who has switched to DCC will know that keeping the locomotive wheels clean - and the track - is one of the keys to successful operation.
Wheel cleaning involves the treads being cleaned a section at a time, with the loco placed back on the track to move the wheels forward to allow the next section to be cleaned, and so on until all the treads have been cleaned.
A track rubber, such as made by Peco, can be used in this process, but there is a risk that the chrome plating will be rubbed off, revealing the brass below.
A better route is to use surgical spirit or mentholated spirits using a cotton bud. This is very effective, but still takes time.
However the locomotive requires excessive handling during this process, with the risk that detail can be knocked off or the paint finish damaged.
Woodland Scenics make a wheel cleaner on which the loco sits. Power is obtained from metal strips so that the wheels rotate against a cleaning strip. Gaugemaster make a simplified version but this seems to polish the dirt rather than remove it. This is shown in the photo below.
This page describes the construction of my own wheel cleaning track.
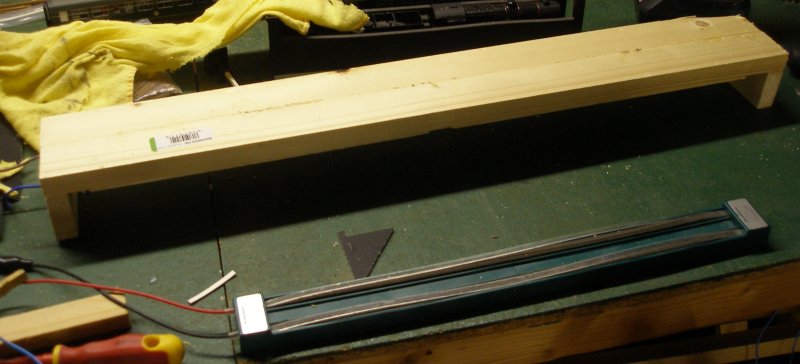
First, glue two strips of 2" x 1" together, and add end stops, so effectively making a bridge.
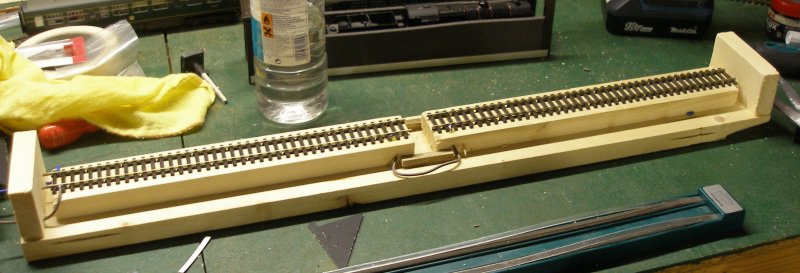
Now invert the 'bridge' and glue two pieces of 2" x 1" down the centre line, leaving an approx 1" gap between the two pieces. Once dry, add flexitrack, in this case Peco Streamline Code 70, and again remember not to lay the track across the gap. However, the two pieces must be correctly aligned. Finally, a + and - leads need to be added. In this case they enter through two holes drilled in the left hand end, and are soldered to the track. Then a pair of jumpers bridge the gap, so both sections of rail are live.
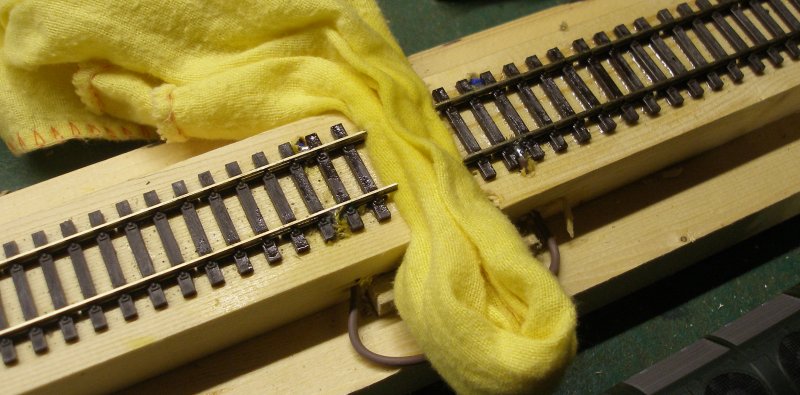
A duster is folded up, inserted into the gap between the two rail sections, and a dash of the cleaning fluid added so that the upper surface is moist.
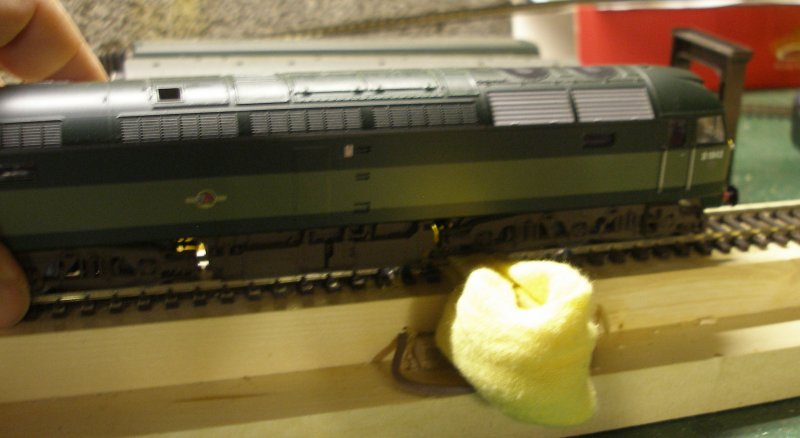
The loco is placed on the left hand track, and then with the power applied and the wheels spinning, it is gently eased over the duster, an axle at a time.
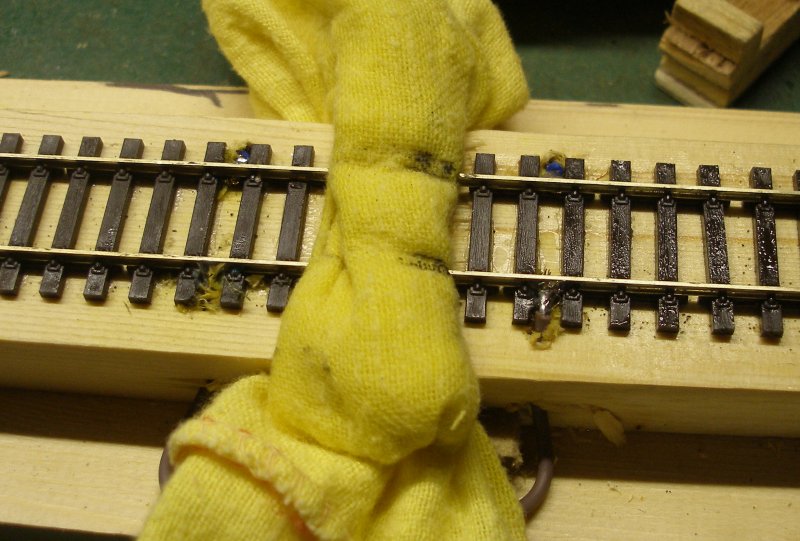
This was a loco with relatively clean wheels, and literally a few seconds per axle, has produced the above result.
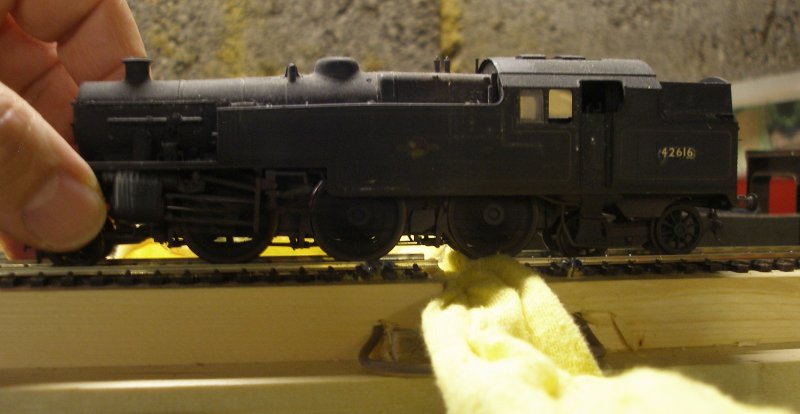
Low Moor's Stanier 4MT tank 42616 beautifully illustrates the cleaning track in action.
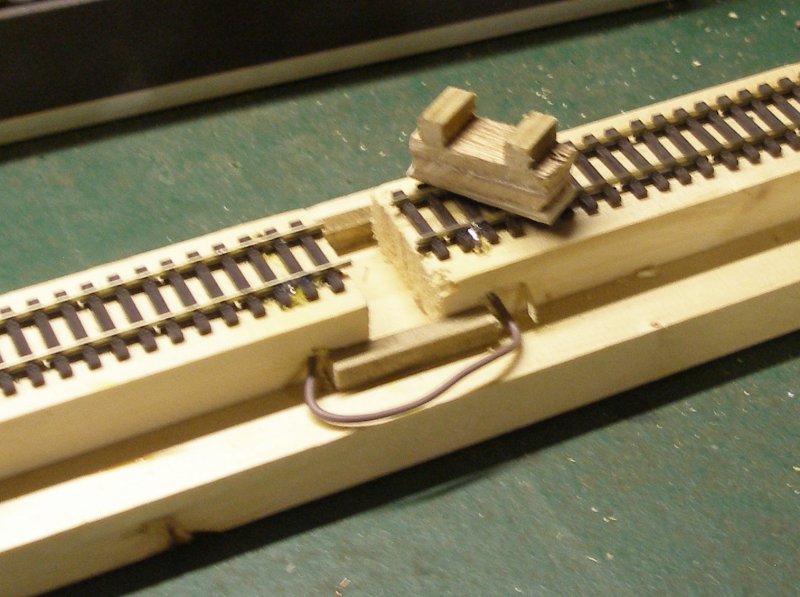
I thought that the pad might need a firmer support under the wheel set being cleaned, and created this drop in piece, with the idea a strip of cloth could be placed over it, and so firmly pressed against the tread. However, this had little give in it, and it was difficult to get the loco to run at full speed for a reasonable periods due to the greater resistance created, and so was less effective.
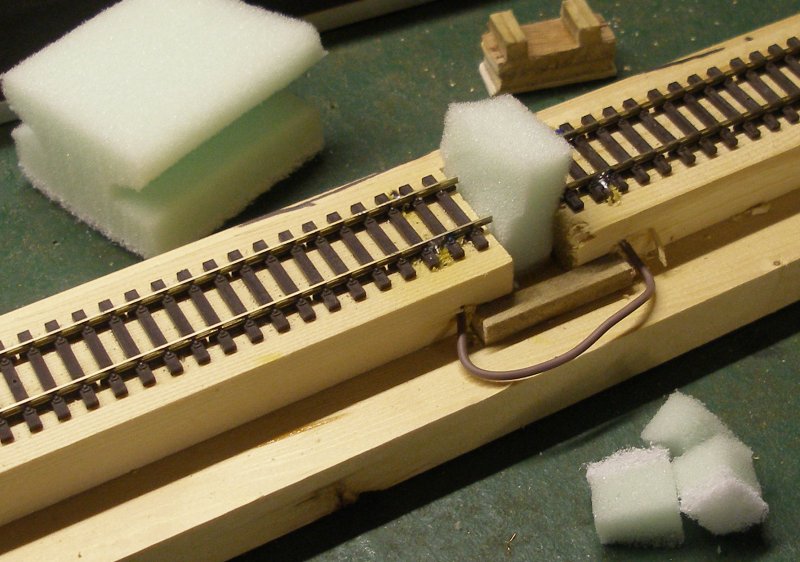
A further test was made with a common kitchen cleaning pad, but although there was plenty of give, the foam rubber was pretty ineffective at capturing the gunk, and the rolled duster on its own proved the best medium for both give and gunk capture..
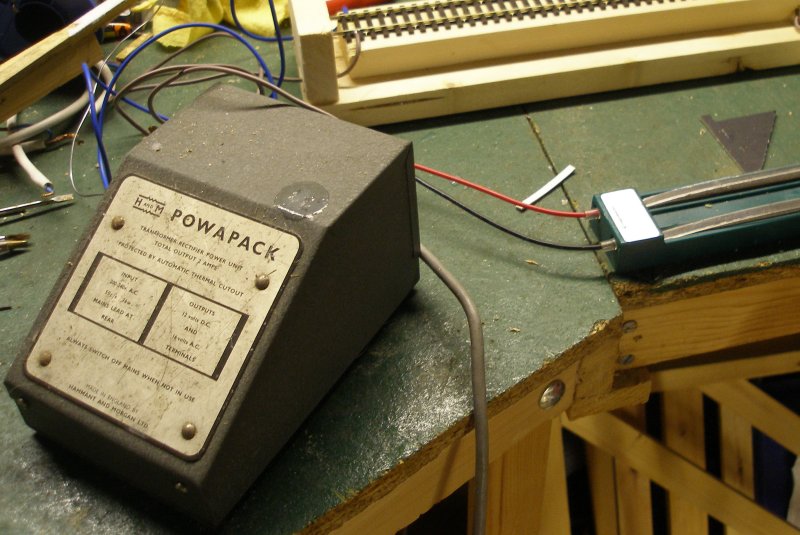
My first plan was to tap into the layout's DCC bus, and use the DCC throttle. However, an immediate problem was that the inertia settings meant that the loco took time to reach maximum speed, and I opted to use a classic DC supply. I have seen it suggested that these 'classic' H&M units are better for DCC chips, and this 'Powerpack' is perfect for the job.
Did it work as planned? Well no, because a surprising number of locos didn't have the power to overcome the resistance of the friction created by the loco standing on a piece of track AND effectively turn against the cleaning pad.
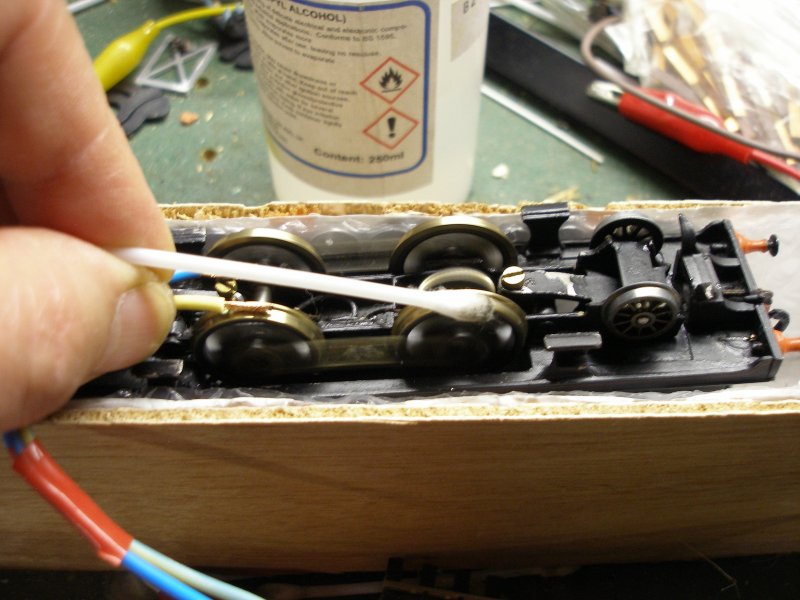
The final solution was to build a 'U' shaped trough out of plywood, and then line it with a sheet of bubble wrap to create a cradle to hold the locos upside down.
The H&M Powerpack is still be used for the DC supply, but a two-wire 'prong' has been created so that power can easily be fed to the wheels. With the wheels rotating a cotton bud dipped in IPA is used to clean both the treads and the backs of the wheels where the pick-ups make contact. I have never attempted to clean the wheel backs before, assuming the pick-ups were effectively 'self cleaning'. Suffice to say, they are not self-cleaning!
1 March 2017
When I originally wrote these notes, IPA was the accepted track and wheel cleaning fluid. But then a video by a couple guys in Australia started to circulate suggesting that we needed to know more about the science of track cleaning fluids, and know the difference between polar and non-polar. The suggestion is that the black crud that builds up on the wheels is not dust or skin cells mixed with oil, but, in fact, nickel and silver!! Given that this crud existed before we knew about IPA it follows that the simple arching we see as power up by the wheels may in part be a driver of this process. You can view the lads' video on YouTube here.
If you find a list of contact cleaners, grouped by their degree of polarity, and ignoring Kerosene, the possible non-polar cleaning fluids are WD Contact Cleaner (not the one used as a lubricant) and lighter fuel. IPA is quite a way down the list.
When I shared this pearl of wisdom with an old friend recently, he recounted how he had been involved at a show with a live steaming group, and that part of their set-upping processes had involved the use of petrol to clean the track! As he noted, this surely has to be a health and safety issue with the heady mixture of lit meths burners and petrol vapour, but he survived to share the tale.
Now some people are saying - quiet rightly - that IPA works for them and they so no reason to change. The argument is - not that WD Contact Cleaner cleans better - but that the track and wheels stay cleaner for longer.
And perhaps for the first time I have finally there is an explanation of the science behind diluted IPA might be; the stuff that is 70% IPA and 30% water. The addition of water supposedly enhances the cleaning affect of the IPA. In the blog I was reading it was suggested that the water counteracts the polar properties of the IPA. The only snag with this is that water and IPA are both polar, so I am still unsure how the water potentates the IPA. My son, who got a lot further into all of this at University, also doesn't understand the science, so if you are reading this and know the answer, please email me.
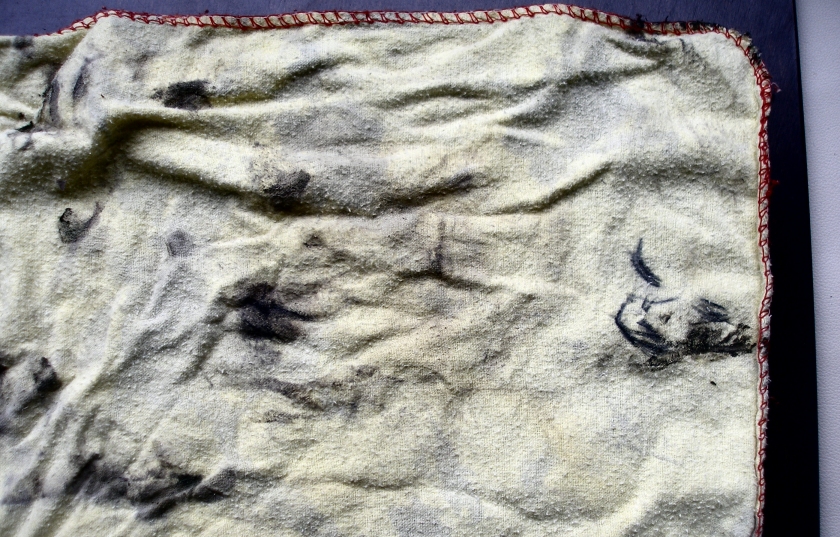
My son also thinks I should go all scientific and run a series of experiments. For now, I will confine my research to using WD Contact Cleaner to clean my test track circle of PECO fourth radius curves, which looked clean, and had recently been cleaned with a PECO track rubber. This what the duster used looked like.
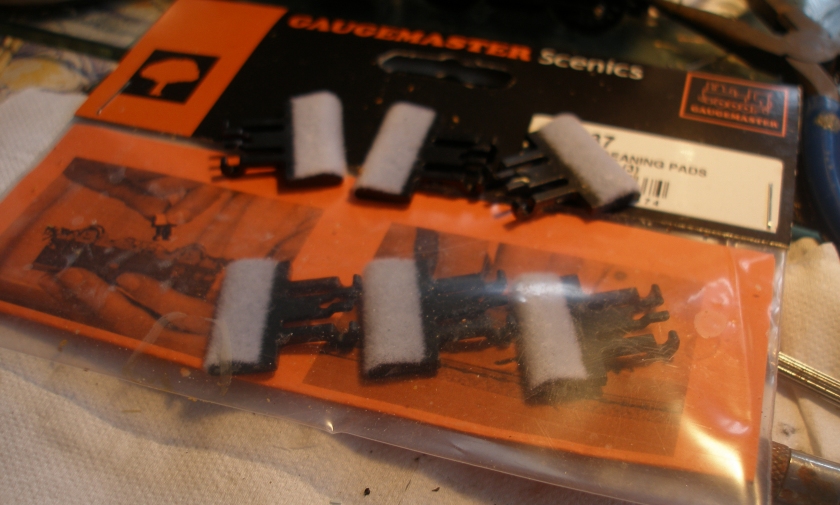
To apply the WD Contact Cleaner I bought a Woodlands Scenics track cleaning arm and pads, and at the same time also bought six of the clip-on cleaning pads from Gaugemaster (made under licence).
Back in the day many model railway clubs used a piece of hardboard which was hung from the underside of a wagon on a pivoted arm so that the edge of the hardboard was dragged along the rail head. Buying the two packs from Gaugemaster looked easier, but should the pads ware, I will to replace them with strips of hardboard.
I decided that I would fit these under my brake vans. My thinking was that there is always a brake van at the back of every goods train that I run (so if the train has a brake, it also has a track cleaner), and secondly, the footboards neatly concealed the cleaning pad.
However, a small difficulty was that pad was too wide to fit easily between the footboards, and needed the edges trimming to fit. In the photo below the right hand van has an untrimmed pad, whereas the left hand one is now trimmed and folds up under the body of the van.
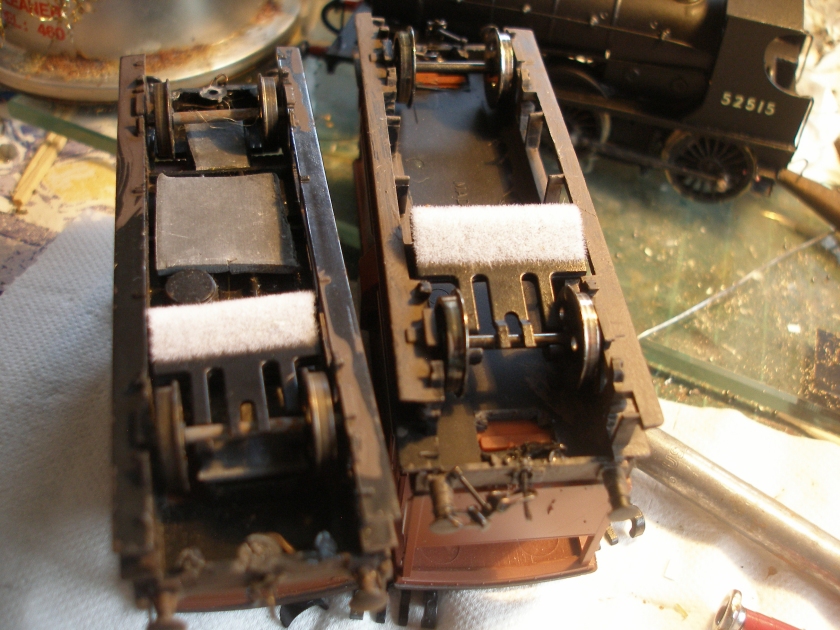
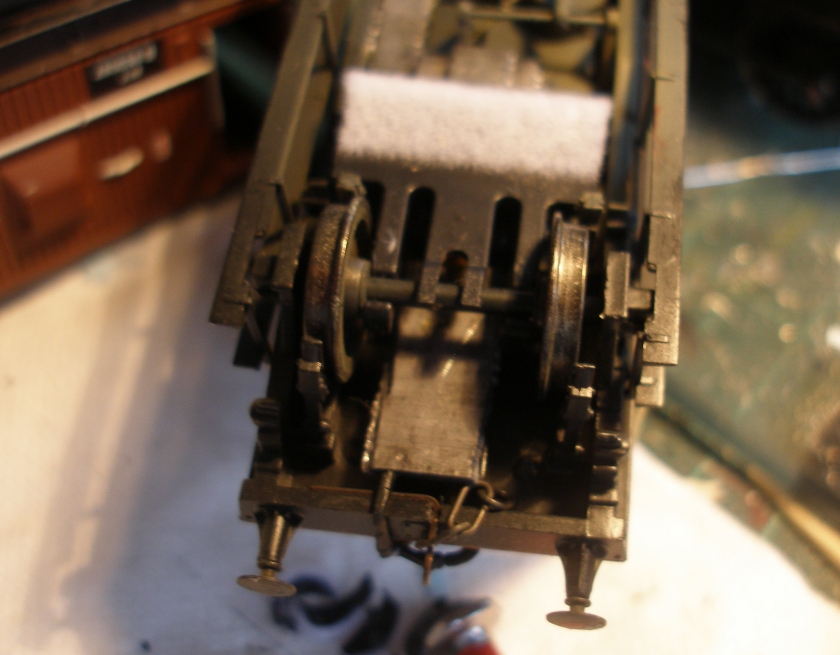
Finally, one of my vans had plastic bosses to insulate the wheel from the axle, which protruded somewhat, and meant that I had to trim the end of the arm for the pad to clip in and move freely.
29 March 2021
