
The tale of three L&YR Class 23 0-6-0 saddle tanks
My aim in Lockdown was to reduce the number of unmade or not working locomotives in the fleet. However, the fleet has continued to grow, primarily due to 'bargains' that keep appearing on eBay.
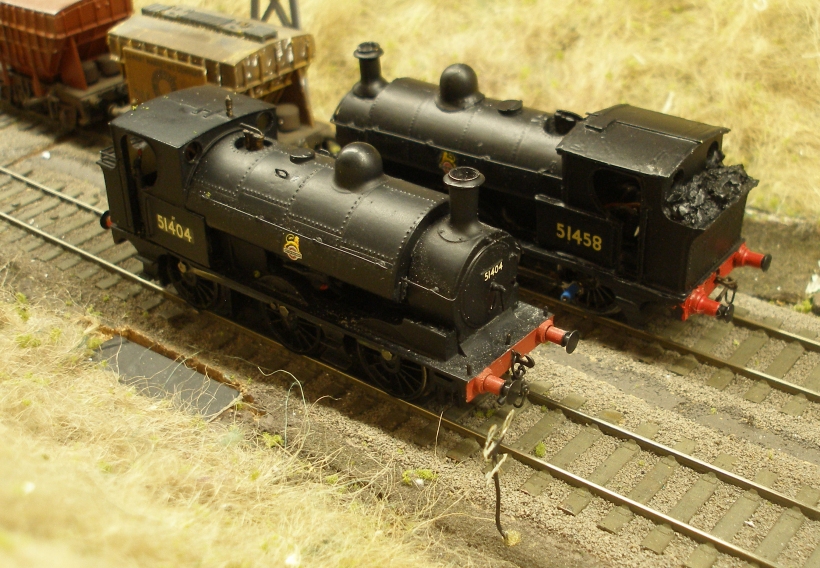
In a relatively short space of time three LYR Class 23 Barton Wright tanks came up, namely:
1. An OOWorks body (51404)
2. A Cotswold kit mounted on a Triang chassis with an open-frame motor (DS10?) (to be 51343)
3. Costswold kit on the original chassis to EM gauge with an XO4 motor (to be 51458)
Strictly speaking, none of these could be justified for Hall Royd, although there are photos of a Class 23 shunting the West Goods Yard at Todmroden, and in the Hall Royd sidings before the First World War. In the late 1950s these locos were confined to places where substantial shunting still took place, with the nearest allocations being Newton Heath and Rose Grove. But a bargain is a bargain...
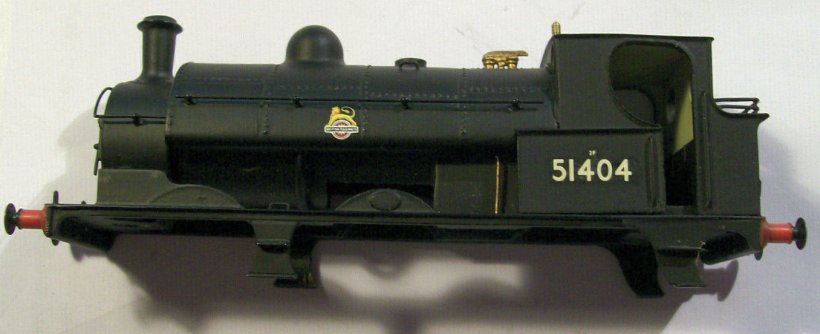
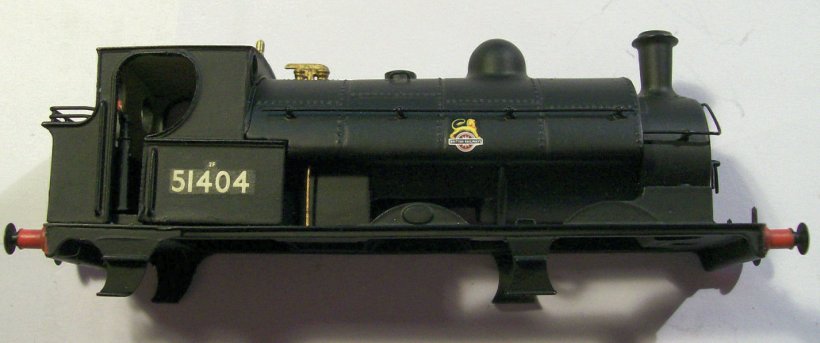
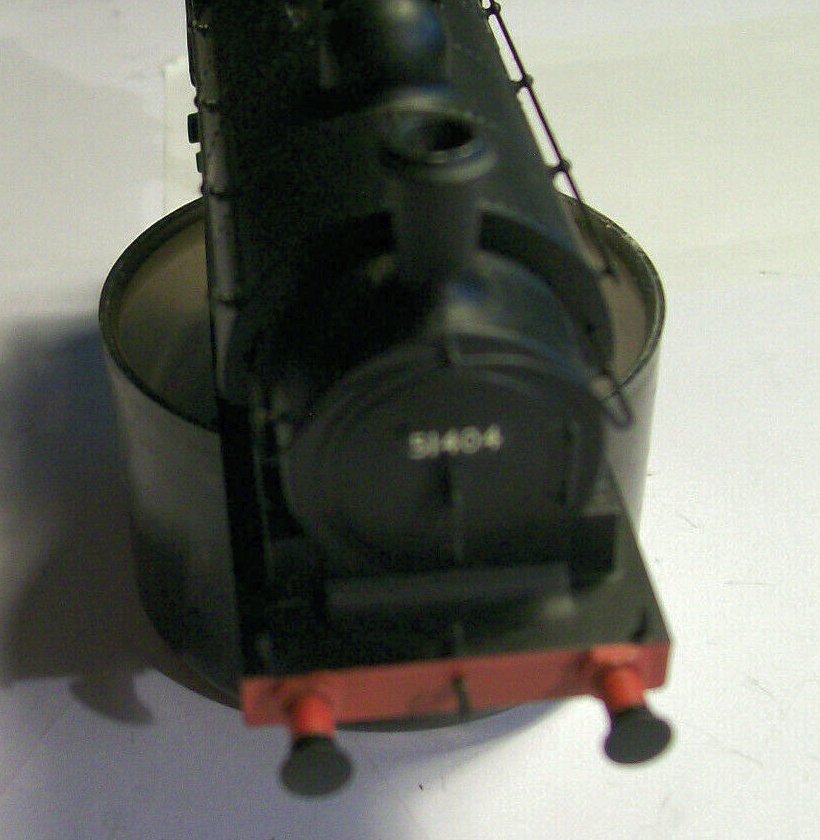
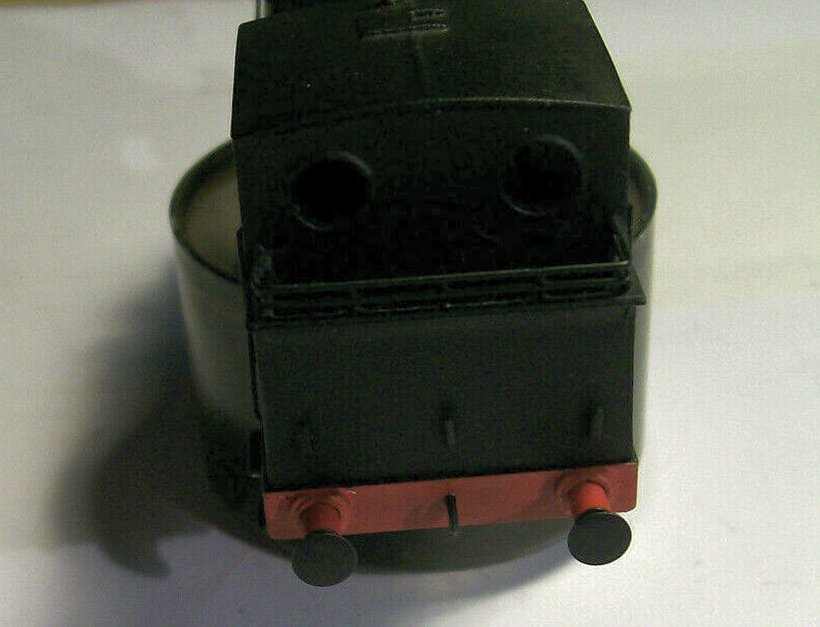
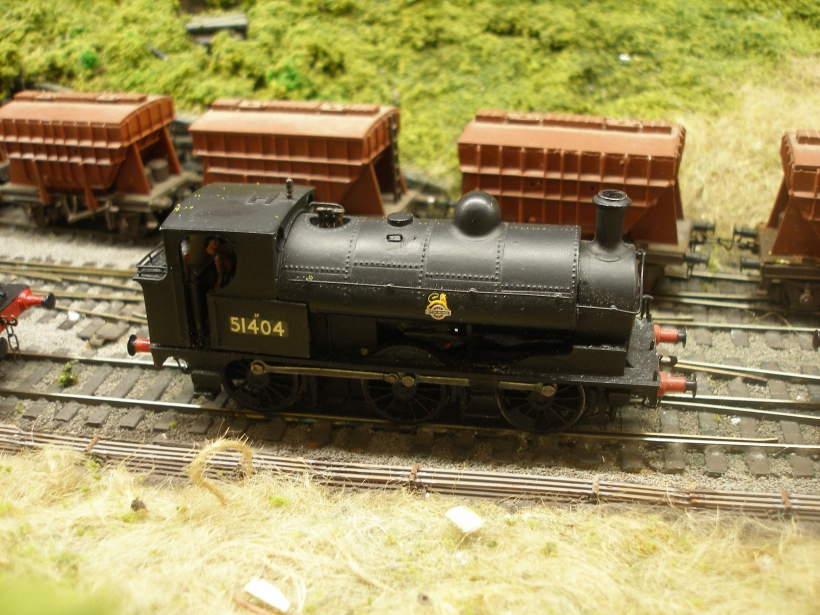
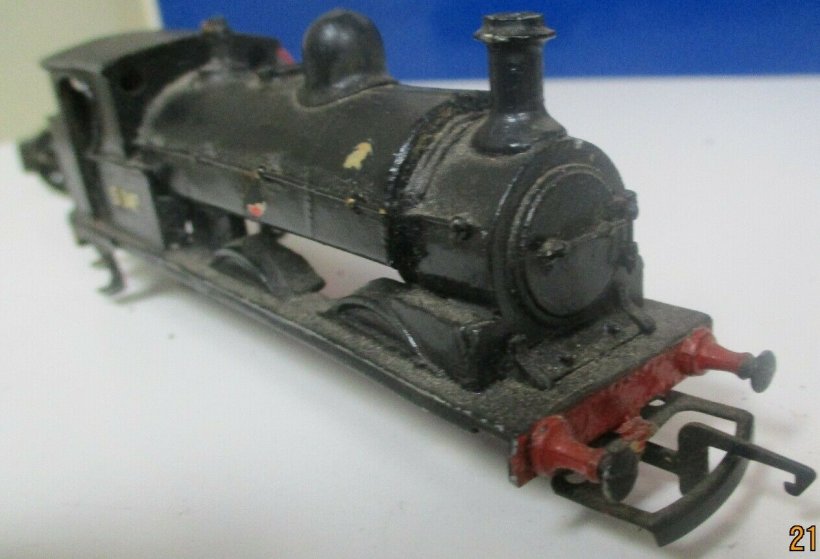
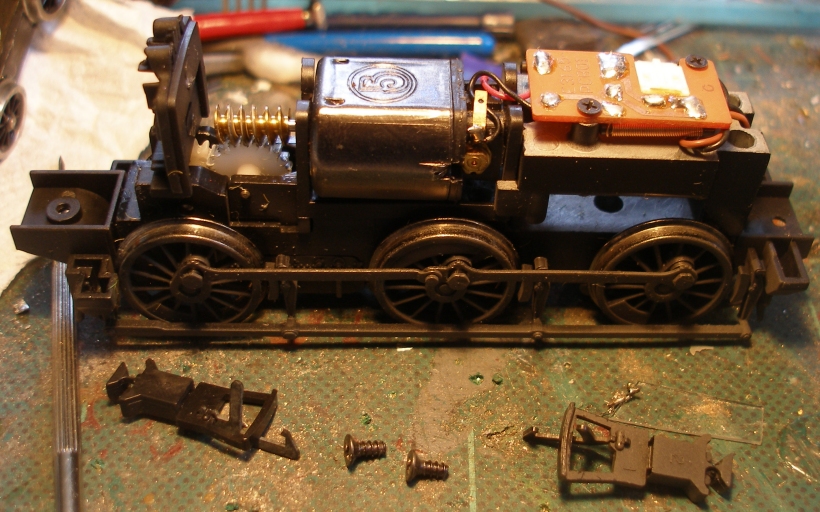
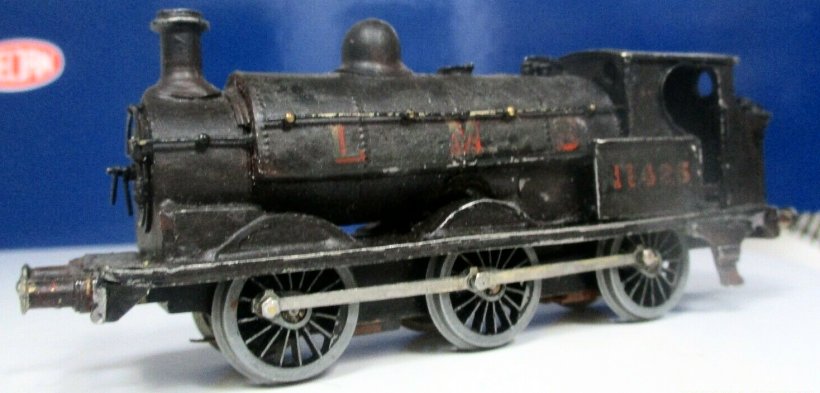
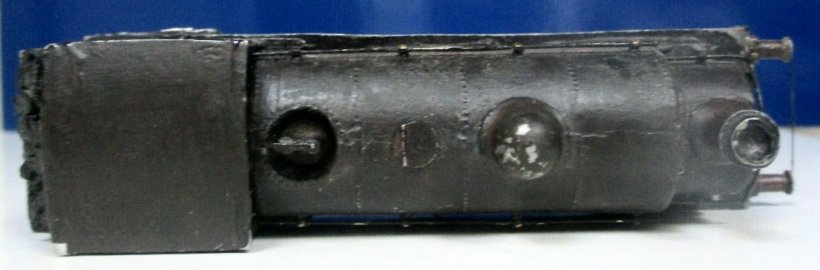
51404
This is how 51404 appeared in its eBay listing.

The lack of a chassis was a challenge. Rootling round the internet for photos of the original OOWorks chassis failed, although I did find one of the more recent LSWR 0-6-0 as running on the KESR. The primary option looked to be buying a chassis kit from London Road Models.
However, as I write (April 2021), there appears to be something of a melt down in the motor/gearbox market. Firstly, Mr.Mashima of Mashima Motors has now really retired, and the supply of these items has now dried up. Secondly, I have taken very much to the High Level gearboxes, and adopted them as my 'standard' after some very disappointing experiences with other brands. I will put my hand up straightaway and say that this failure is more likely to be due to my indifferent modelling than any failure with other makes: let's just say that High Level seemed to have been designed with this particular 'average' modeller in mind.
With other locos to do, I put an order in for three High Level boxes in February 2021, and then some weeks later got an email saying that due to supplier issues, they could not currently complete the order.
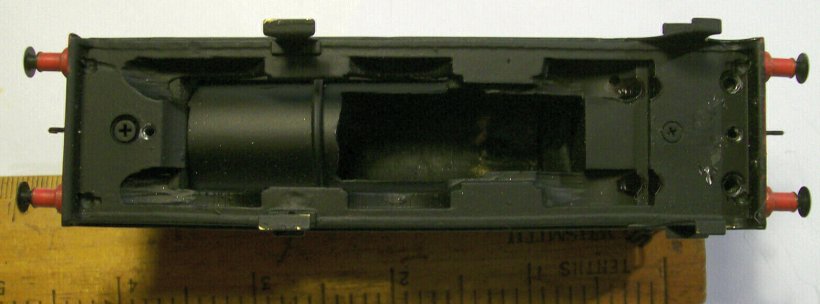
At this point I had also established that the Barton Wright's had a wheelbase and wheel diameter identical to the GWR classic Pannier (and also the Hornby 'Thomas'). As luck would have it, I happened to have a Bachmann Pannier that I had previously plinthed as a present for a relative. This was removed from its plinth and the chassis offered up to the OOWorks body.
The lower barrel section of the boiler and cab interior had to be removed from the Pannier chassis, and there was also a fair bid of grinding required to the underside of the OOWorks body. But it worked, so one down!
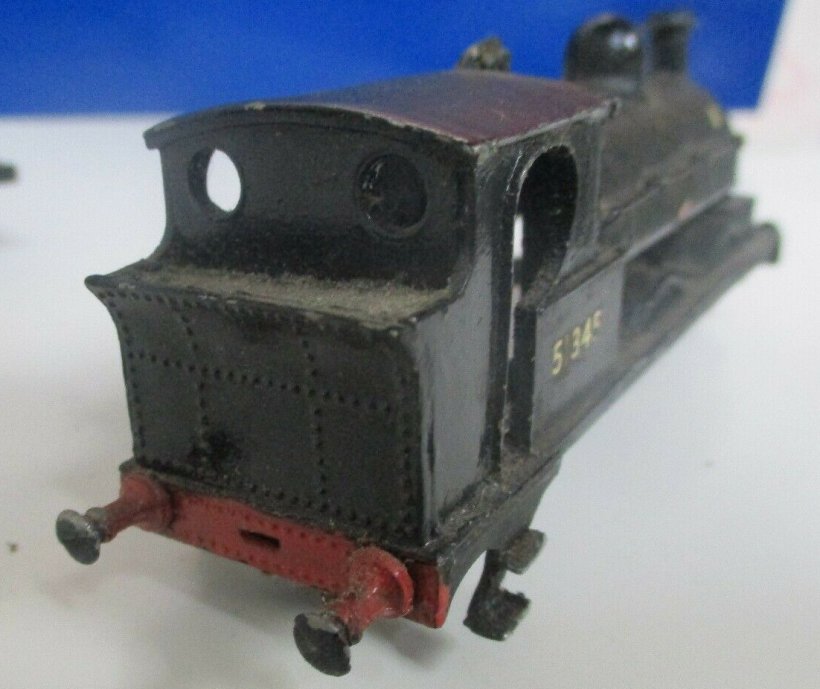
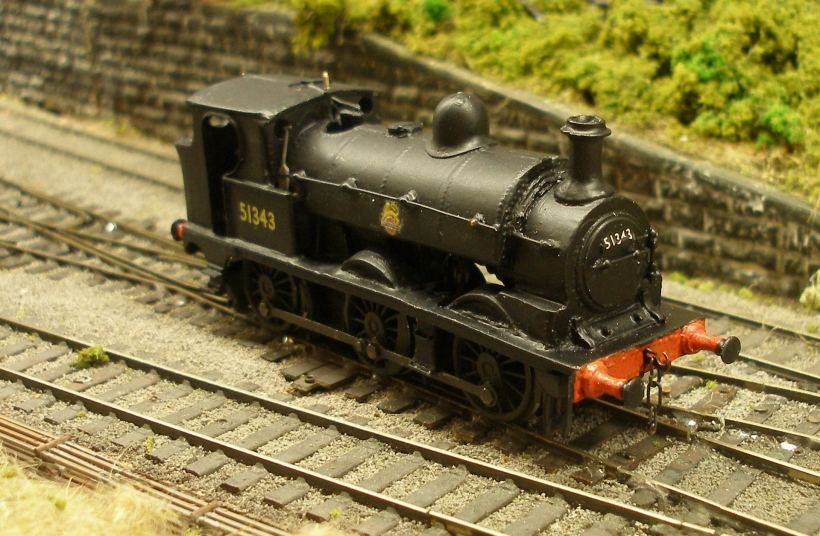
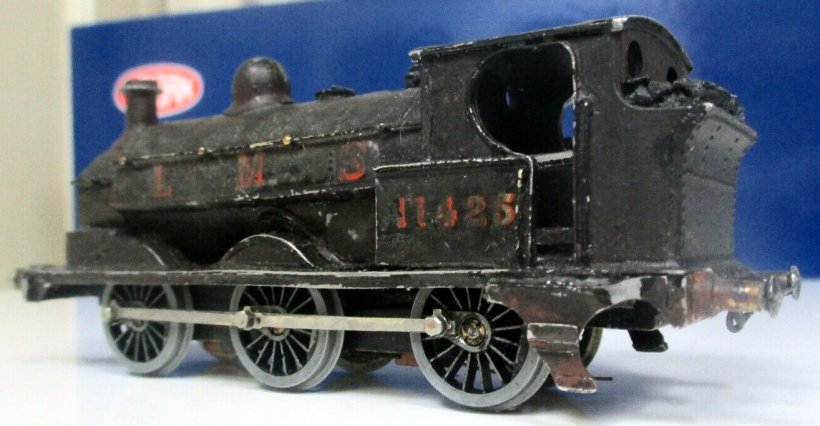
51343
Just I finished off 51404, another Class 23 appeared on eBay! This looked quite attractive at £34...but it closed at £67, which was more than I wanted to pay, but I fancied a Lockdown project.
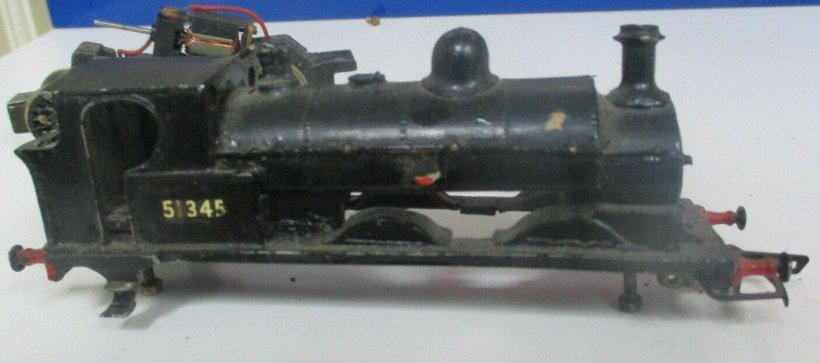
The first task was to strip the paint off using Nitromors. In the process various bits fell off, including one of the cab steps, which vanished into the ether.
The missing cab step was replaced with a Plasticard one, and a pair of cast cab steps sold for the Hornby Princess were used for the front steps.
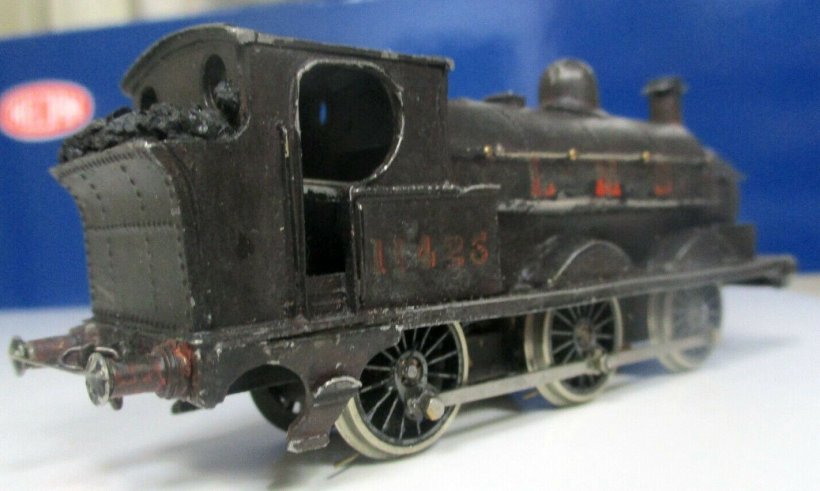
The reassembled body was sprayed with grey primer and then matt black car spray. The numbers are Fox. There are three configurations of smokebox door that made it into BR days, and they are also fitted with either three-link or screw couplings. Fortunately the Internet usually provides photos of specific locos in their later BR days. The loco as bought has the original smokebox door (without dogs) but with a handrail fitted. 51343 is therefore an appropriate number, but I didn't realise until I had painted the loco that the handrail is too low, and for now I have placed the numberplate above it, which isn't correct.
The Costwold cab roof has no detail, so a central seem, ventilator and runners, and a whistle were added. The whistle came from Peter's Spares as a lost wax casting.
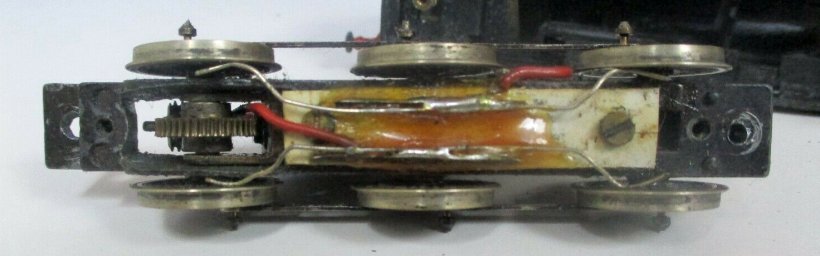
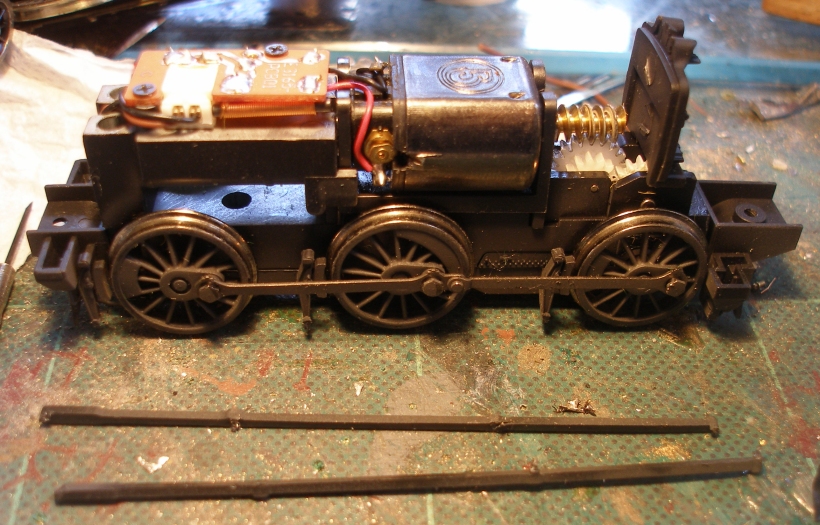
The wheelbase of the Triang chassis is actually too short, as the rear axle should be further back. When placed on the track it ran, but not stunningly well. The photo shows that the builder has used the original Triang coupling rods with Romford crank pins but has failed to bush the holes. The solution was a pair of Gibson Universal rods, and these were purchased and fitted. I have a piece of wood that has .9mm Gibson straight wire inserted into it to create the jigs for making these up. The piece of wood now has a number of these jigs, and is jolly handy!
The loco ran better with the new rods, but still had a tendency not to start without a prod when the direction was reversed. It would also start perfectly if carrying on in the same direction after stopping. This seemed to me to be a gear meshing issue, but it isn't obviously without removing the motor how the worm and gear are meshed.
And there was the dilemma. If the wheelbase was correct it would be worth playing around with it to get the meshing right. However, the motor is slightly too small for the weight of the body, so if the loco is held such that the wheels are free to turn then the motor is likely to stall.
The spare Mashimas and pre-built gear boxes I have are all too large for the Class 23, and the delay in supply of new High Level gearboxes has led to the decision to acquire another Bachmann Pannier as a chassis donor. The cost of a second hand one, including the postage is £61.94. This compares to a new Comet Pannier chassis kit at £20 plus the secondhand Portescap 1219 currently being touted on eBay at £68, and a set of Romford wheels which second hand would probably cost another £20,so a total of £108. The only issue with the Bachmann is the balance weights, although as Barry Lane notes in his book, as these came from different builders, some did have weights on the same wheels and broad shape as the Pannier.
As I write these notes, the Pannier is still awaited.
One detail that irritated was the way the safety valves had been placed on top of the saddle tank, rather than sitting in a recess in the tank top. The Nitromors loosened the valves, and I found that the red cap from the top of the container holding my scalpel blades was a perfect fit diameter-wise. The cap was trimmed, and then glued in place from underneath in the tank. The valves dropped neatly into the new cavity, and I have set them off-centre (so moving them towards the cab), as Barry Lane illustrates this feature in his book. I think it was so that the tank was a standard size and would fit any of the class, irrespective of the original builder and boiler configuration.
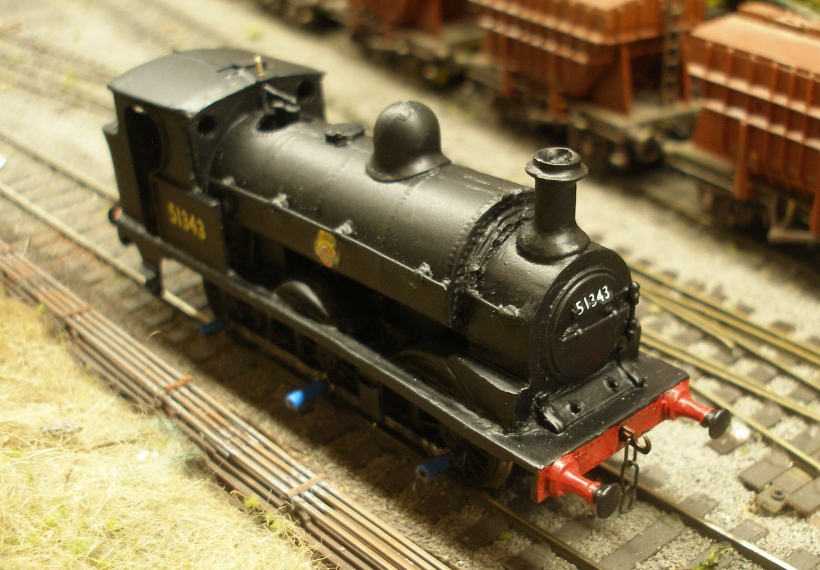
For the time being, here is a snap of 51343 in her new home. The smokebox number plate is in the wrong place (as noted above), and seems to be raked backwards so something still to be sorted out.
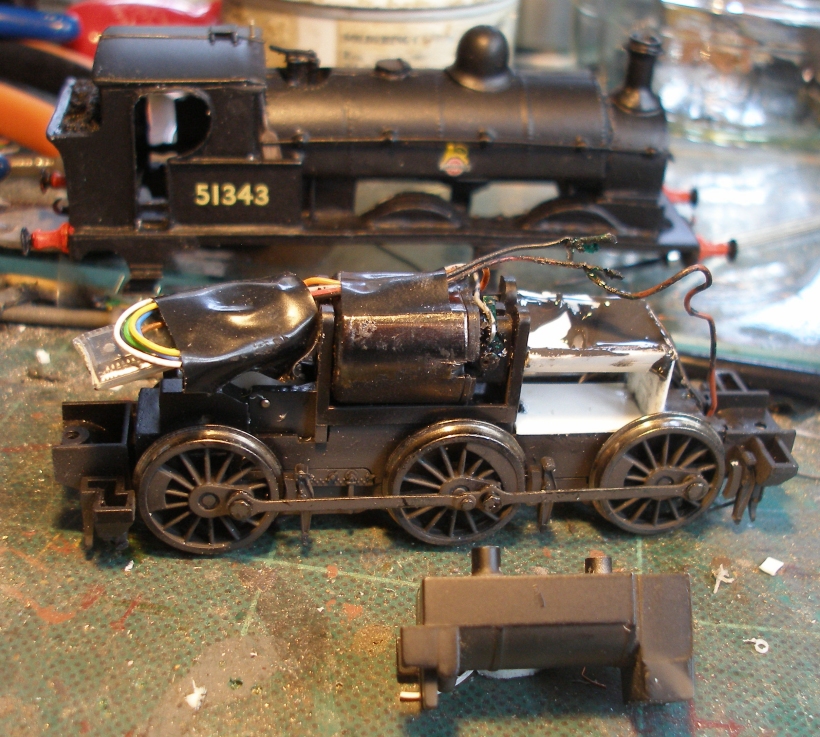
The problem of the short wheelbase was also resolved by the use of a Bachmann Pannier tank chassis. Care was take to select a DCC friendly chassis, and as the photos show, the chassis was from the batch which anticipated an 8-pin decoder socket.and was shipped with a simple board with the TV suppressors installed, but not the socket.
The first task was to run the loco on my DC test circle of 4th radius curves, and she ran smoothly in both directions.
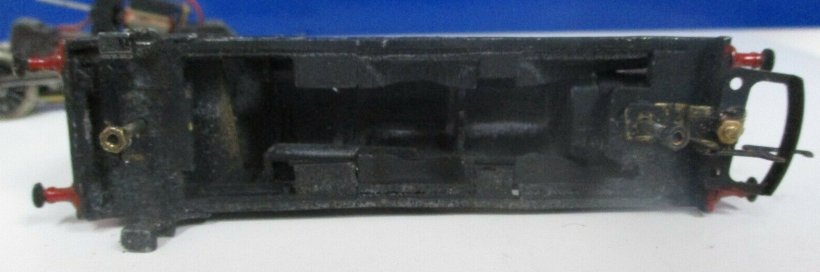
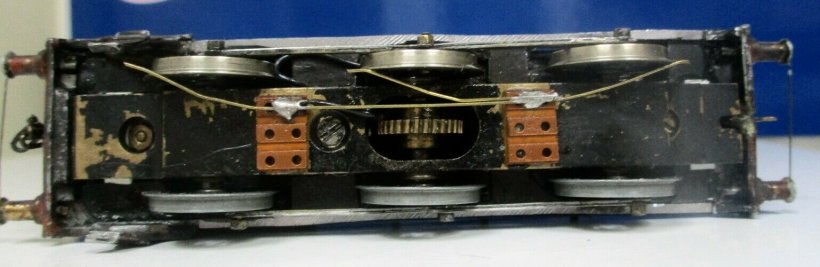
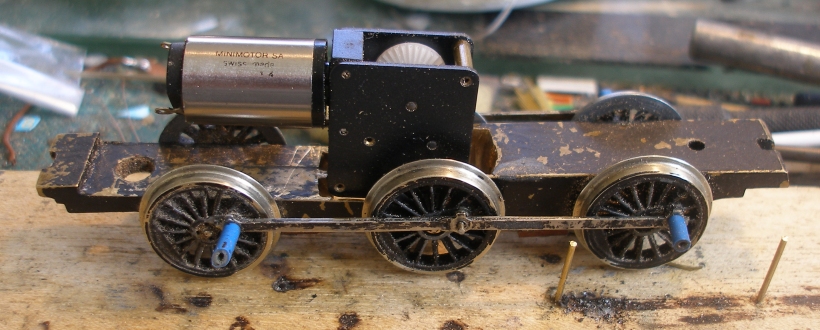
The next step was to remove the body, and as it is often difficult to know which screws to remove, the following shots how to take the body off. The first shot shows how the loco looked on arrival.
The trick is to now gently lever the couplings out of their sockets at both ends of the loco, and then the two screws that are concealed beneath them.
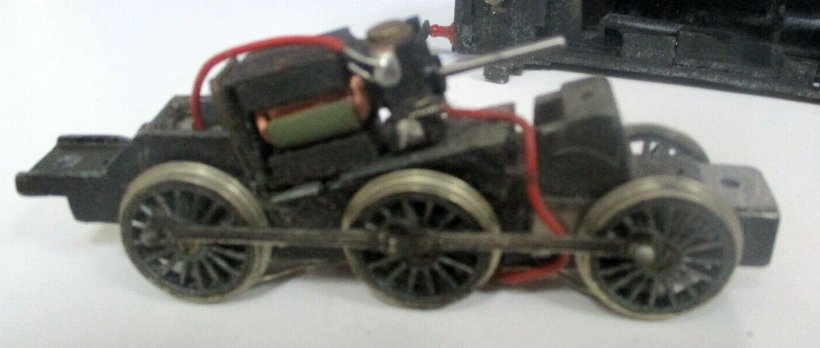
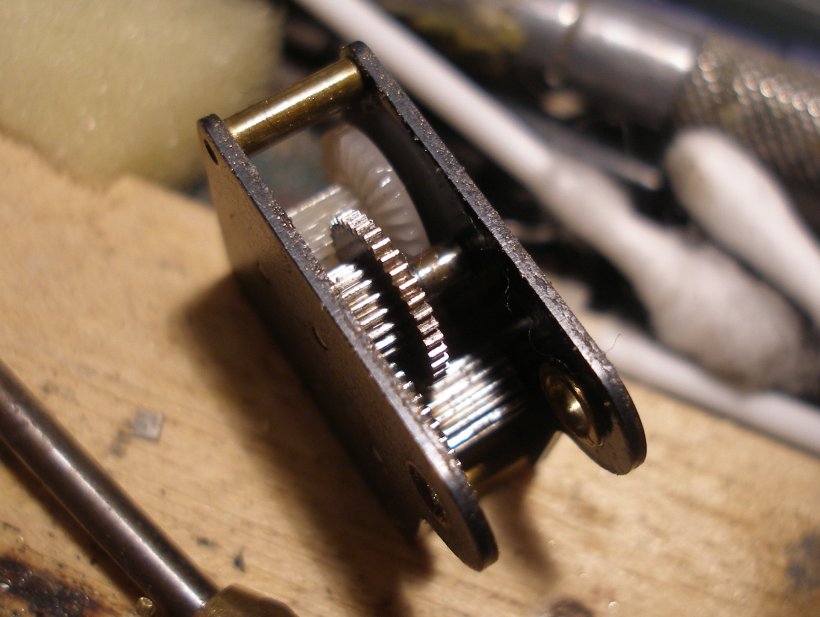
This is what the chassis looks like with the body removed. The points to note for the proposed conversion is the plastic backhead clipped to the top of the gearbox; the pre-DCC board screwed to the top of the false lower boiler section, and the distinctive external brake rodding, outboard of the wheels.
The external brake rodding is removed from the donor Bachmann Pannier tank chassis with a scalpel.
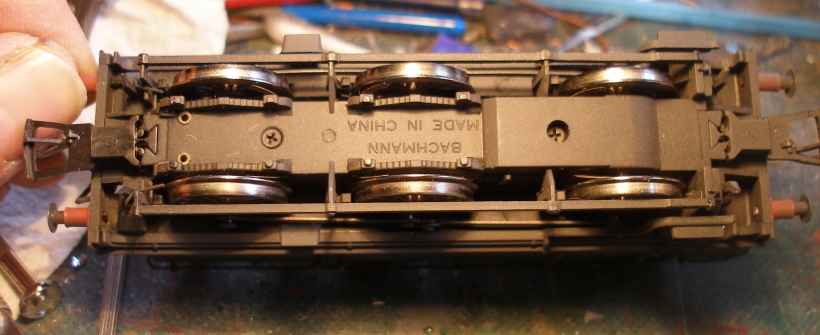
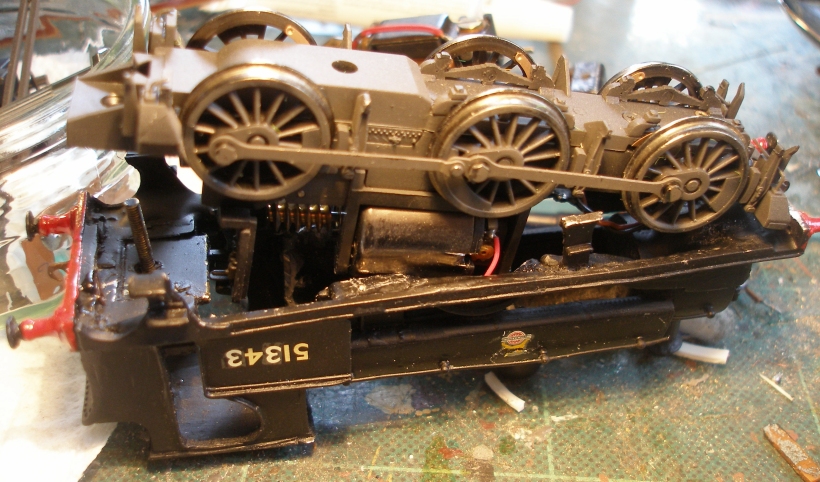
This is an opportune moment to compare the two chassis. In the foreground is the original chassis as supplied with the loco. The leading coupled wheels are the correct distance, but the rear set are the same length, and sadly are too short for the prototype. The Bachmann chassis has both the correct wheelbase and wheel size.
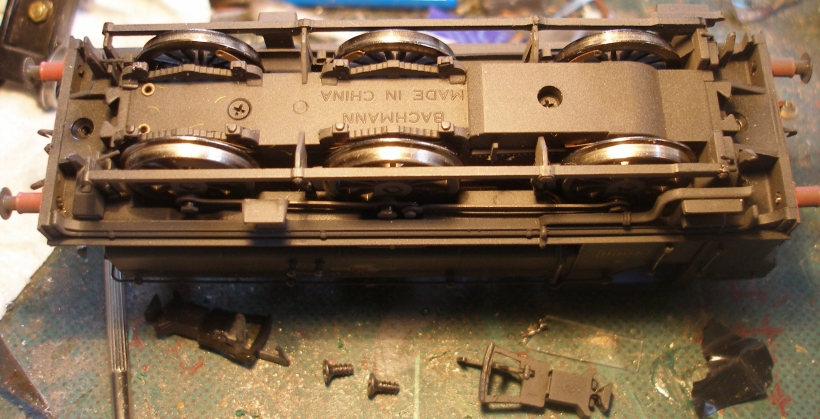
The Bachmann chassis was then positioned over the upturned body to see where it needed material removed to achieve a comfortable fit. Sadly Bachmann positioned their motor so that its widest side is in the vertical axis; if only they had positioned it horizontally it might have slid straight into the body cavity.
Some filing later
And then moments later...
Now the Zimo decoder has been added. This is hard wired in, with the decoder taped to the top of the motor. This would have worked a treat if it hadn't been for the recessed mount for the safety valves. Unfortunately the backhead had to be removed, and the decoder now sits under the cab roof.
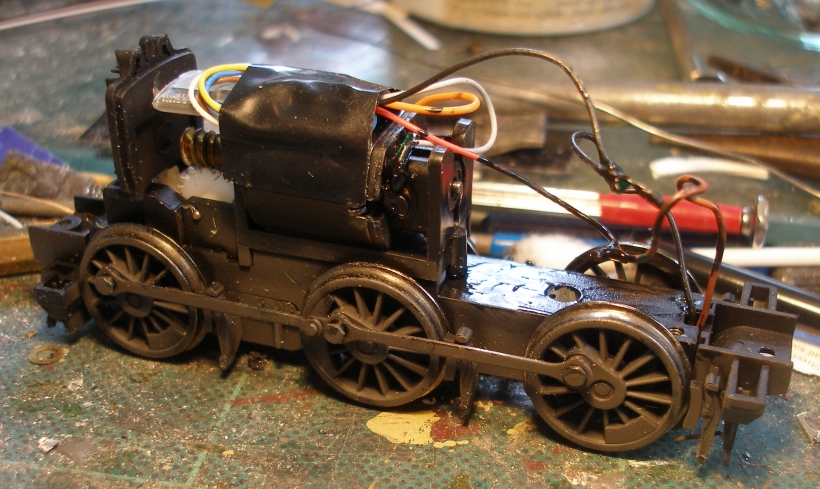
The loco could now undertake road tests. She has proved to be both a powerful and very quiet runner, fully justifying the conversion. However...
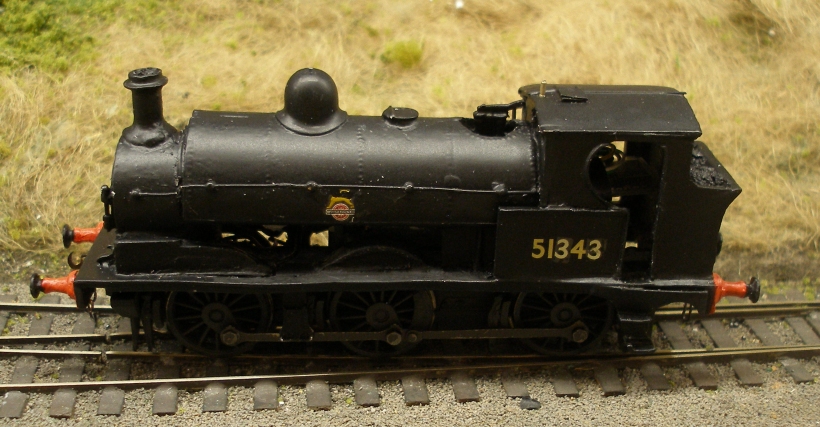
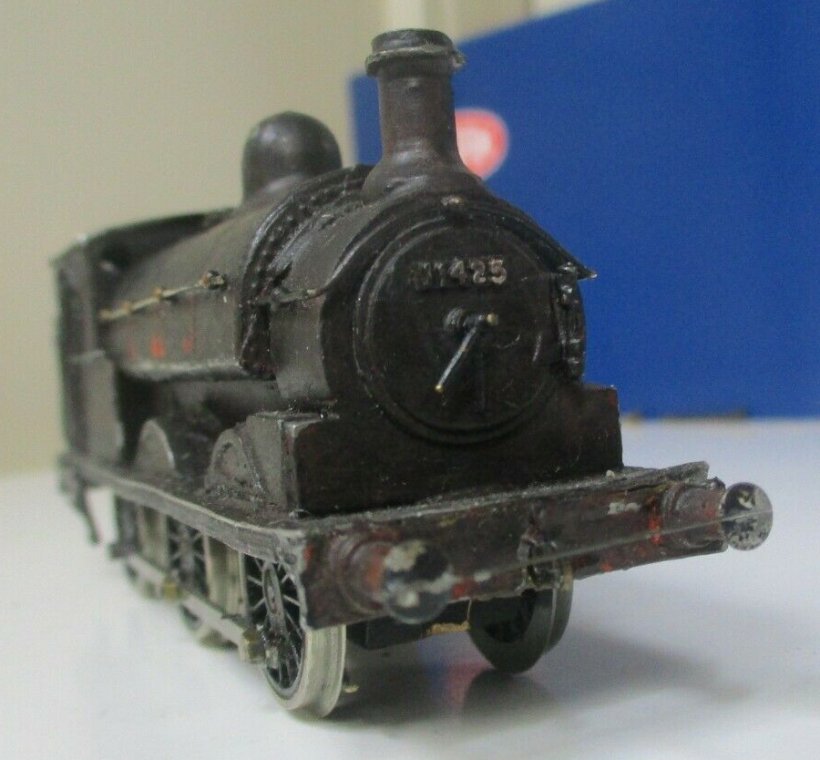
That smokebox numberplate really needs sorting out :-) Note the shovel popped behind the handrail next to the cab; a detail spotted in a photo in Barry Lane's book.
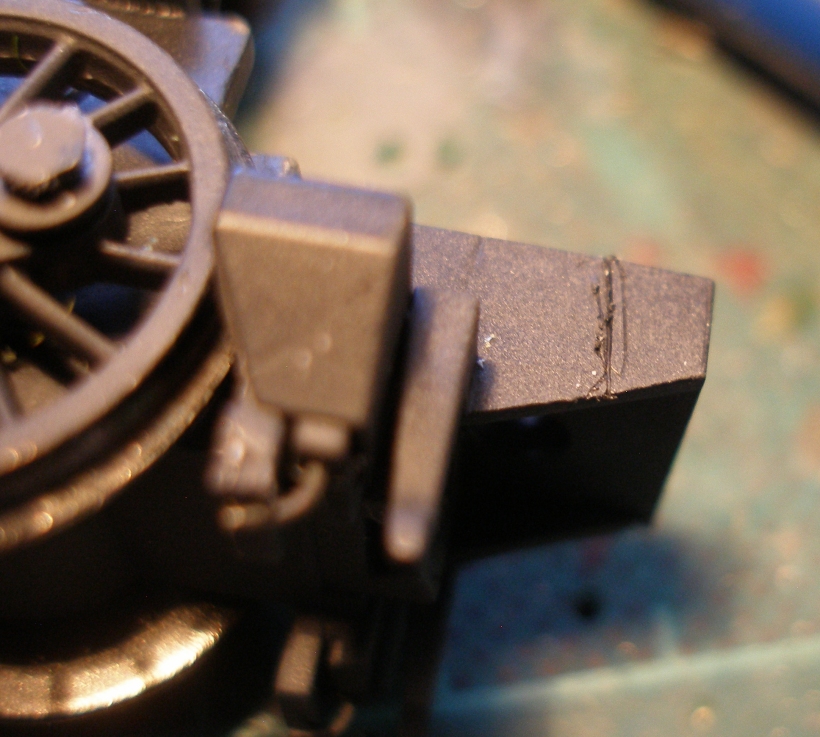
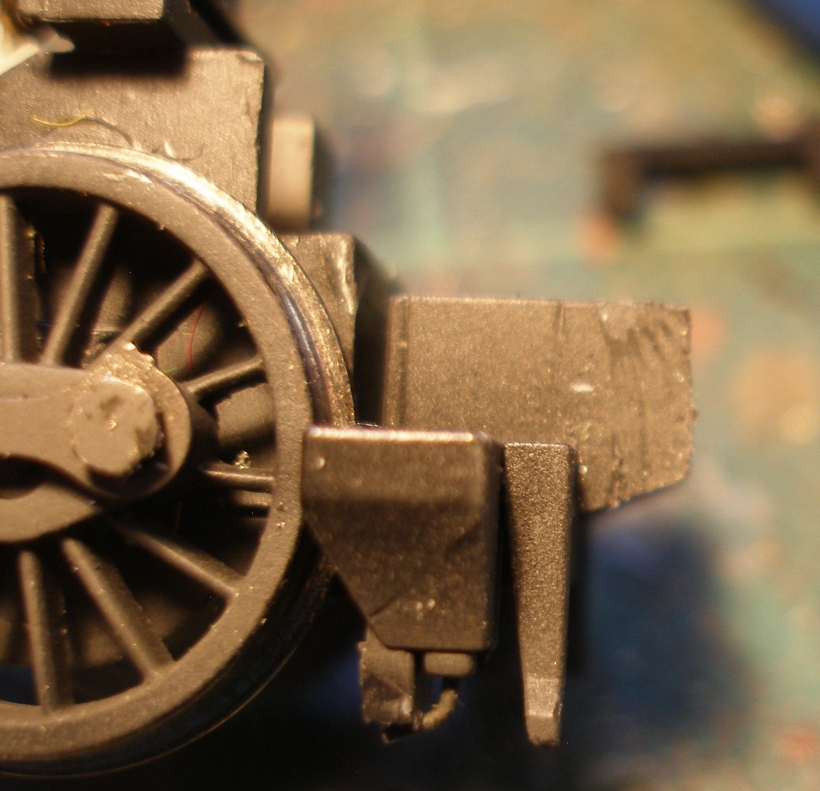
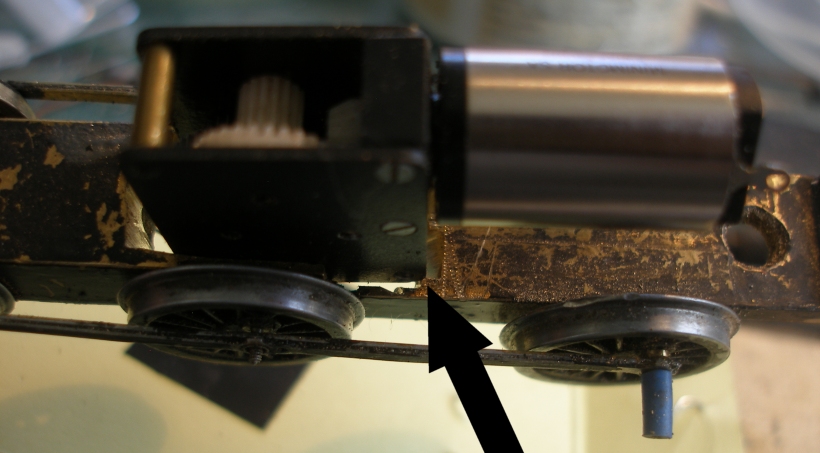
It was apparent that the coupling rods were striking something on each rotation, and it turned out it was the front steps which were incorrectly mounted inboard of the footplate valencing, as shown in the image below..

This was corrected, with the steps now mounted on right angled pieces of fret glued to the underside of the footplate, and flush with the valencing. The JB Weld will be filed flush when it has set hard after being left at least 12 hours. The next task is to create a false boiler to show below the saddle tank.
29 April 2021
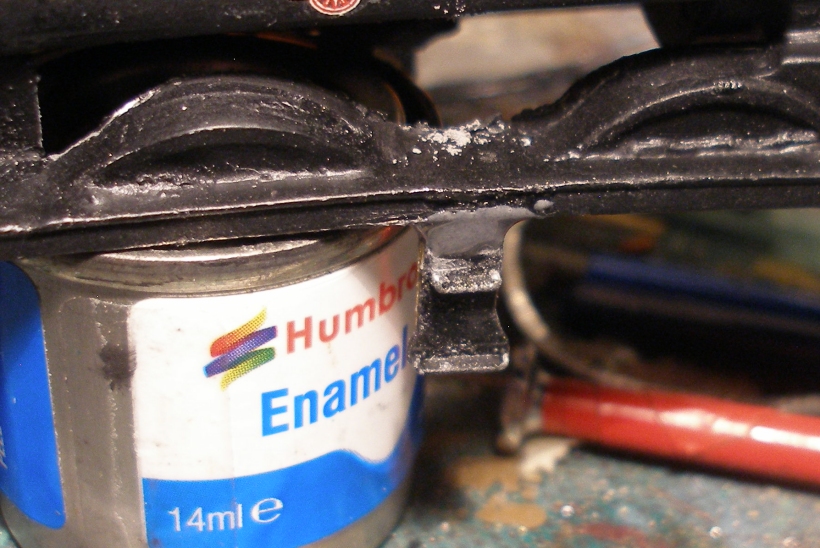
The casting that former the lower section of the boiler barrel was missing from this loco, and the Bachmann equivalent from the Pannier tank would have required drastic surgery to get it to fit. Having rifled through the various medicine stashes around the house looking for a long thin tube or container, I popped down to my local Wickes. They now stock a 15mm diameter plastic water pipe, which scales out at a neat 3.75 feet, so less than the track gauge, and probably a pretty close match for the real boiler. The length was carefully calculated and trial fitted onto the chassis, with the body then fitted.I felt It needed a vertical end piece to support the front of the boiler section, which in turn would rest against the back of the smokebox. I didn't like the idea of a butt joint between the end-on plastic sheet and the metal chassis block, so I cut a piece of Plastsicard which was glued to the top of the chassis block, which would then provide an edge for the upright sheet to be glued against. Having assembled the unit and glued it on place, I then reinforced the joints with JB Weld. Do note where the end of the motor armature shaft is and do be sure to keep any glue away from it.
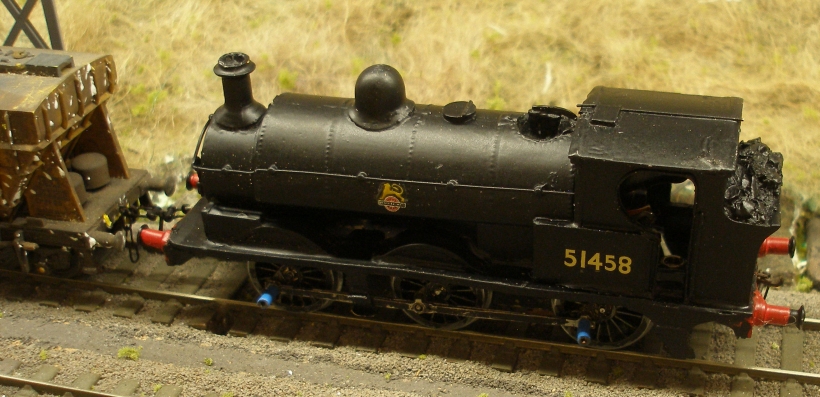
51458
And then loco Number 3 popped up on eBay!
This was the best of the lot in that it was complete and working; the only downer was that it was EM gauge, and consequently bought for just £47.
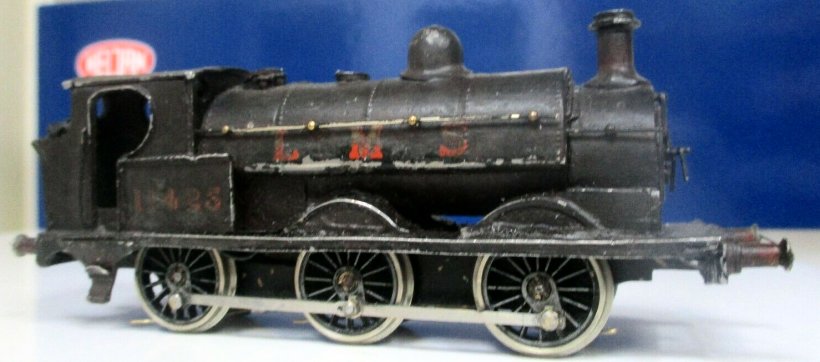
The loco was fitted with what appeared to be a Triang XO4 motor, although to my eyes the brushes looked rather short. I had a set of OO Romford axles in stock and it was the work of moments to convert the loco to OO from EM.
It ran well on my OO DC 4th radius test track, starting and reversing, although even on DC the speed range seemed limited, being somewhere between speedy and fast, with slow running not available. I assumed that once chipped I would be able to bring some discipline to the running.
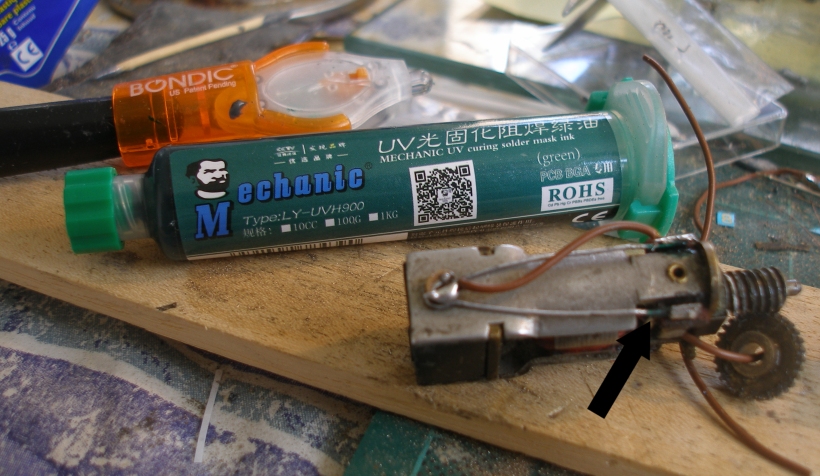
At this stage I tried it on DCC, hard wiring a Zimo decoder onto the XO4. To do this needs an insulated sleeve on both sides of the brush spring. My normal technique with the XO4 is to cut the generous fibre sleeve on the original insulated side in half, and feed the half onto the non-insulated leg. On this motor, the sleeve was short, and everything I tried as a sleeving material filled the gap between the brush and the motor frame such that the brush would not sit against the armature. It occurred to me I could use Solder Mask to insulate both arms. This is a thick green glupe that is applied with a cocktail stick and then the dried by expose to Ultra Violet light. I happened to have a Bondic torch handy, and this worked a treat, in that it properly insulated the brush springs ends, and allowed the brushes to be seated properly. The arrow in the photo below is pointing at the Solder Mask in situ.
Again, the loco was given the Nitromors treatment, resprayed matt black, numbered with Fox transfers and coated with Railmatch satin varnish.
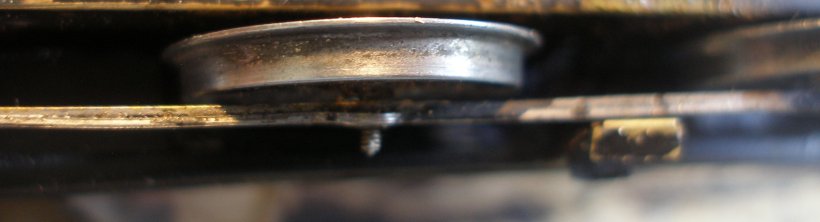
It was then chipped and introduced to the layout, at which point a number of issues became apparent. Firstly, although the XO4 and the chassis ran smoothly, even with manipulation of the CVs, it was difficult to get it to run slowly: basically any speed you like as long as it was fast. It did have plenty of power, and could easily move my rather weighty rake of Presflos. As will be apparent from the photos, the wheels reflected its age, as only the set on the pick-up side were plated, the non-insulated set being plain alloy. It was apparent that this set picked up lot more grot than the plated side. I have been following the recent discussion about polar and non-polar contact cleaners, and WD Contact Cleaner v undiluted IPA. The suggestion was that both are effective cleaners, but that items cleaned with WD Contact Cleaner stay cleaner longer. The crud shown in the photo below has accumulated after only a few minutes running after using WD Contact Cleaner, so the jury remains out for now, as this could also be an issue with the alloy wheel surface.
As I am considering fitting sister 51343 with a Pannier chassis, this would release a set of plated 18mm wheels that could be reused here.
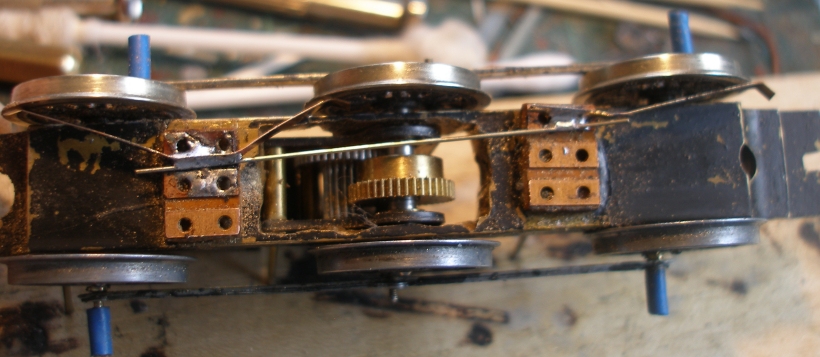
This just left the problem of the motor and gearbox. As noted, there seems to be a world Covid/Brexit shortage of gears currently, and so I then looked at my very small stock of Kean-Maygib RG4 1219s (a stock of 1!). This looked as it would fit very well, and I set about increasing the slot in the Cotswold chassis for the gearbox. Imagine my consternation when having hacked out the slot, and trial fitted the motor, I discovered that on the application of power, the motor could hardly turn!!
I had recently bought this on eBay as unused, but had made the cardinal error of not testing it on arrival.
Sometimes it pays to stop what you are doing, and sit down with the computer. The first thing I discovered was that the old MJT gearbox conversion kits for the 1219 are still available from Dart Castings, so I ordered one, thinking that having a kit of parts would allow me to strip down and rebuild the seized up gearbox. It then occurred to me that if I was going to strip it down anyway, I might as well do that whilst waiting for the kit.
I have a large fleet of RG4s, and have never had an issue with a gear box seizing up before, although scanning the Internet, it is apparent that this more common than I had realised. It may relate to the batch and distributor, and Iain Rice provides an excellent overview of which manufacturer made what in a two-part article in the November and December 1983 issues of 'Model Railways', which describes the development of the RG4 gearbox (RG4 = reduction gearbox, 4mm scale) by Ken Pelham of Kean Maygib in 1979.
I carefully drilled out the ends of the three securing rods, and carefully prized off one side. It was apparent that the two metal gears were almost solid on their spidles. I Lifted these off and carefully cleaned the insides and the rods with WD Contact cleaner. I re-lubricated with a PTFE spray lubricant (due to the plastic gears present) and reassembled. The side was pressed back on, and then the tops of each rod glued in place with Superglue. I am hoping that the MJT kit will contain something to create a more permanent solution in due course.
What a difference! From being almost static, with the motor hardly able to turn the gears at all, suddenly I had a very free running and very quiet motor!
Past experience has taught me that is a good idea to take some reference shots before dismantling anything, as sometimes the parts are so delicately mounted that they go flying everywhere once the cover is removed, and it is very difficult to fathom out retrospectively how things are supposed to go back together again.
And this is what is looks like inside. When you look at the inside of one these things close up, everything else looks pretty crude in comparison. It seems odd, with such a lovely piece of engineering, that a lubricant was used has the ability to set solid after lying in a box for maybe over 40 years!
Looking at the terminals on the back of the motor, this is unused, and came to me in its original box. The upright spindles that the gears are mounted on are rigid and don't wave around. Having removed and cleaned each gear and its spindle, it was possible to replace the side without any alignment issues, and the spindles engaging immediately with their holes. My respect for the team that designed and put these into production has risen even further. It does seem odd that here we are in 2021 and I cannot buy one of these brand new. They were ground breaking in 1983, and still, with the possible exception of the Slater's direct replacement and the pair of DJH ready-made motor-and-box sets, remain probably the best such assemblies ever released.
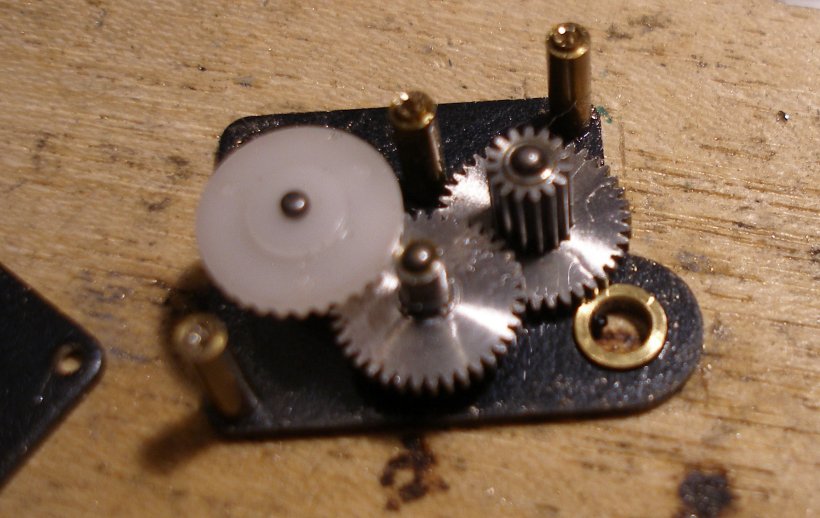
With the gearbox reassembled, t was possible to trial fit it in the chassis. The problem with the Sunderland 'Cotswold' kits is that they use a solid block of brass that has had the space for the gear wheel milled out. This hole has to be increased in size to take a gearbox, and just in case you thought I got carried away and took too much off the front, in fact I had tried to fit an alternative first, but it was ultimately too big. I wasn't keen on the way the motor was sitting high, so further adjustment was required.
Critical examination revealed where a little but more filing was required.
With the major surgery completed, new pickups were added using Slater's phosphorous bronze strip soldered to the original pads. This photo clearly the difference between the insulated and non-insulated wheel tyres.
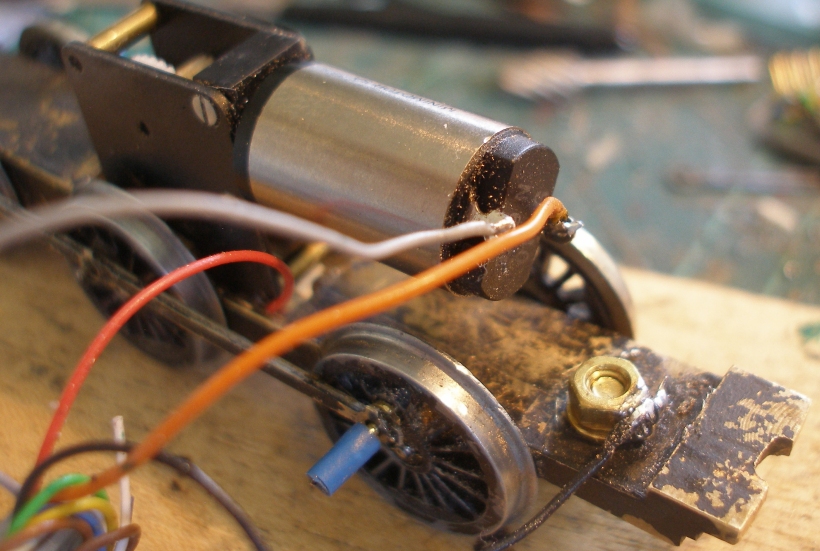
Finally, we come to the hard wiring of the decoder. It was obvious from the pristine condition of the tags at the back of the motor that it had never been used. Note how it is the grey and orange wires that are soldered to the brush tags, whilst the red wire has been soldered to the pickups, and the black wire earthed to the chassis using a washer bolted to the chassis through the hole previously provided for the XO4 brush spring nut and bolt. A word of caution here, as I saw someone recommending it on Facebook yesterday: never put track power directly to the brushes after you have installed a decoder, as it will simply blow the decoder.
And now track testing part 2! Note how the coupling rods have yet to be finally fitted, and are secured with pieces of insulation cut from domestic flex. The reason for this is that I am minded to swap out the alloy uninsulated wheels for plated ones. In the May 2021 BRM Tony Wright made reference to using solid, rather than jointed,coupling rods in OO. For a long time I have used jointed ones, believing this gave greater flexibility to the chassis, and so eased the running round sharper curves. For this reason I bought a second pair of Gibson Universal rods, meaning to fit them to 51458. However, on test she seemed quite comfortable on my 2' 6" curve, so maybe Tony has a point.
Ironically, the loco can still comfortably pull the long rake of Presflos, so there appears to be no benefit from upgrading from the XO4!! In fairness, it was very smooth running XO4, and I have carefully placed it in my spares box for potential further use.

Copyright J K Wallace, t/a 'Hall Royd Junction' 2013-2023 email: Hall Royd Junction
7 Portobello Close, Chesham, Bucks. HP5 2PL, UK
tel: +44 (0)7513 412880