
A few months ago I acquired a Millhome Hughes 4-6-0 Dreadnought on eBay. This was in LMS livery and fitted with a 5-pole open frame USA Pitmann motor. Back in the late 1950s and early 1960s these were regarded as high-end devices.
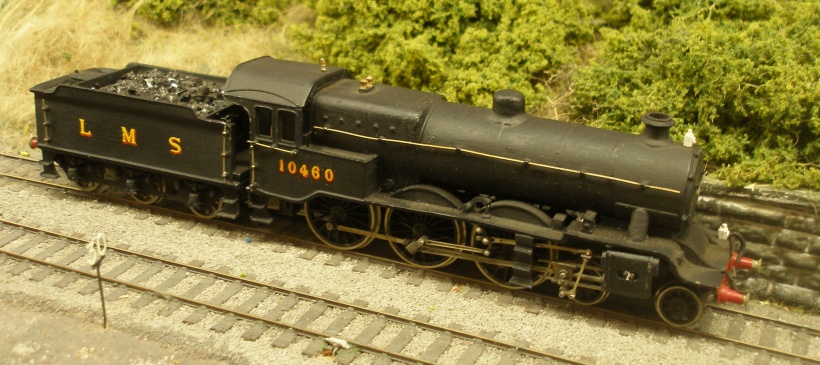
However, in the DCC-era the Pitmann looked tired, with a tinge of rust on the pole pieces, and drew a healthy 1.2 amps, so needing a heavy-weight Digitrax decoder. I did a quick livery upgrade to early BR mode, fitted the decoder and established that it ran, and then left it there.
At the beginning of June I started a programme of loco running to assess the fleet and make decisions about those to keep, repair or repair and sell! The Dreadnought ran erratically, and was obviously not in good health.
At the same time as the Dready was being evaluated, Rikki Lamb on the Facebook 'British Railway Modelling' was having problems getting his recently acquired kit to run, reporting that the coupling rods appeared to be too long.
This seemed to be the appropriate moment to take a closer look under the body.
It had been my intention to replace the Pitmann motor anyway and I had previously acquired a Portescap RG4 for this purpose.
So step one was to remove the Pitmann motor and offer up the RG4.
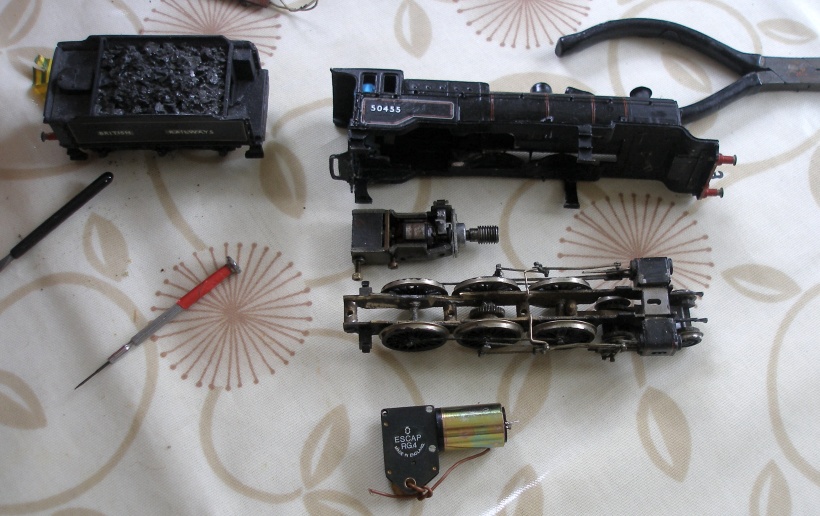
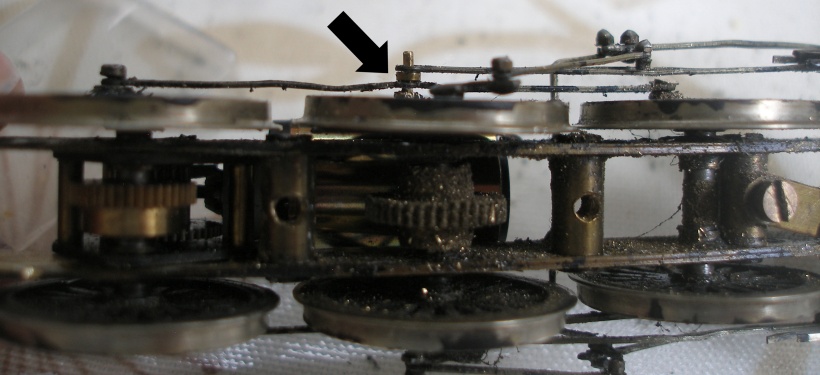
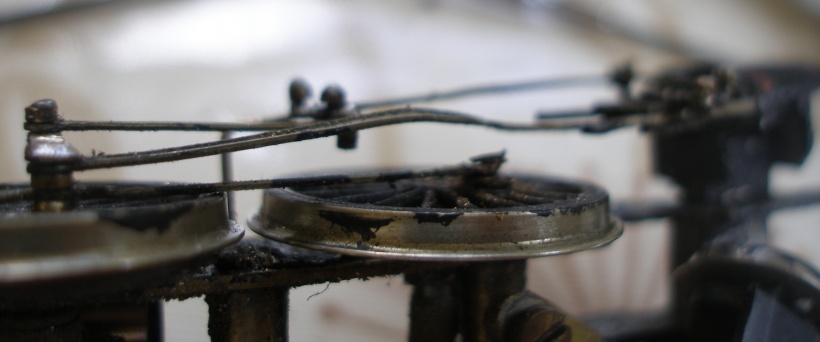
In the photo above, the mounting plate for the Pitmann has already been cut off the top of the frames using the trusty Dremel. The rear axle was then removed, and the top hat bearings filed down so that they are flush with the inside frame surface.The Dremel and routing tool was also used to cut a flat surface in the centre of the axle for the grub screw on the RG4 final gear to engage with (the grub screws on the RG4s are notoriously delicate and do not take well to being over tightened).
The joy of this type of restoration is the 'unexpected'. In the original Facebook post there was a request to show how the various parts of the motion were assembled, so this write-up will have more of a focus on the mechanics of soldering up the Romford crankpins, etc.
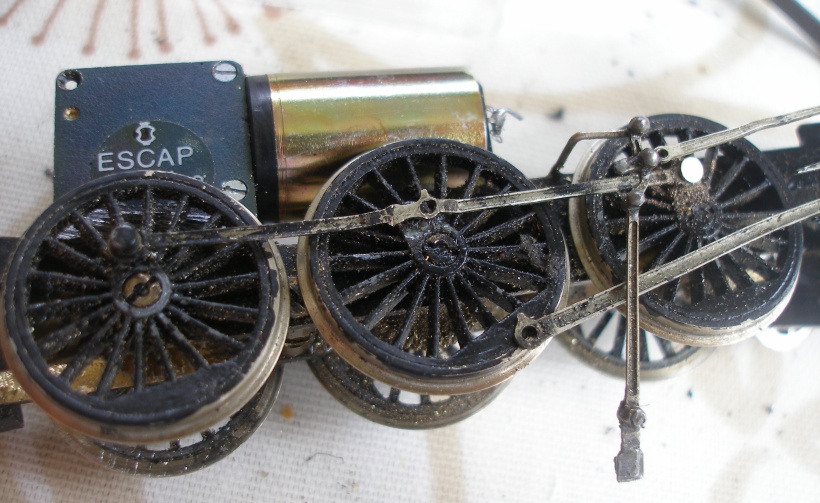
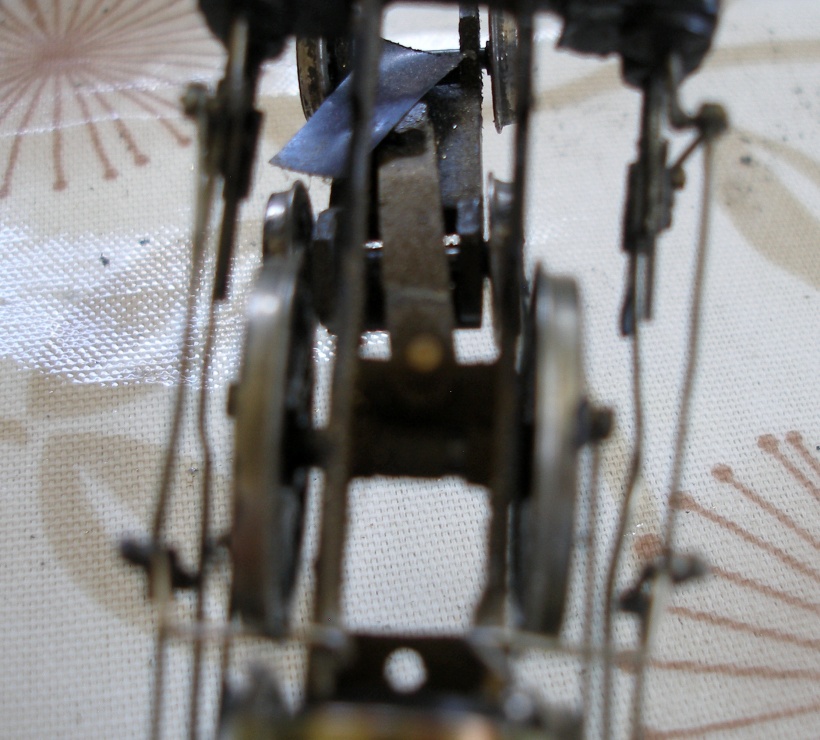
The first problem to be addressed was that the centre crankpin was rotating, so that the return crank did not rotate with the wheels. In attempting to tighten the pin, it broke, so the return crank, etc had to be removed anyway. Note how bent and buckled the coupling rod is. Also at this stage, I have attempted to address the problem of the connecting rod constantly catching the front crankpin by further filing of its top surface, clearly caught in the light.
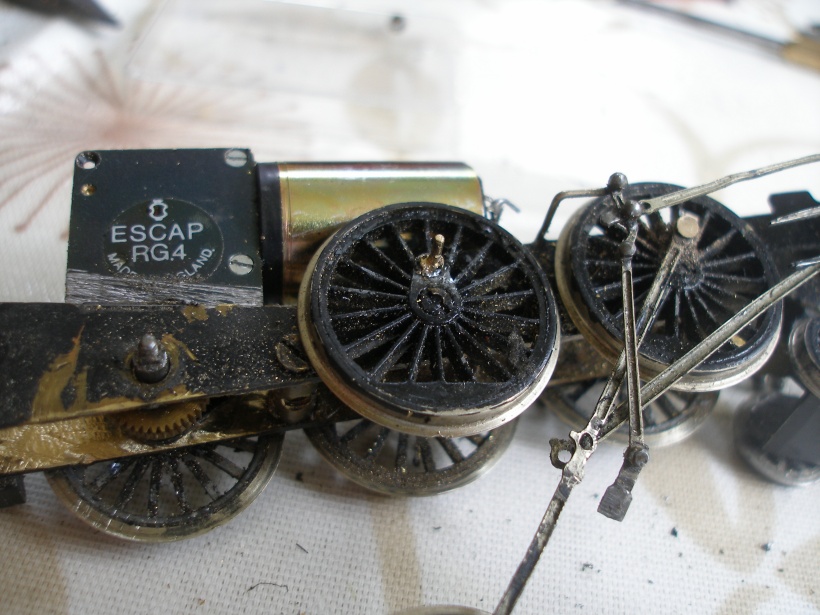
Oh look, a new problem :-) With the rear wheel removed, and the coupling rod swung out of the way I discovered that the Romford crankpin did not have the slots cut in its upper surface into which the Romford screw driver engages. This inability to really tighten the crankpin may explain why it had worked loose. In this case, it was possible to unscrew the old pin with a air of pliers and replace it with a modern item, with the slots. The Society for the Prevention of Cruelty to RG4s will be onto me: I needed to every so slightly reduce the width of the gearbox to get it to easily slide in. I am of the view that I buy things to run, and do not have an eye on the final resale value of individual items, although I hope that in the fullness of time the loco will appear on eBay as a complete and operational unit, and not as a collection of premium-priced 'Buy it now' spares.
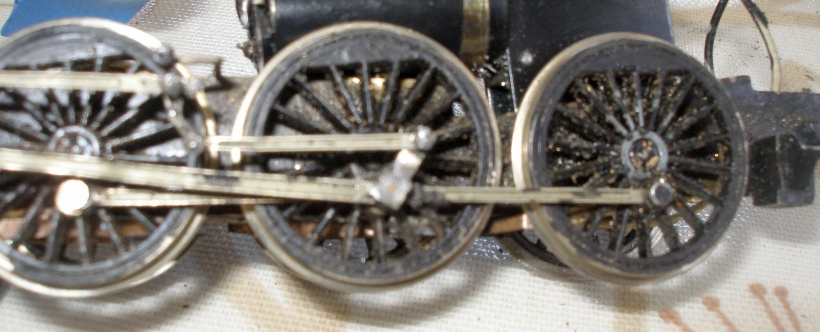
Moving on, I used the crankpin washers to space out the connecting rod and return crank on the centre crank pin. The buckled nature of the rods in this view is apparent, and I that should have given me a clue to past problems... Note how I have left the original gear wheel in situ on the centre axle. At this point in the proceedings I was trying not to remove the centre wheels, and there is no reason to remove the gear as it does not affect operation or appearance.
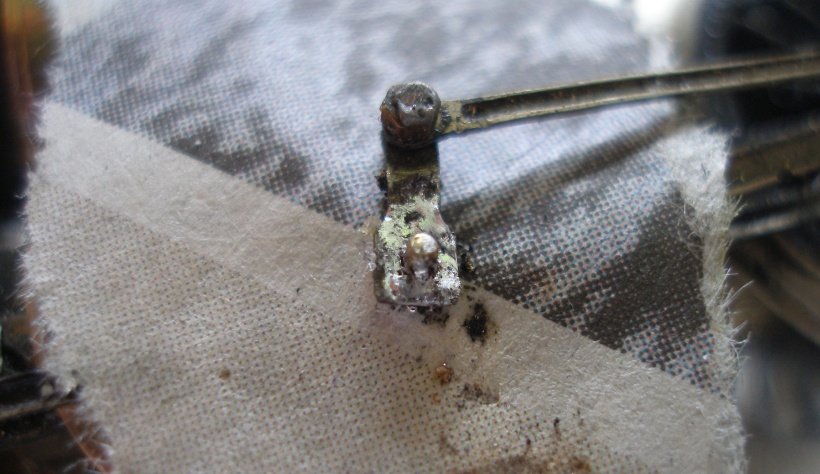
With the 'sandwich' of coupling rod - brass washer - connecting rod - brass washer - return crank assembled, it is now time to solder the return crank to the crankpin. To do this, remove the return crank, push a piece of newspaper over the end of the crankpin, and replace the return crank so the assembly is now coupling rod - brass washer - connecting rod - brass washer - piece of newspaper - return crank. A spot of flux, and a smear of solder and hot iron, and the job is done in the blink of an eye. Just remember that the crank is slightly to the right of centre on the right hand or fireman's side. Check that you have not inadvertently soldered things up solid by rotating the wheels, and then remove the paper washer.
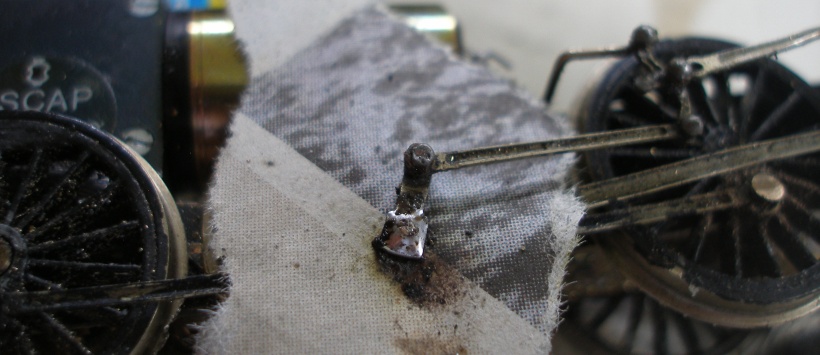
And now the finished job, after the solder and end of the pin have been filed flat.
With everything reassembled, things started to get interesting. One of the great attractions of the RG4 is that the wheels can be easily rotated. Within a few rotations, it was apparent that something 'orrible had happened at the front end, with the connecting rod repeatedly engaging with the front crankpin (despite already having been reduced in depth). Mmmm. Obviously something was not right, and given Rikki had already suggested the connecting rods were too long, it was looking as if there might be a design flaw.
So I concluded if the rods were buckling naturally, may be I needed to go with it, and create my own joggles so that the rods would miss each other when in motion. This so 1950s, but needs must, and crucially, it allows the correct dimensions to be judged for any replacements that might be ordered.
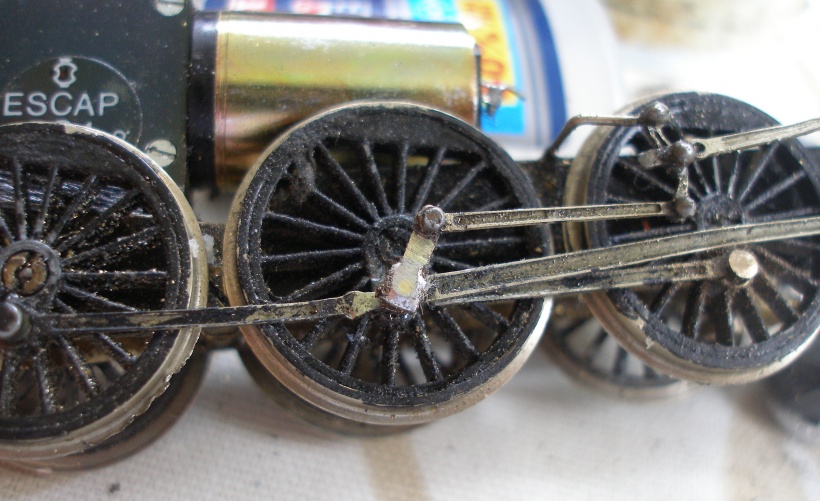
Now what has happened here? It looks as if the return crank on the driver's side has now shifted, and investigation found that it was the crankpin that had loosened.
This side of the loco was now stripped down, a modern crankpin inserted, and the whole thing reassembled. I also gave further attention to the 'joggle' required in the connecting rod, and this shows a further step along that particular road. Not photographed, but I found that I also needed to joggle the radius rod on both sides. This needs to be done carefully, as there is the ever present risk that something else will snap off or fail with all the bending and straightening that is gong on. And to prove the point, the fireman's side cylinder block fell off! It was reattached, as shown.

As this drama with the chassis played out, I was also offering it up the body and thought it might help if I swapped out the Digitrax decoder for the slimmer Zimo basic.I had fitted the Digitrax to cope with the original Pitmann, and thought it also be a good idea to recover the Digitrax for any future high amperage conversions.
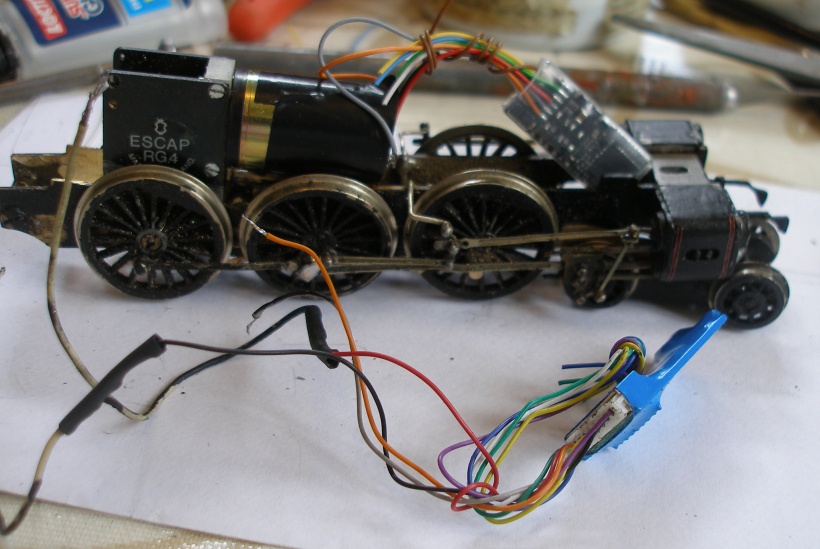
The photo shows the replacement Zimo fitted, and the recovered Digitrax. Note how I have been able to wire the Zimo directly in, with the red and black terminating on the pick-up bases, and the grey and orange on the brush tabs on the motor. I have also put a piece of insulation tape round the motor so that it doesn't short should touch the top of the wheels (more on this later).The Zimo was found to fit neatly either into the boiler barrel, or cound be taped to the top of the motor, under the firebox crown (which is what I opted for).
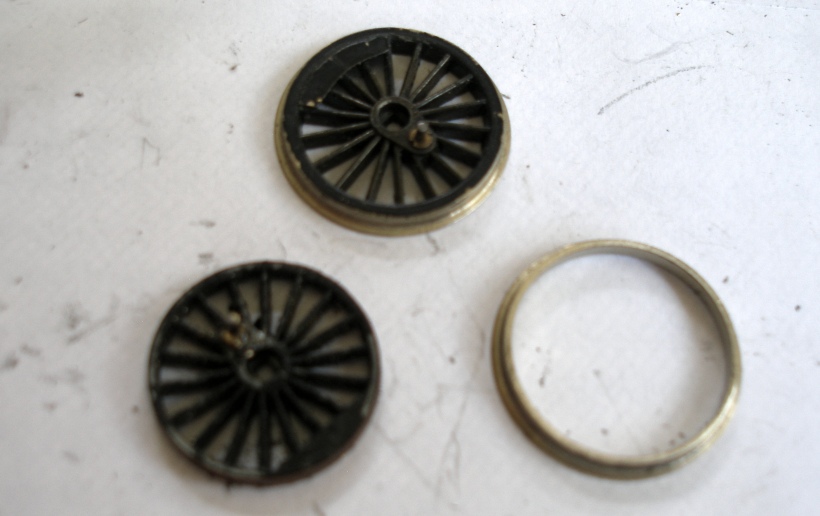
And this almost the end of the story. I had to replace one of the rear driving wheels, as somewhere along the line I had ground off a section of flange (a first for me), and then the tyre came off one of the centre drivers - another first - as I have never had this type of failure before in 35 years of using Romfords. Once off the loco, it was an easy matter to run a gentle coat of Superglue round the outside of the wheel and press the tyre back on.
With the chassis mods completed, it was time to reunite the chassis with the body. There was something very wrong, as the more I pressed the body home, the worse the loco ran - or didn't run at all.
I ground more out of the inner firebox, and eventually removed the splashers and footsteps but all to no avail.
I was completely stumped, and then looking at the chassis noticed that the insulation tape put round the motor was crumpled on the bottom edge. It then dawned on me that the GG4 was pivoting around the rear axle, and the more I pressed the body down, the more I was pressing the motor on to the top of the centre drivers!
The solution was so simple. I removed one of the screws holding the pick-up plate, and replaced it with a longer screw, so that the end of the screw made a physical connection with the underside of the RG4, and kept it elevated abut the wheel flanges.
With the loco running (but sans footsteps and splashers) I was able to video the result and share it with the Facebook group.
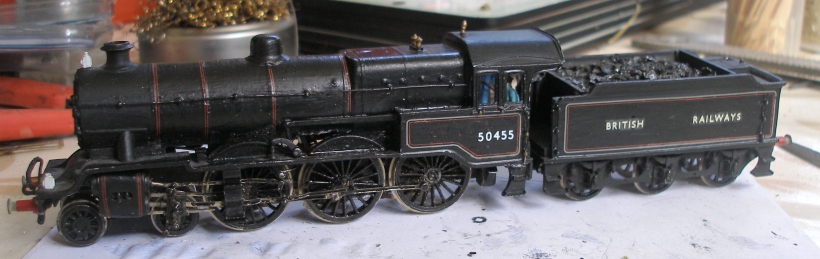
And here is the final result of 24 hours intense activity, joggled connecting rods and all!
So how does it run? It is a bit of a noisy beast, but the combination of the weight and the RG4 does mean she has the ability to handle the 10.05 am Liverpool Exchange - Newcastle (the only restaurant car train diagramed for the Calder Valley) with ease, and also the scratch LMS rake I keep to represent things like her last run from Blackpool to York and return in 1952. It is recorded that there were engineering works on the day, and the outbound excursion had to run 'bang' (wrong) road eastwards from Todmorden. What is not recorded is whether it moved to the wrong road at Todmorden East or at Hall Royd, but for my purposes I have assumed it was at Hall Royd. The rake was all maroon LMS vehicles, except for the lead coach in red-and-cream, which I now need to source to complete the illusion.
But what a beauty. If only Hughes had not lumbered them with his silly spring-loaded valves which quickly furred up, and had fitted a drumhead smokebox that didn't leak, perhaps it would have been the GWR organising some loco exchanges...

Copyright J K Wallace, t/a 'Hall Royd Junction' 2013-2023 email: Hall Royd Junction
7 Portobello Close, Chesham, Bucks. HP5 2PL, UK
tel: +44 (0)7513 412880