
Bibliography: the prototype
There are some excellent books and magazine articles dealing with the Calder Valley and West Yorkshire in general. Copy Pit dominates, and places like Sowerby Bridge and Hebdon Bridge remain ever popular. But Todmorden and Hall Royd Junction were that little bit further away from the main centres, and so less accessible. Even today its still a trek, which might explain its lack of popularity; yet it was the last location that steam bankers waited their next turn, the bankers being active right up to 3 August 1968. So here is my recommended reading list.
I also discovered an un-Googled resource which contains an interesting selection of photos, including one of a 4F that failed to stop at the end of the Todmorden Down Goods Loop and is in the process of being recovered. Click the link for the list of L&YR photos on Photobucket or for L&YR signal box images on the Web.
Railway Memories No. 11 - Halifax and the Calder Valley by Jack Wild and Stephen Chapman
Bellcode Books ISBN 1-871233-10-0
As it says in the title, the book deals exclusively with the Calder Valley and its trains, and it follows that most trains depicted in the book passed through Hall Royd.
Of particular interest are:
P.2 Jubilee 4-6-0 45739 'Ulster' crosses Stansfield Hall Junction with the 9:35 Bradford-Blackpool special (1X17) on Easter Monday 1966
P.5 Great Central D11/1 4-4-0s 62664 'Queen Mary' and 62662 'Prince of Wales' cross the viaduct after a water stop at Todmorden Station on 12 May 1956 with the eastbound Ian Allen Pennine Pullman railtour.
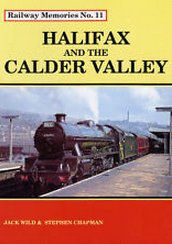
P.13 The 8.48 Bradford - Backpool (1X16) leaves Stansfield Hall on Easter Monday 1966 hauled by Jubilee 45565 'Victoria'
P. 20 B1 4-6-0 61306 on an east-bound parcels train standing at Platform 2. Cannopies all still intact.
P.22 Fairburn 2-6-4t 42110 with the 9:10 pm for Manchester Victoria via Burnley, Accrington and Bury on 3 June 1960 standing in the bay platform, with the grain warehouse still standing
P.22 Late 19th century view showing coaches in the bay; both warehouses/good sheds intact and early painting of distant signals.
P.23 Taken at the end of the viaduct, opposite Todmorden East box, Black 5 44735 heads the 07:50 Middleton Junction - Healey Mills empties on 14 June 1968. Grain warehouse demolished
P.24 Jubilee 45678 'De Robeck' approaches Hall Royd bridge eastbound with a 3-coach local on 30 September 1961
P.24 A Cravens DMU crosses Stansfield Hall Junction heading for Todmorden. East bound frieght visible in the distance, plus banker standing in its siding.
P.25 Banker 48493 snapped in its siding on 14 June 1968
P.25 Banker 48493 has returned from Copy Pit and is standing alongside Stansfield Hall Junction box.
P.28 WD 90100 arrives from Copy Pit on 30 September 1961 and approaches Hall Royd bridge with an empty coal train
P.28 A4 'Mallard' turns onto the Burnley line with the Alan Pegler sponsored 'Northern Rubber' special on 30 September 1961. The caption suggests that the A4 left the WD banker 'standing' but in fact the banker in the shape of 90348 banked in the normal manner, and there is photographic evidence by E F Bentley showing the WD buffered up to the Devon Belle observation car and under way at the rear of the train.
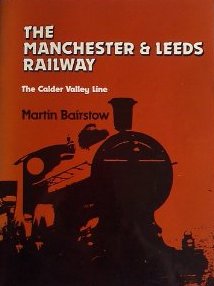
The Manchester & Leeds Railway: The Calder Valley Line by Martin Bairstow
Wyvern Publications
P.1 WD 90726 passes the water tower on Platform 2 with eastbound empty coal wagons. Cravens DMU standing at Platform 1 having arrived from Preston
P.33 WD 90337 passes Littleborough with a Todmorden-Southport excursion (C546) on 20 May 1961 with non-corridor stock
P.36 Early Metro-Cammel DMU enters Todmorden with a Bradford Exchange - Manchester Victoria service on 23 June 1962
P.36 The 10:30 Liverpool Exchange - Harrogate DMU approaches Hall Royd Road bridge on 17 July 1965 comprised of 2 3-car 110 Calder Valley units
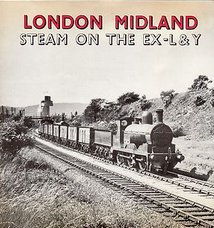
London Midland: Steam on the ex-L&Y by R S Greenwood
Bradford Barton ISBN 0 85 53 231 4
P.56-7 Black 5 45205 rounds round the curve between Stansfield Hall Junction and Hall Royd Junction on a Saturday in 1962 with an empty coal train.
P.58 Midland 4F 0-6-0 44570 enters Todmorden east-bound with the 9:05 a.m, Manchester - Wakefield local passenger train on 28 December 1960
P.58 Jubilee 45710 'Irresistible' enters Todmorden Station west-bound with the Mytholmroyd - Moston coal train in August 1960; this was the retunr working for the loco off the 7:15 a.m. Manchester - Bradford passenger train
P.59 Jubilee 45558 'Manitoba'stands at Platform 2 with a summer Llandudno - Bradford extra (1N85). Alonside is a Cravens DMU just arrived from Accrington, still to shunt out into the bay ready for departure
P.60 WD 2-8-0 90470 runs along the Down Main (caption wrongly says Down Loop) from Todmorden East to Hall Royd Junction. A Crab stands in the background on banking duties.
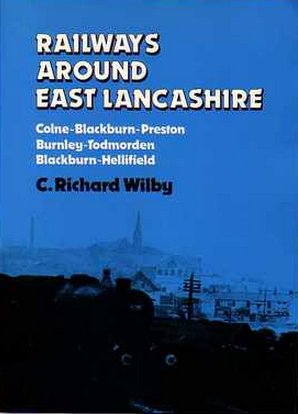
Railways around East Lancashire: Colne -Blackburn - Preston; Burnley - Todmorden; Blackburn - Hellifield by C. Richard Wilby
Wyvern Publications
P.56 View of station and vaiduct taken from the hillside above the station in 1880
P.56 Todmorden Station east-end with Black 5 44928 heading westwards, passing a Radial Tank standing at Platform 2 in August 1957
P.57 Todmorden Station looking west from east end circa late 19th century
P.57 Todmorden Station showing Radial tank departing towards Manchester circa late 19th century
P.57 Fowler 0-8-0 49627 heading eastwards at Hall Royd Road bridge on the Down Main with an empty mineral working
Lancashire & Yorkshire Railway Traffic Control Maps Volume 4 Lines East of Todmorden Yorkshire 1922 by T. T. Sutcliffe
Self-published
Map 1 shows Littleborough to Milner Royd Junction.
In Appendix, photograph of Hall Royd Junction signal box, a standard all-timber box of 1904. It notes that the lower end windows of the box were painted over at this time: in fact, they had been replaced by planking in two phases. No explanation is given for the size of the box being far larger than the actual frame installed. Gallows signal not visible, presumed removed.
Railway Modeller September 1996
Pages 404 - 406 Todmorden: A prototype location modelled in 7mm scale by Trevor Smith. This layout passed to the Todmorden Steam Trust, who rented the Up side buildings for a time, before the rent was put up by Northern Sprint, so forcing their demise. Subsequently the layout was bought by Brian Nuttal and moved to his home in Southampton.
Pennine Steam by Kenneth Field & Brain Stephenson
Ian Allan Ltd
P.87 Manchester - Bradford local train approaches Hall Royd Bridge with Black 5 44912
P.88 Black 5 44987 passes through Todmorden Station westbound
P.88 8F 48152 approaches Todmorden Station from the west
P.89 Stansfield Hall Junction, Burnley line original LYR Starter and Calling-on signal with original arms with WD 90548 with early BR emblem
Back Track November 2001: Pages 627 - 634 by Jeffrey Wells
Todmorden 1836 - 1914
11 photographs including Gauxholme Skew Bridge; the Great Wall of Todmorden; Todmorden Station West c. 1890; Todmorden Station East c. 1890; lithograph of the viaduct; Todmorden Viaduct 1997; Stansfield Hall Junction 1973; Millwood Tunnel east portal; Lobb Mill Viaduct; Hall Toyd Junction 16 April 1973; Horsfall Tunnel)
Back Track November 1990 (Volume 4, issue 5): Page 237 Photograph
Three quarters front view of Todmorden East Junction box in colour taken between 1965 and 1973, with 'East Jct.' painted out to leave just 'Todmporden'. Coal drop sidings and signal still in situ
Back Track November 1991 (Volume 5, issue 1): Page 46 Letter by David J Williamson
Todmorden East Junction
Mr Williamson provides additional information about Todmorden East Junction box. He notes that the box was built in 1884, and extended in 1906, the 60-lever frame being supplied by the Railway Signal Company of Liverpool. He notes that the extension was readily detectable by the difference in brick colour and the provision of a main upright post, not normally seen in LYR boxes. He adds it was renamed Todmorden after Todmorden West closed on 10 January 1965, which was 628 yards towards Manchester. All three boxes on the 'triangle' closed on 21 October 1973, with the commissioning of the East Lancashire signalling scheme based on Preston.
Railway Memories No. 20 - West Riding Steam Pictorial by Robert Anderson
Bellcode Books ISBN 1-9781871233-20-9
P.68 Jubilee 45581 'Bihar and Orissa' heads the Batley-Blackpool on 30 March 1964 (1X37) on the Up Manchester passing Hall Royd box.
Steam Trails: Manchester to Leeds by Bob Pixton and Eric Bentley
Ian Allan Publishing ISBN 9-780711-035232
P.34 A4 'Mallard' on the 'Northern Rubber' special taken from Hall Royd Road bridge on 30 September 1961, slightly to the left of the previously identified shot. This to repeats the 'left the WD standing' myth.
P.58 Stansfield Hall Junction with WD 90345 heading northwards with a mineral train
P.58 A peak through the trees from behind Stansfield Hall Junction box showing two 8Fs in the banking sidings
Signal Boxes on the Lancashire & Yorkshire Railway Lines: North East Lancashire by Chris Littleworth
Signalling Record Society ISBN 1-873228-21-X
So close and yet so far! The coverage of lines ends at Stansfield Hall Junction on P.137. However it does shows two levers as being relevant to Hall Royd. The distant for the Burnley line on the gGallows signal at the mouth of Millwood Tunnel is worked by lever number 4 - a pull of some 462 yards round a curve, although the diagram suggests the home is 580 yards from the distant; and there is a reference to 'Worked Catch Points in Down Main 445 yards to Home'. The diagram shows both trap and catch points, and worth noting here that there is a difference. Seems a shame that these key - even critical - features are often omitted from many purportedly finescale P4 layouts - why build your track to two decimal places and then leave out critical pointwork? In the era of continuously braked trains, catch points have been steadily removed from running lines in recent years. There is another book in preparation.
Todmorden Buses: A Century of Service by Ralph Wilkinson
Nostalgia Road Publications ISBN 1 903016 68 1
May seem an odd choice for a railway site, but this is a highly recommended book for anyone interested in Todmorden, or wishing to model the viaduct area, as the bus station latterly has sat underneath the viaduct, and there is a great deal of essential detail behind and to the sides of the buses!
P.25 1960s view of the viaduct from Burnley Road featuring PD2/1 No. 5
P.26 Roof detail of the stone-built structure that sat between the arches in the bus station area
P.35 Early sheds in the bus station, plus a vague trident on top of the viaduct
P.36 Two shots showing where buses parked up by the station between duties, before the bus station was built. TD5 No. X23 parked on the Station Approaches on 14 April 1952. Also shows bottom of girders forming the bay platform.
P.44 A signal post and a signal arm make a showing
P.51 Building between the arches again
The book also provides sufficient detail to enable a model of the concrete bus shelters that populated the bus station and adjacent streets. I haven't found a ready-to-run model of this type in 4mm scale.
Roger Birch's collection of Todmorden related material is second to none, and the illustrations, captions and production values set a high standard for this type of photo odyssey.
A Way of Life: Glimpses of Todmorden Past (a prequel to the five volume set)
Plate 21: 4-4-0 and 4-coach train at The Holme, about to pass over a stone arched overbridge
Plate 22: Western mouth of Horsfall Tunnel seen in the hillside.
Plate 27: White Hart Inn showing top of water tank on the Down platform at Todmorden Station
Plate 30: Radial tank on the viaduct with Holt's the Ironmongers in the foreground.
Plate 44: 1 March 1866 showing railway station in the distance, and detail of the warehouse and spinning mill on the site of the later goods yard.
Plate 55: Rose & Crown at Castle Clough, showing the early pair of signal posts controlling trains approaching Hall Royd Junction from the Leeds direction. Be interesting to know where these were worked from, as the original Hall Royd Junction was at the point Hall Royd Road crosses the railway. Could there have been a signalman stationed here?
Plate 62: Early view of Todmorden Station looking east, circa 1866. Shows the entry to the Down side goods sidings, and also a siding on the Up side accessing a warehouse belonging to the Fielden Brothers from whence they dispatched woven goods. The siding drops away from the main line, and is on the site of the later goods yard. Also there is a trailing single slip in the Down road.
Plate 101: View of Up loop and bracket signal taken from the field in front of Stansfield Hall c. 1900. Shows sidings laid alongside L&Y main, but the two that were subsequently laid alongside the Copy Pit line have yet to appear. In the distance can be seen the bracket signal mid-way down the Up loop. Note how it features two arms at this time.
Todmorden Album 1: People Places and Events by Roger Birch (ISBN 0 950910007)
Page 9 features a fairground set-up behind the market, with the trident on the viaduct behind the helterskelter, as does the picture on page 81 of a Gospel Hall meeting tent, and on page 110.
Page 10 is above Dobroyd, showing the crossing and warehouses at the southern end of the goods yard. There are better reproductions of this photo elsewhere.
Page 23 is described as A Band of Hope Demonstration, in the field in front of Woodlands. Immediately behind the Band are the tracks of the Copy Pit line (Hall Royd Road bridge is out of view to the left). The down loops then feature, along with the main line, which appears to have a freight train on it, featuring three GN vans.
The Great Wall of Todmorden under construction features on page 31.
Track relaying at Hungry Wood Bridge in 1934 is depicted on page 35, and also a low-bridge double decker negotiating Hungry Wood Arch at Cornholme.
The signal box and level crossing gates ends feature in a photo of Walsden showing the damage after severe flooding on 12 August 1938.
The demolition of Lobb Mill chimney on 26 September 1906 shows people standing on the railway behind to get a better view.
On page 47, a photo from the upper floors of the Town Hall looking north takes in the viaduct and the trident signal.
A distant view of Lydgate Viaduct c. 1910 appears on page 87. Gauxholme viaduct features in the bottom right corner of the photo on page 105.
Todmorden Album 2: People Places and Events by Roger Birch (ISBN 0 9509100 1 5)
In Volume 2 Page 10, the trident bracket signal on the viaduct can be seen in the distance, on the viaduct, and a section of track is seen on the hillside above Rochdale Road, Gauxholme on page 18.
Page 23 is dedicated to Walsden, with a view of the goods yard from the hillside looking south in 1946-48 (a good overview, showing how the sidings fan out) and a photo of the Booking Office on its last day on 6 August 1961. It stood to the left of the footbridge steps.
Todmorden Station looking east is a double page spread on pages 24 and 25, with a Radial tank and coal wagon on the Up main passing the platform end. The sidings in the goods yard are full of wagons.
On Friday 4 September 1942 a Midland 4F 0-6-0 left the rails of the Up Loop and fell down the steep embankment behind the market ground.4 The driver, Charles Thatcher, was pinned between the engine and tender for some 2.5 hours while the rescue party fought to release him. The driver sustained severe burns and had to have his right arm amputated. The train comprised 28 wagons loaded with coal and was heading towards Manchester at 10 pm, and had been looped to allow another train to pass. A telegraph pole was also demolished. The loco was lifted back onto the line the following Sunday by two cranes from Newton Heath, and it was back on the rails, ready to be taken away 'own wheels' at 3:30 pm. The photo on Page 26 shows the loco down the embankment with the cranes ready to make the lift. There are other photos of this incident on the Web.
The other photo on the same page shows the arrival of the first diesel train - a Metro Cammel 3-car set. This could be a demonstration run.
Dobroyd level crossing with cabin, crossing keeper's cottage and end of the warehouse appear on page 42 c.1900.
A general shot of Portsmouth on page 51 features a train in the middle distance climbing towards Copy Pit.
Pages 52 and 53 feature the signal box and station at Portsmouth c. 1910, whilst Page 58 has a picture of Cornholme Station from Shore New Road in 1909.
On pages 72 and 73 is a wonderful double page spread taken from the southern side of the canal looking north across the valley in 1910-1912. In the middle distance the railway features, with the Hall Royd 1904 signal box featuring on the left hand side. Next is the brick-built permanent way hut, followed by the 'new' Hall Royd Road bridge. Almost in the gutter is Stansfield Hall box, and then, to the left, is Todmorden East box - possible the only photo to feature all three signal boxes.
Pages 98 and 99 feature the well-known photos of the Charlestown rail disaster on Friday 21 June 1912. The first shows the upright Radial tank, and the second is from the rear of the train looking eastwards.
Page 101 is a view down the valley at Springside with a LYR passenger train in the middle distance.
Page 104 features Redman's furniture business at Tipside, with the roof of Todmorden East signal box and water tank on the Up loop visible on the top of the embankment.
Todmorden Album 3: People Places and Events by Roger Birch (ISBN 0 950910023)
There are people who spend their lives not looking at the main subject of a photo, but at what is contained in the corners, as the incidentals are often of far greater interest. And so it is with Volume 3.
With direct relevance to this site, the upper illustration on page 13 shows Hall Royd's engineering sidings c.1910, looking westwards from Hall Royd Road bridge. The Up and Down loops are there in all their glory, with Todmorden East box in the background. The book dates the photo as being in the 1920s, but the loco types visible suggests possibly 1910. There are five locos in view: a 0-6-0 tender type standing in the Up goods loop with a short train facing in the down direction; a Barton Wright 0-6-0ST working the sidings, whilst in the background is a large-boliered 0-8-0 on banking duty. Meanwhile there's action on the viaduct with a loco getting under way - possibly in connection with the second goods train in the Up loop, which lacks a loco. Meanwhile, tucked behind Todmorden East box, is a loco working the coal drops. Note the three-way point in the yard which was later replaced with two regular points. The wonderful gas lamp was dummed-down in the LMS period, and the L&YR signal replaced with an LMS/BR short tubular post job quiet early on - certainly before other signals in the area were upgraded.
On page 88 the book zooms to the other end of the Hall Royd layout and has a photograph showing the Hall Royd Up Distant Bracket, worked by Lever 32 in Hall Royd Junction box, and giving drivers early notice of the state of the junction. The photo shows that the signal In L&YR days was a single post for the main arm, with the Copy Pit arm mounted on a conventional bracket. The catch point at this location in the Up line is just out of view at the bottom of the photograph. It is likely that the post was upgraded to LMS standard tubular at some point, before the signal was replaced by a colour light signal sometime in late 1965 further out on the other side of Horsfall Tunnel, which is in the middle distance. The photo is dated 1905.
A general view of the town from Woodhouse in 1984 appears on pages 8 & 9, and by a curious fluke, Hall Royd Junction is right in the centre, if somewhat obscured. The viaduct can be seen in the distance.
The image at the bottom of page 14 is a remarkable - and possibly inadvertent - view of the bay platform at Todmorden taken from the upper floor of the Town Hall before rebuilding took place of the intermediate buildings in 1934. The photographer is side-on to the bay platform looking at it from the south-east, and it clearly shows the two girders supporting the lead into the bay platform; the signal post for the bay starter that was mounted outboard of the girders on the middle pier, and...a train for Burnley! The Burnley local consists of a Radial tank with a short smokebox (Bachmann) coupled to an LMS compartment brake third (Airfix/Dapol).
However opposite on page 15 is a photograph which on first inspection appeared to be of St Mary's Church in the 1860. The caption states the view is unchanged today expect for the growth of the trees. In 1965 there were the first significant changes to the Todmorden railscape since L&YR days; these included simplification of the signalling and pointwork at Hall Royd; the demolition of the stationmaster's house, the platform canopies and the railway warehouse on the Station Approach. This was a particularly nondescript building that did not attract a great deal of attention, and so any views of it are scarce, and those that do exist tend to be from the railway side, generally with a train in front of it. However, here the rarely - or even never - photographed south-east elevation is revealed, with three-quarters of the building poking out from behind the church.
Gauxholme railway bridge around 1905 is featured on page 12. Page 13 has a shot of a train in the Up platform ready to depart for Burnley or Preston after L&YR loco number 715 had been turned using the triangle. The photo is dated as around 1895 as the loco has been rebuilt with a Barton Wright boiler, chimney, and other fittings for use on the East Lancs section. The notes suggest the loco was withdrawn in 1901.
The viaduct and the Down Trident appear in a number of views, and the Trident in one of two locations: either mid-viaduct or as later relocated at the Eastern-end, next to the signal box. Photos on pages 20, 29, 31, etc, refer.
Suggestions that recent flooding at Walsden Station is due to a realigned culvert may have some truth in them, but page 74 shows the regular river running between the platforms on 20 August 1954, with the level crossing gates in the foreground. The Summit Tunnel fire has a down page spread on pages 78-79.
There a lovely shot taken on the platform at Cornholme in 1905 looking towards the level crossing. A signal post makes it into the shot of the Mount Zion Methodist Church on page 98. A line of coal tubs is shown in the mid-distance of a shot of Bankwell Pit on page 100. Portsmouth station gets two pictures on page 101. The larger one shows a group of platelayers and stationmaster standing on the level crossing, whilst the lower shot shows an 'early saddle tank' at Portsmouth c. 1890. The loco is No. 541 built in 1877 and withdrawn in 1936. Lydgate Viaduct features twice on page 106.
For those modelling Eastwood, there is a section of track and a bridge abutment in a photo of the burnt out Bridgeroyd Mill on Sunday 17 July 1898.
The 3 foot narrow gauge railway built to service the construction of Gorpley Reservoir in 1904 features on page 62 with locomotive 'Omerod' in view.
Todmorden Album 4: People Places and Events by Roger Birch (ISBN 10: 0950910031 / ISBN 13: 9780950910031 )
In Volume 4 there are a number of photos of direct interest. On page 33, an early aviator caught Hall Royd Road bridge and the signal box with much railway activity in 1938. A long coal train main up of Private Owner wagons is heading towards Burnley - the loco is off to the left and the brake van is just about to pass under Hall Royd Road bridge. A short train is on the down goods loop, between the road bridge and the signal box, whilst another loco stands in the sidings off the down loop.
On page 8 is a shot also taken from the air showing Todmorden station in 1968 with the cotton warehouse still standing. Although it requires much magnification, the wall facing the town can be seen in sufficient detail to allow a stab at a model. The viaduct on Burnley Road appears on page 9.
P. 58 shows the original Stansfield Hall Station in the late 1880s, and a 'train smash' with wagons across and over the platforms appears on page 59.
Star photo as far as this Website is concerned appears on page 59 and is of 'Hallroyd Level Crossing 1890s. The level crossing at Hallroyd was removed for safety purposes in 1896 and replaced with a road bridge some 75 metres west of the old crossing'. The photo is attributed to Herbert Hardaker. This shows the existence of the Up (Manchester) at this time, together with the siding half way along it. The Burnley line comes in immediately west of the level crossing, and two tracks cross the crossing. The down (Leeds-bound loops) will have terminated before the Burnley line came in. It should be noted that the L&YR Private Siding diagram book suggests that the private siding provided for the Fielden's lying literally next to the junction survived the building of the bridge and was finally removed in 1905. This therefore suggests that the junction remained in its original form, with the bridge built over the original layout.
A view of the Unitarian Church includes Private Owner wagons in the West Yard. 'Primrose Main' and local Caleb Hoyle, Todmorden predominate.
Page 78 has a nice shot of 'Flying Scotsman' crossing Gauxholme Viaduct on 1 June 1969 on a special to Newcastle running via Bradford, Halifax and Carlisle. Two tenders and blue-and-grey coaching stock. Parts of the viaduct also appear on pages 75, 76 and 77.
The original Walsden Station from the air is on page 83, and the re-opening of the station on 10 September 1990 is illustrated on page 84.
Todmorden Album 5: Shops by Roger Birch (ISBN 978-0-95091000-4-8)
In a book entitled 'Shops' one is going to struggle to find railway themed photographs. However, the front cover scene is taken from the top floor of the town hall, and shows the viaduct in 1976. OIt also shows the site of my Great Grand-father's and grand father's ironmonger's shop which traded from 1875 through to 1927 and occupied the Reeds Rains shop, which in the photo is branded 'Bradford & Bingley'. The station appears distantly on page 18. However greatest railway interest - and for Holt's the Ironmongers - is page 113 showing the viaduct in two views. In the upper view a Radial is standing on the viaduct with two bogie carriages. All the arms on the trident are 'on' so suggesting the train is standing on the Up (Manchester) line, with the loco at the wrong end. The second photo is from a similar angle and view, but this time a Radial tank is facing towards Manchester and is standing by the Up home and distant signal located on the viaduct.
Lancashire & Yorkshire related material
Modeller's Back Track February/March 1995: Pages 324 - 330 by T. T. Sutcliffe
Standard LYR Signal Boxes: A brief historical survey.
7 photographs (Clifton Road Cabin (Brighouse); Victoria Station East Box; Hoghton Tower box; Ribby; Agecroft Junction;Goole; and Hebden Bridge) + plans of a Number 5 box (wood base) and a Number 6 box (brick base)
Lancashire & Yorkshire Railway Signalling by Tom Wray
The Lancashire & Yorkshire Railway Society LYR Focus No. 3 ISSN 1462-5520 Winter 2002
There's also a train under steam with a four-car local set pulled by a Barton-Wright 4-4-0 on page 94 about to cross Ashenhurst Road in 1901.
P. 100 and 102 show Lydgate Viaduct, and P.114 shows Portsmouth station and the row of houses in front of it.
P. 115 features a nice shot of Eastwood Station looking east, and there is an excellent detailed shot of the coal drops with a horse-drawn cart being loaded.
P. 117 shows the line on its embankment passing Bridgeholme and P. 118 is taken above Lobb Mill viaduct c. 1900.
The Development of Todmorden 1700 to 1896 Complied by Mrs E M Savage
Available from the Information Centre on Halifax Road
P. 30 A rather poorly defined photograph entitled 'Halifax Valley 1868-1875' taken from the hillside above Todmorden Station but showing just the last two eastern arches at the end of the viaduct, but crucially both Todmorden East Junction and Hall Royd Junction in there original forms, with the signal box and level crossing evident at the original Hall Royd Junction. The original Todmorden East signal box is on the southern side of the line, located about halfway along the coal drops, which are centre stage. There is a single arm signal between the box and the viaduct in the Up direction. The box itself is a two-storey affair which appears to be brick built at the rear, and wooden at the front. It is a style of early box that I am not immediately aware of. The loop to Stansfield Hall exists, as does the Down goods loop, and two sidings. Immediately to the north of the sidings (the inside of the triangle) the land falls away quite steeply, showing how much fill was required to create the embankment from the end of the viaduct to the present Hall Royd Road bridge. Then - as now - there's a small copse growing in the middle of the triangle. Presumably loco ash was regularly taken to Todmorden and tipped here to create the level area that existed latterly in the centre of the triangle. The booklet makes no reference to the railway except to note its opening.
Background Reading
The Steaming Sixties: Stirring episodes from the last decade of Steam on BR - No. 3 The Shed and the Pit Rose Grove Homage by Paul Anderson
Irwell Press ISBN 978-1-906919-06-1
This is a highly recommended photo album with excellent colour photos of Rose Grove and Copy Pit: most of the locos depicted would have worked to Todmorden at some time or other. Some nice shots of freight on the Todmorden - Burnley line, together with a Class 37 having sneaked in on P.28 with 7M40 from Healey Mills - green with fill yellow ends. One shot shows banker 48070 en-route to Todmorden, and establishes that they travelled smokebox-first to take up their duties, turning on the Stansfield Hall - Hall Royd - Todmorden East triangle.
Rose Grove: East Lancashire's Great Railway Complex Volumes 1 & 2 by Noel Coates
L&YR Focus 69 ISBN 978-0-9559467 2 1
Lots of photos of trains and locos at Rose Grove, many of which will have visited Todmorden. Also detailed Train Working timetable extracts for a selection of years including 1947, 1953, 1965, 1960-1962, 1966
Of Railway Modelling Interest
Model Railway Journal: Issue 115 1999
Houses on the Hill by Geoff Taylor. Details of the construction of a terrace of house on a hillside in Holmfirth
Model Railway Journal: Issue 143 2003
St Mary's Church Todmorden by Geoff Taylor. Details of the construction of the Parish church
Model Railway Journal: Issue 22 1988
An LMS Tubular Post Signal in 4mm scale
Trevor Hughes describes the construction of an LMS signal for Gauxholme Viaduct, the Rochdale Model Railway Group's layout.

Copyright J K Wallace, t/a 'Hall Royd Junction' 2013-2023 email: Hall Royd Junction
7 Portobello Close, Chesham, Bucks. HP5 2PL, UK
tel: +44 (0)7513 412880