
Cornholme Crash 15/16 August 1967
On the night of 15/16 August 1967 a Lostock Hall - Healey Mills freight train headed by class '40' No.D398 ran into a class '8F' 2-8-0 after the driver of the diesel locomotive, who had recently consumed 'the equivalent of five and six pints of beer', ignored all speed limits and ran past six signals at danger. The driver received fatal injuries, and the freight train was derailed – one of its wagons ending-up on the kitchen of a nearby house, while others landed in back gardens. The train had a guard, who had fully applied the brake in his van, obviously to no effect. The train was apparently under almost full power and was running at almost 70 mph. The class '40' apparently pushed the Stanier '8F' 48375 for a distance of about half-a-mile down the 1-in-80 gradient, suggesting that the driver of the 2-8-0 may have attempted to halt the freight train with its own weight and braking power. I am grateful to the Railforums gang for this information.
Study of Chris Littleworth’s ‘Signal Boxes on Lancashire & Yorkshire Railway Lines: North-East Lancs’ finds that Cornholme was manned continuously from 12.05 am Monday to 11 am Sunday. It finally closed on 27 July 1969, so had the train got there, it could have been diverted into the sand drag. Portsmouth was still open at this time, and was also open for three shifts. There were two signals here that the train would have passed. There was a goods loop on the Up side, BUT there was no direct facing connection into it from the Up Main so the signalman could only have watched in dismay as the train thundered past.
Copy Pit has three signals, but it is unclear from Chris’ notes when the Up loop was decommissioned, although the Pit sidings and Down Loop had been removed by 1969. So the ‘sixth’ signal would have been the home signal guarding the entrance to Holme Tunnel worked by Cliviger East. This could have been the first ‘danger’ signal the train passed. The box was open continuously mid-week, and given it is just under two miles to Copy Pit it might be expected that ‘train running away right line’ to have been sent so Copy Pit could have used its loop – if it was still connected at that time.
Norman Sutcliffe wonders if the locos had been present why he did not photograph them at the time. It is possible the 8F was dragged the two miles down to Stansfield Hall and initially dumped in the banker sidings, to be followed by the Class 40. This set of movements could have been going on whilst the track was being sorted and the wagons re-railed. Certainly, having found two photos of the loco after it was returned to Rose Grove, it would have needed great care when being moved, and the tow over Copy Pit would have required a cable and some way of braking the loco. The return of the loco to Rose Grove probably occurred some time later when a engineering possession could be booked.
The 8F was built at Horwich in November 1944. It had been transferred to Stoke in November 1966, and then onto Rose Grove at the start of August 1967. The 8F was dragged to Rose Grove and cut up at the shed after the accident. Noel Coates in the LYRS publication 'Rose Gove' Volume 2 notes that the loco was deemed too dangerous to move, and had the distinction of being the only loco to be cut up at Rose Grove. The loco was still intact on 12 November 1967, but by 21 April 1968 only part of the driver's side of the cab and some of the tender remained.
Norman Sutcliffe recalls: "The loud crash briefly disturbed my slumbers, but not sufficiently to rouse me from my bed, so that it was next morning when I learnt what had happened."
We are very fortunate that Norman had the foresight to record the aftermath of the collision, and I am very grateful to Norman for permission to reproduce the set of photographs here.
The sequence of photos starts from the south, and is taken from the hillside above Oakleigh Terrace. The wagons are mainly 12 ton BR mineral wagons, but a 21 ton hopper is at right angles to the camera in the foreground. It took around 36 hours to clear the wreckage and repair the track. As the 8F was dragged to Rose Grove, it must be assumed at the time of the photos it was still where it had come to rest, and would be one of the last items to be removed from the site after the wagons had been cleared and the track re-laid.
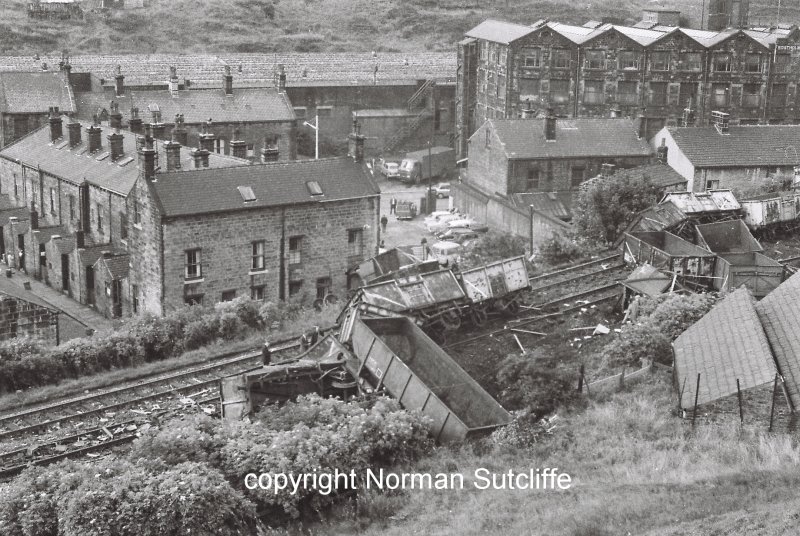
Photographer & Copyright Norman Sutcliffe; All rights reserved.
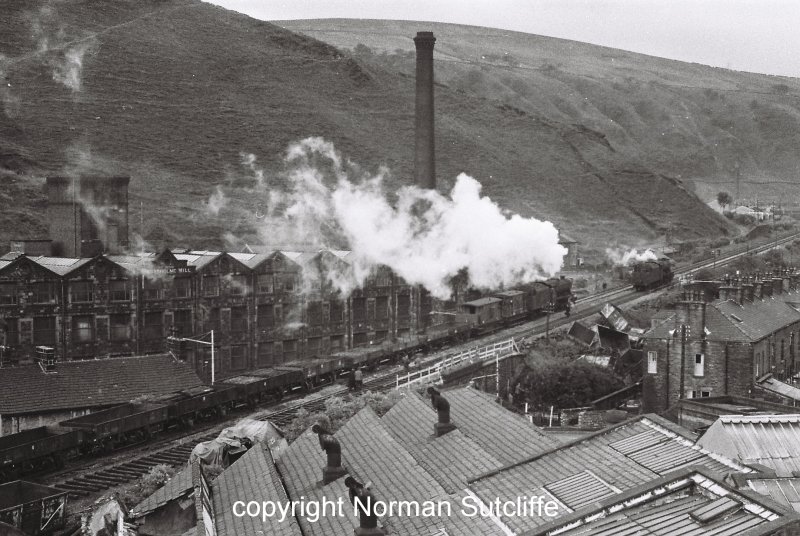
Turning slightly to the right, the breakdown crane can be seen in operation, and has lifted four of the derailed wagons onto the other track, although the crane is now going to have to be moved so that the re-railed wagons removed before more wagons are rescued. There were two cranes involved in the task, and the other is probably to the left of the photographer. Note the three riding vans for the wrecking crew, with a steam loco (Black 5 or 8F) coupled to the consist. The hole in the factory roof in the foreground is very obvious. Also there is heap of wagons that have gone down the side of the embankment just before the Pudsey Hill road bridge, and is lying in front of Cornholme Terrace.
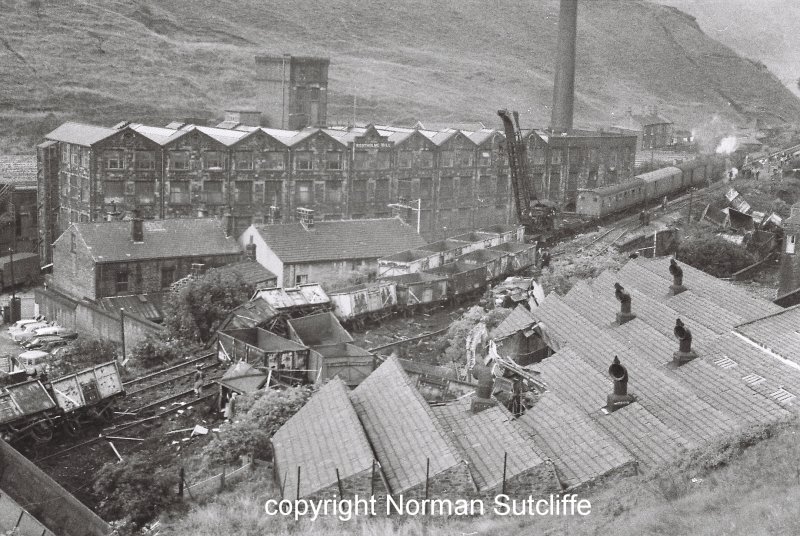
Photographer & Copyright Norman Sutcliffe; All rights reserved.
Now the photographer had turned his camera even further to the right and caught the loco, and what appears to be a brakevan, on the downhill track. Without any braking, it would appear that every wagon on the runaway has derailed or been thrown off the tracks. The track has also been torn up and displaced, and will need replaying. The residents would have had a pretty rude awakening.
Photographer & Copyright Norman Sutcliffe; All rights reserved.
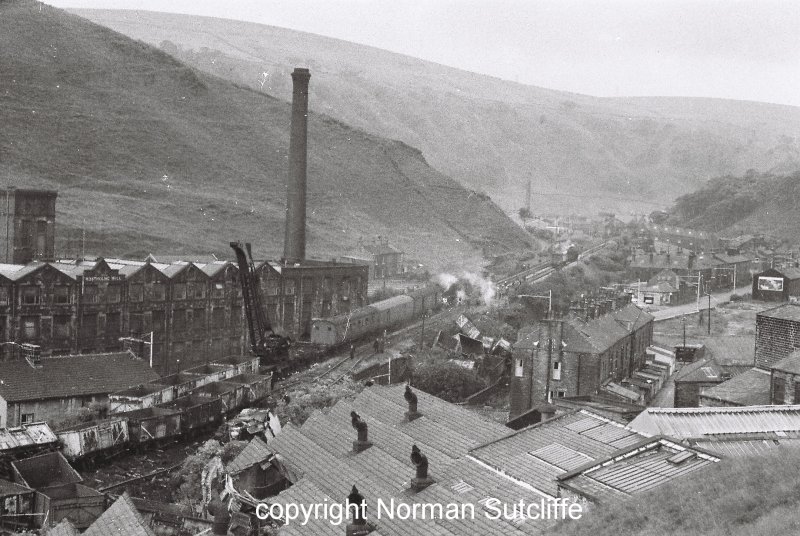
Probably a day later, as the displaced track has now been restored, and there is a loco that looks like it is about to run over the re-laid line. Rails are still required in the bottom left hand corner. The object beside the line and against the back wall of the factory has been sheeted over with tarpaulins. It is not clear from the earlier image what this is, although probably not the Class 40 or 8F that were involved. From other images of the accident, they were both largely intact and could be removed 'own wheels', although the 8F had lost its front buffer beam and pony truck.
Photographer & Copyright Norman Sutcliffe; All rights reserved.
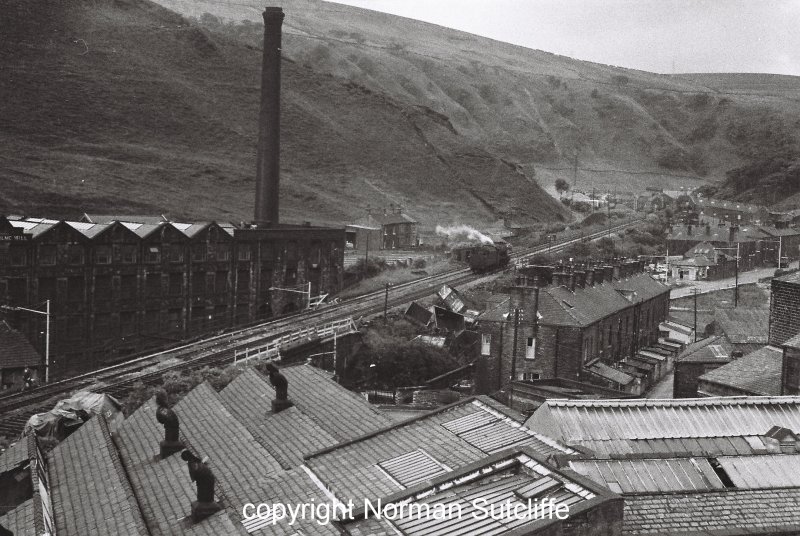
The damage to the factory roof can be seen in the photo below, as can also the laying out of the sleepers ready to have new rail popped back on.
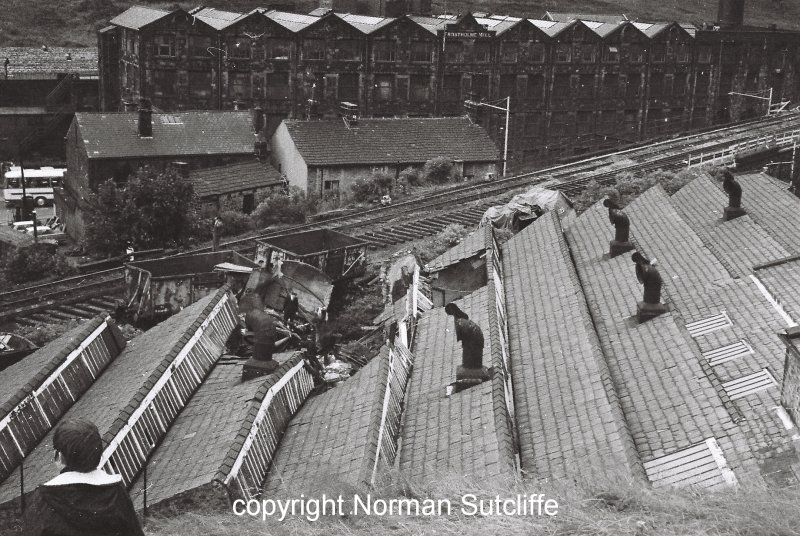
Photographer & Copyright Norman Sutcliffe; All rights reserved.
The brakedown train meanwhile has been working southwards, and not the wagons that were seen derailed in the first photo have been popped back onto the tracks. An 8F can be seen above Harrison Street and Hirst Street.
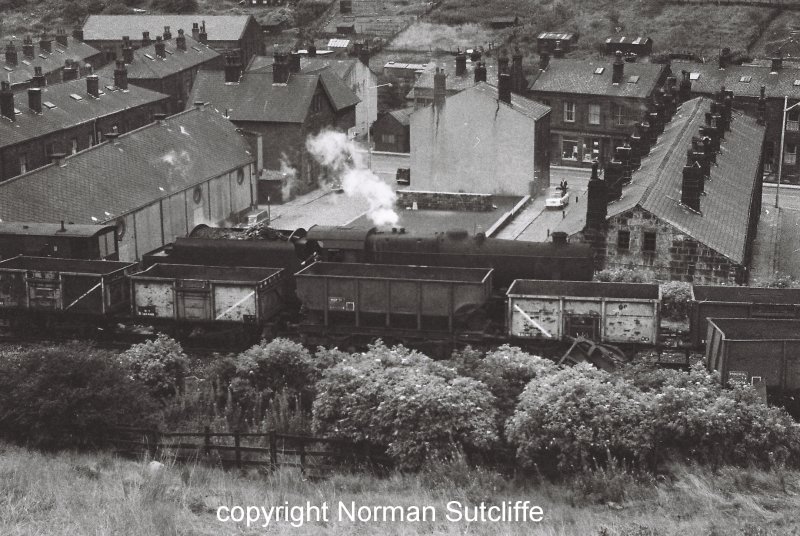
Photographer & Copyright Norman Sutcliffe; All rights reserved.
What looks like a permanent way train is in place lower down. The remains of one of the loaded covered vans that was at the front of the train is in the foreground. This would have had vacuum brakes fitted, so the train may have had a fitted head (the first few wagons connected to the loco's braking system) but these clearly had little effect on retarding the trains downward progress. The Western Region had, in fact, already found in a series of trials that a diesel powered trains with fitted heads were more likely to derail if the fitted head was used for serious braking.
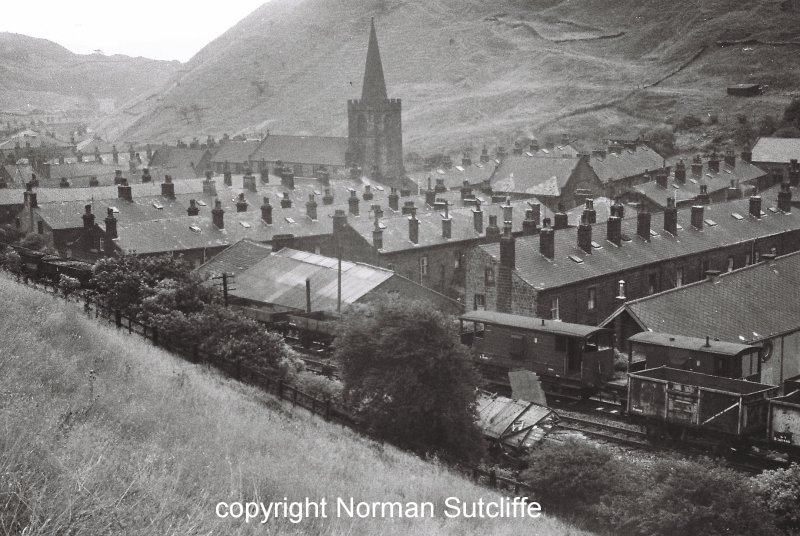
Photographer & Copyright Norman Sutcliffe; All rights reserved.
The Permanent Way train seen in the previous shot is now moving away towards Copy Pit.

Photographer & Copyright Norman Sutcliffe; All rights reserved.
Photographer & Copyright Norman Sutcliffe; All rights reserved.

Copyright J K Wallace, t/a 'Hall Royd Junction' 2013-2023 email: Hall Royd Junction
7 Portobello Close, Chesham, Bucks. HP5 2PL, UK
tel: +44 (0)7513 412880