
L&YR Class 31 0-8-0 heavy goods loco
or the last of the Sea Pigs...
26 April 2018
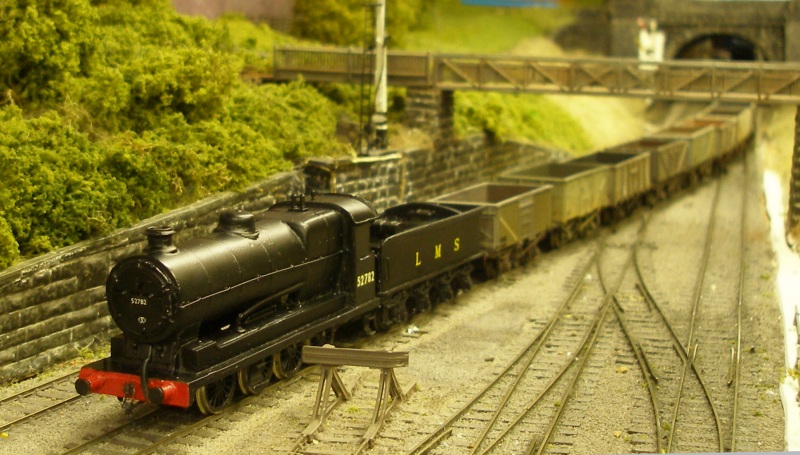
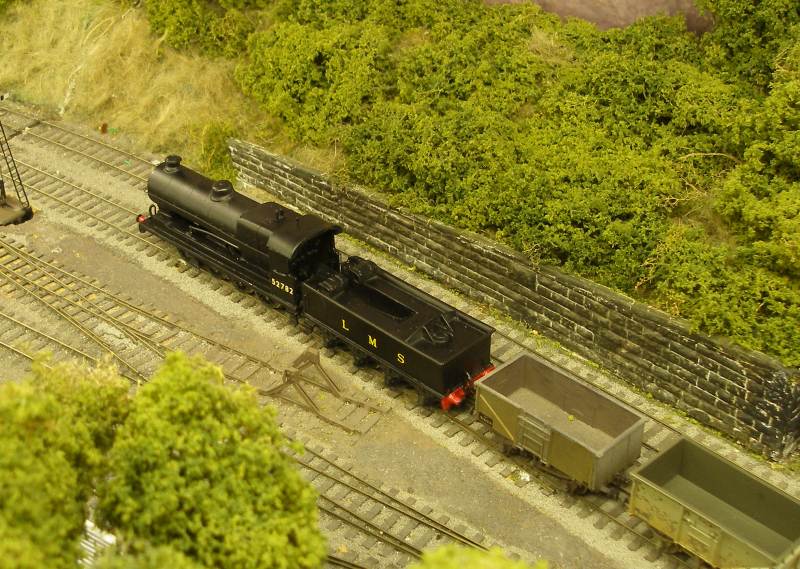
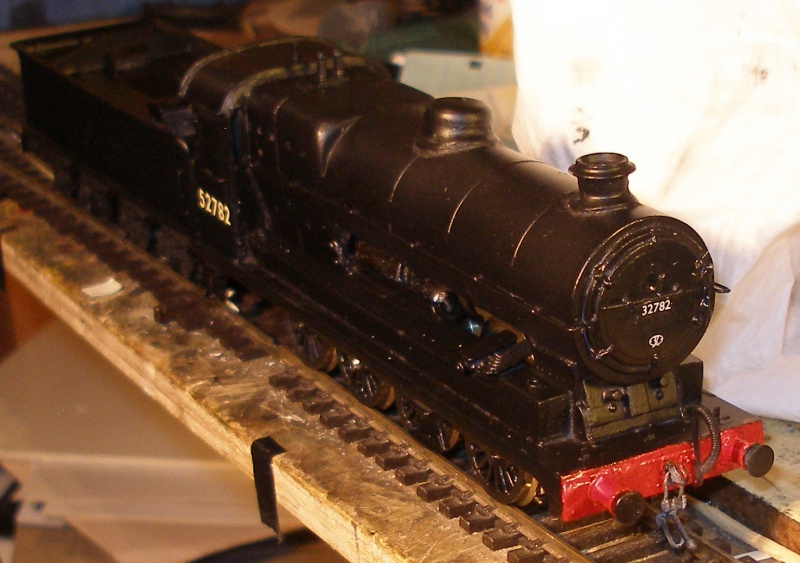
No posts for a couple of days as 52782 has been undertaking road trials. Running her continuously for an hour at a time has seen the mechanism loosen-up considerably, and she is a quiet and steady runner. The noisiest element is the tender, which 'rattles' when the loco is running light. The Mashima motor, to my mind, runs warm but not to the detriment of performance. She's been rolling round the layout tonight with a load of 22 coal wagons. This load didn't seem to affect her top speed, so we might yet try and assemble a prototypical 55 wagons.
She needs weathering and I'm going to buy my first airbrush. Once airbrushed, she'll then need a crew; coal, lamps and fire irons. The shots show 52782 taking the Copy Pit line at Hall Royd Junction.
22 April 2018
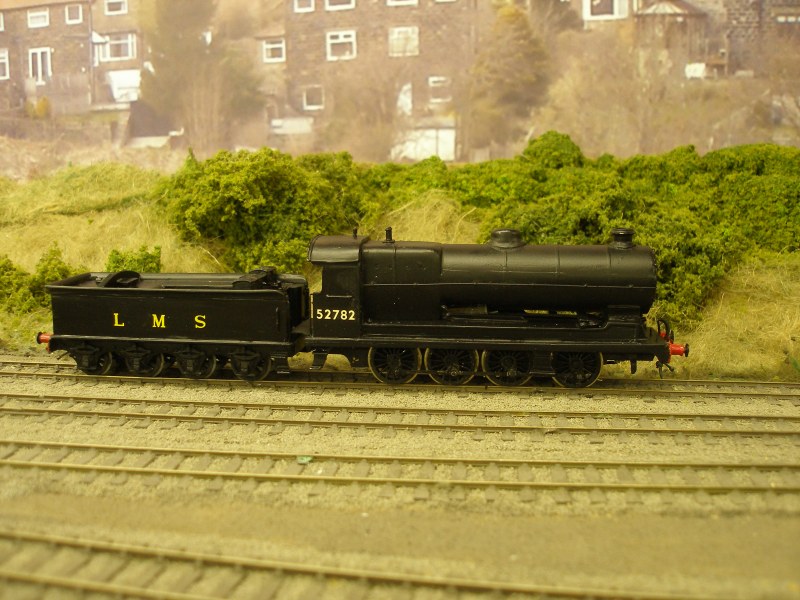
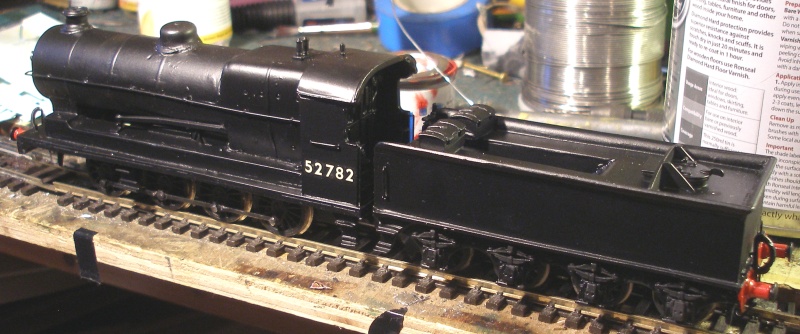
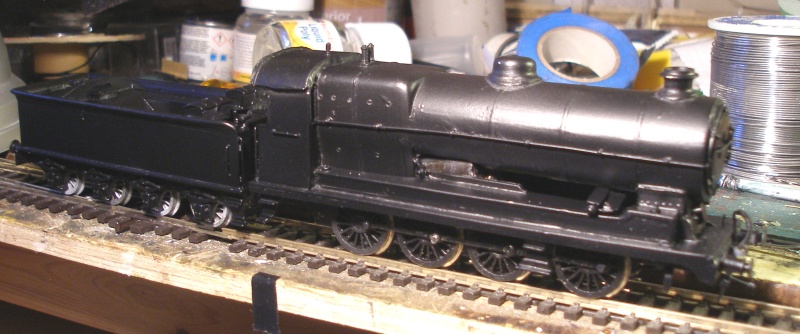
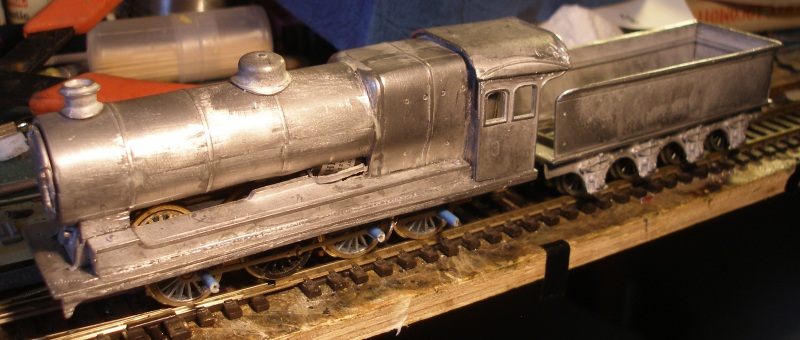
The drawbar is a whitemetal casting which is asking to be broken when the loco is lifted off the track so that will be replaced before going into service. The fallplate has now been added, and then for a little bit of fun the loco was photographed on the layout in its authentic 1951 livery. At this stage it has been test run on the layout in DCC mode.
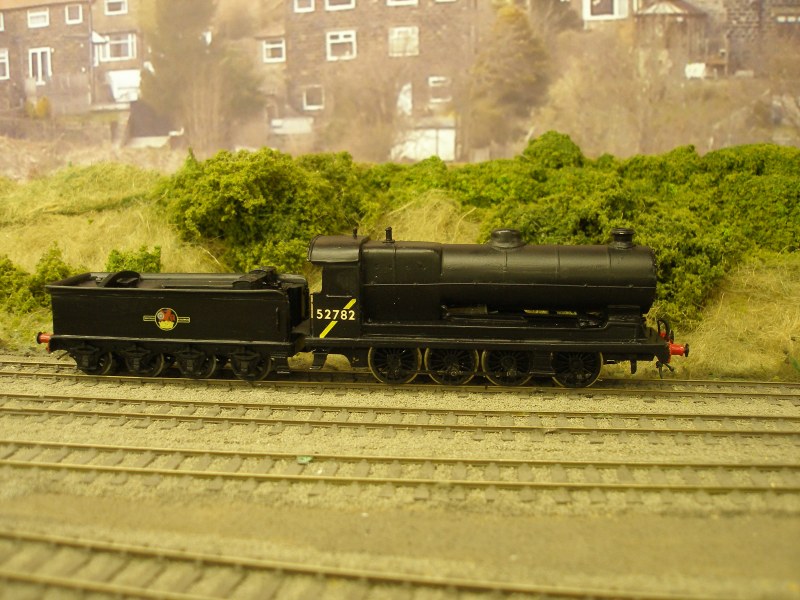
The kit was bought - and built - because I rather fancied having one. But it is difficult to explain it operating on a layout clearly set in the 1964-68 period. So just supposing the inadequacies of the G3s had been recognized early on, and instead the bearings of the LYR type had been taken in hand, such that they were then withdrawn along with the G2s in 1964... A little bit of photoshopping produced this image. Just needs the AWS fitting...
20 April 2018
The numbers on the fireman's cab sheet were applied in the afternoon, and this evening's task was the smokebox number and shed plate. The Fox Midland Region shedplate sheet does appear to have one plate per Midland shed, so had a full selection of North West plates. Amusingly they incorporate a 'SC' (for 'self cleaning') plate, which led to the thought it could have been finished in a late BR livery complete with yellow stripe on the cab side...
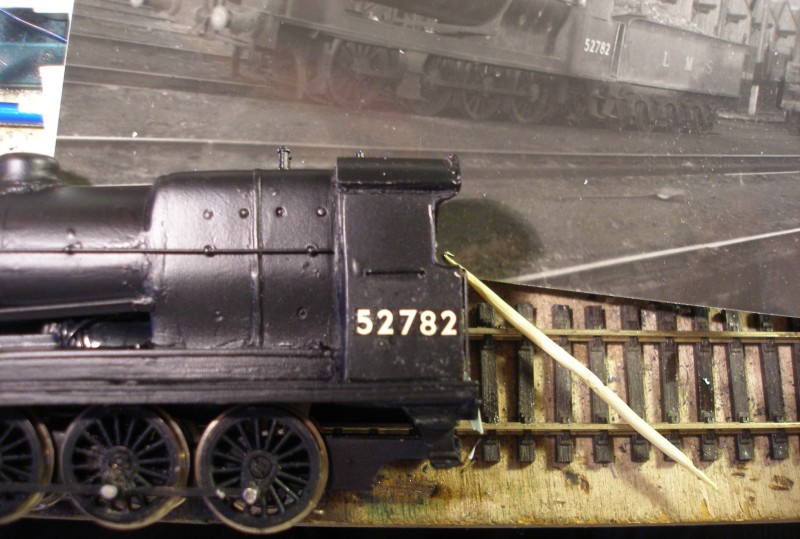
Back to reality, and the shedplate was placed on the smokebox door using my trusty photo of the prototype for reference. The number plate required a two sets of numbers to be cut from miscellaneous number plat transfers and pieced together. I had the sequence '327' available, so used this with the intention of overlaying a '5' when fully dried and initially varnished, which is where we are in this photo.
19 April 2018
With the buffer beams painted a very bright gloss red (the Humbrol Satin 174 bought for the job having very little pigment such that it was no better than a coloured wash), work started on the first set of cab side numbers, gentle teased into place with a cocktail stick. Note the photo of the real thing resting on the wok bench.
Hard experience has shown the value of doing one side at a time, allowing time for the transfers to dry before applying a coat of varnish, and then not attempting the other side until the first side is completely dry.
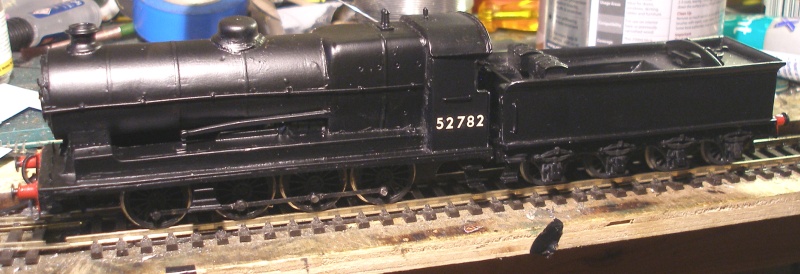
And now a shot from the rear. The tender featured a flat casting with an rectangle indentation representing the coal space. A proper top based on diagrams and photos from Barry Lane's book has been fashioned from plasticard. This will be filled with coal in due course but arranged to show where the fireman has been shoveling the stuff into the firebox. Other essential details will be lamps on the front for an unfitted freight, a crew, an critically, a set of fire irons.
18 April 2018
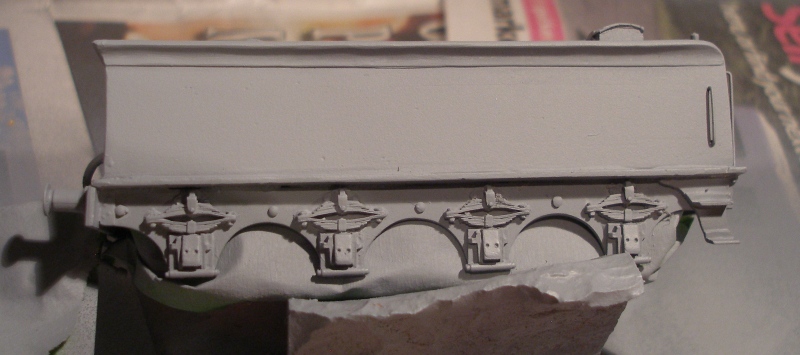
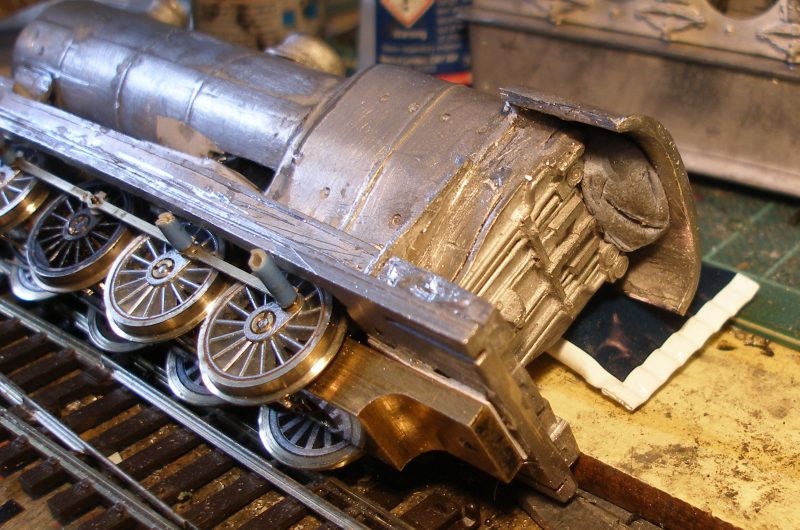
The focus is now on cleaning up the body. A light spray of Halfords grey primer quickly shows two areas that need further attention: the joint between the splashers and footplate and the area under the boiler which was cut away and then replaced.
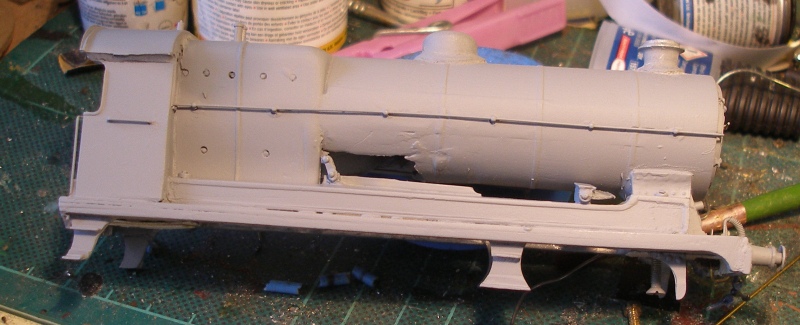
With the tender it was a similar story, with the join between the tender tank and the footplating looking nobbly.
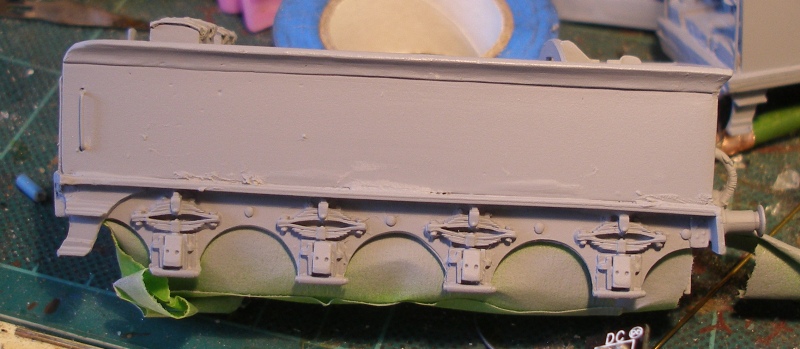
Filler was applied...
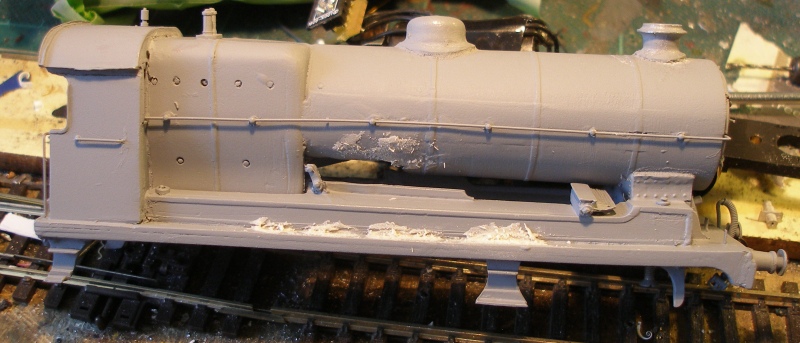
..and then after a bit more filing and wet&dry, a coat of Matt Black. Although not obvious from the photo, the DCC decoder which was built into the smokebox has now been plugged into the socket provided in the firebox.
16 April 2018
Careful scrutiny of the recently fitted handrails showed the that rail at the smokebox end on the driver's side was awkwardly fitted. Trying ease the knob out proved that Superglue is stronger that the a Gibson handrail knob, and the stub of the old knob had to be drilled out and a new knob and handrail fitted.
As already noted. some items were missing from the kit, including the driver's seat (or fireman's - basically there was only one). In one of those blinding moments it occurred to be that a set of buffers from an old Mike Trice sprung buffer kit would fit the bill. Now just need a crew.
The instructions recommended flattening a piece of wire with a hammer and a brick to form the lamp irons. Each 'iron'was filled front and back to smooth off irregularities. Holes were drilled the irons fitted. The loco will be allocated to an unfitted freight so there will be a lamp on the top iron, and over the driver's side buffer. The holes will need a small amount of filler, and the smokebox iron looks like it needs a tweek. This view shows the smokebox door handrail knob and BR smokebox plate, fashioned from a piece of 20thou Platsicard.
12 April 2018
All the handrails have been added to the tender, and after a bit of dithering, the tool boxes fitted in place. I am grateful to the Robert Lomax on the 'Tribute to the LMS' Facebook group who provided a second opinion on this key but often obscure(d) details. Between us we decided that in this 1949 view that is the leading edge of the tool box peeping out from under the ungainly heap of coal. It has to be assumed that the tool box was no-longer being used for its intended purpose, but was very effective at allowing coal to be heaped to a great height on the tender tank top. It's worth noting there appears to be an open framework behind the tool box and this seems to be a later fitting on some locos, particularly those that no-longer have tool boxes.

The tender has now had its first coat of undercoat. Worth reminding everyone of the importance of doing this either outside or in a well-ventilated room. Recently there have been Facebook posts and even Martyn Welch in the 'Model Railway Journal' reporting problems arising from long exposure and sensitisation issues.
Next on the list are the handrails. A Lanky characteristic on these locos and the Hughes Dreadnaughts is the way the handrail doubles back at the smokebox end and is anchored next to the door ring. First, the holes are drilled using a pin vice.
Alan Gibson short handrail knobs fitted the bill very well. The easiest way to fit these is to roll them gently on the bench until the hole is uppermost and then push the wire through. In this case Gibson .45 wire has been used.
The next stage is small details and replacing bits missing from the kit. These are the two rear sandboxes, the fireman's seat and whistle. The cast vertical handrail units for the front of the tender and rear of the cab side sheets were also omitted - too late to complain now! The whistle shown in the picture has been borrowed from a Hornby 'Percy'.
9 April 2018
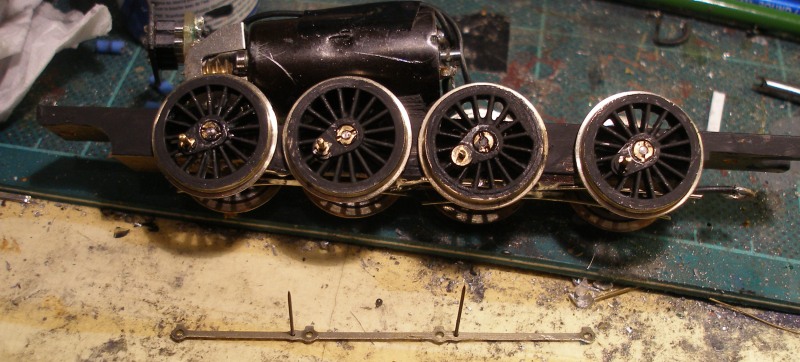
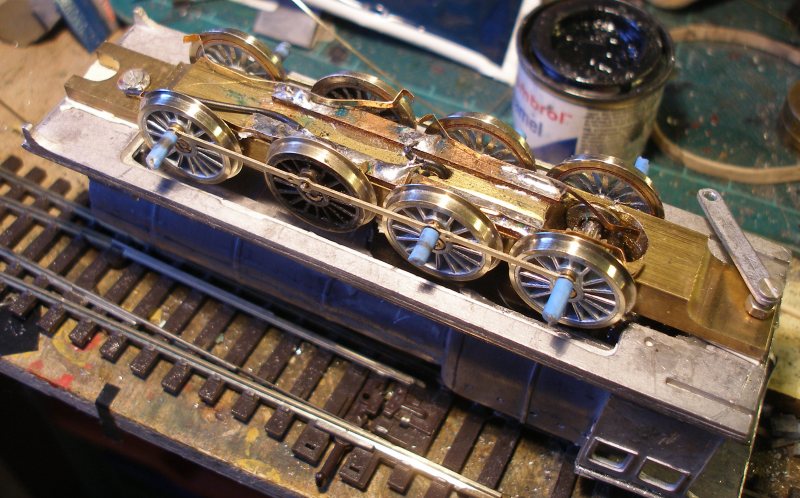
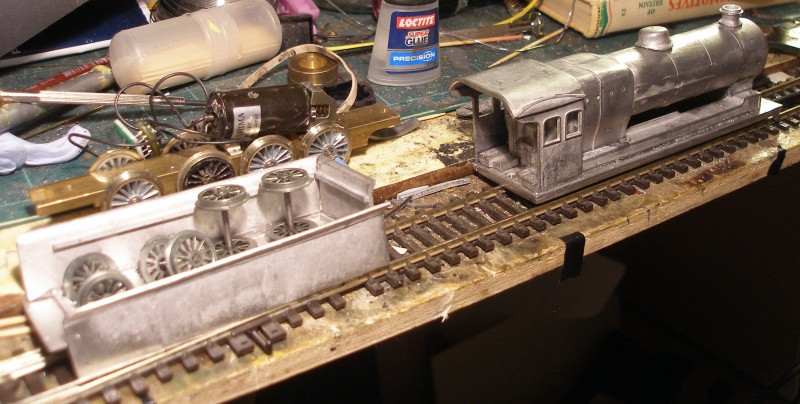
Activity has now switched back to the chassis. Here is how it looked at the start of the evening.
First step was to remove the temporary crankpin bushes and wheels using the ever trusty Romford screwdriver.
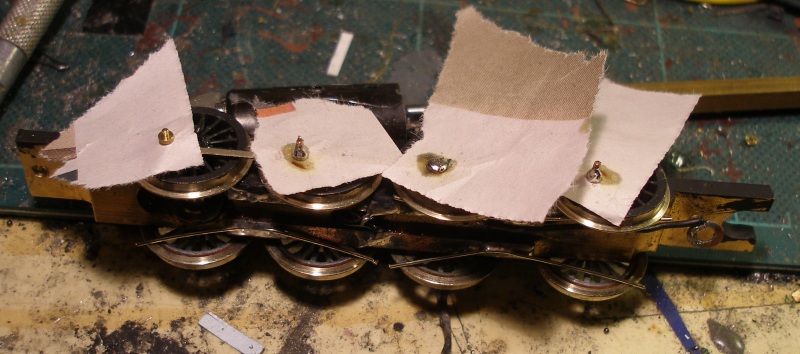
The chassis block and wheels were next painted - the blotchiness shows the paint is still drying.

The coupling rods need pins inserting through two holes to represent the knuckle joints. In the kit these are whitemetal 'rivets' but here PECO track pins have been used. The wheels are now back on, and care taken to ensure that the axle nuts are fully tightened.
The coupling rod is placed back over the crankpins, and the crankpins washers soldered in place. Note the use of newspaper to act as a barrier to stop the flux and solder welding the whole assembly solid.
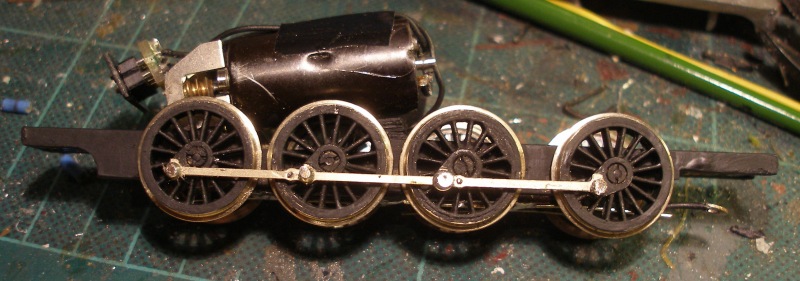
The paper is removed and the crankpins filed down. Further touching up will be done once the other side is completed.
6 April 2018
As threatened, the side window cab was removed first thing. On more careful study, the cab spectacle plate is not at a true right angle to the footplate, which put the cab out of square. It was also apparent that attempting to assemble the two sides and roof simultaneously was a bad idea, and a better approach would be to glue the cab roof to the top of the spectacle plate first, and then piece the cab side sheets in after everything has set. This was achieved by supporting the cab roof on a blob of Blutack.
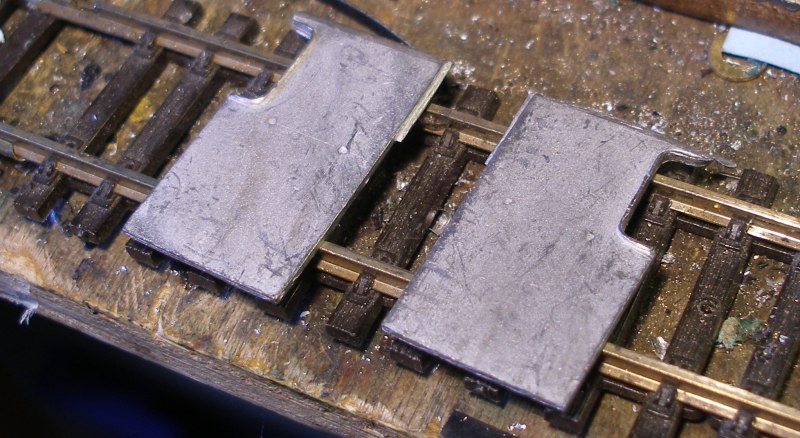
With the cab-windowed sides, I had assumed that there was too much material at the bottom: I have now concluded that the sheet needs trimming both top and bottom, and here are the sheets, with the one on the right already trimmed, and the left one still to do.
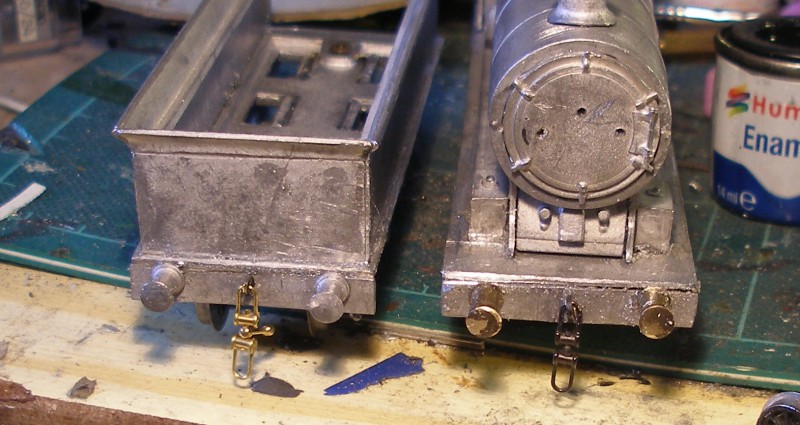
Whilst the cab was setting, the buffer beams were added to the loco and the tender. The loco beam wasn't a terribly good fit, and it was removed again and a shim of plasticard added to give it depth.
With everything set, the screw couplings were added to the loco and the tender. I have made the Romford coupling my standard as it is pretty robust (doesn't pull apart in traffic) and has a reasonable scale appearance - or, rather, did. I tend to use the old black couplings for the front, and the new, brass finish type for the rear. Unfortunately, there appears to have been a retrograde development with these couplings, the older type are much preferred. In case anyone is wondering why a different type of brass buffer appears on the loco, the white metal kit example pinged off under the workbench last night. It has subsequently come to light, but I rather like the brass ones for their better definition, so they can stay for now. I may have also been a tad premature in drilling out the holes for the smokebox door handrails, as checking photos of locos with BR numberplates show that the handrail was raised to allow the numberplate to be fitted in the centre of the door.
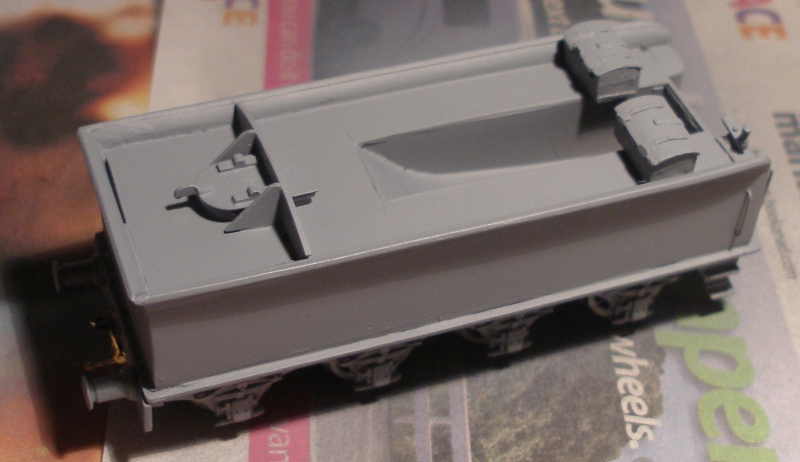
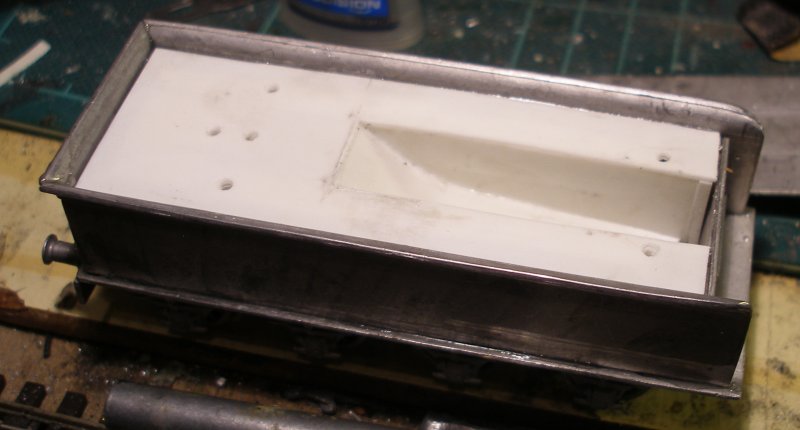
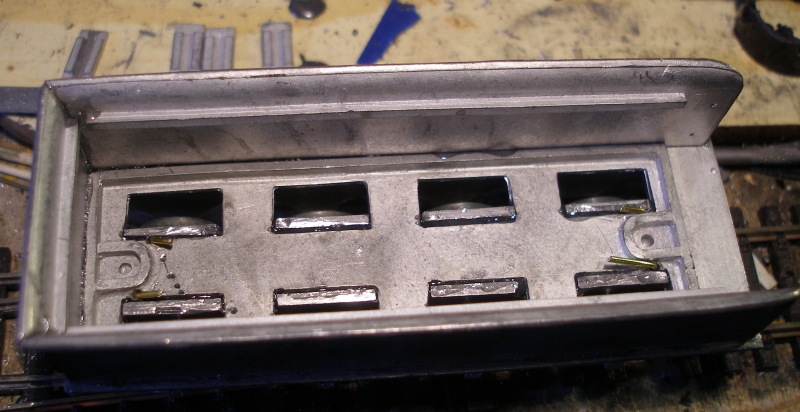
I originally planned to replace the tender tank top with one made from plasticard so that the coal space to be incorporated. I did try cutting this out of the whitemetal item but abandoned it very quickly, and went back to Plan A and made one in plasticard. This proved very quick and easy to made. The first shot shows the two tender tops side-by-side...
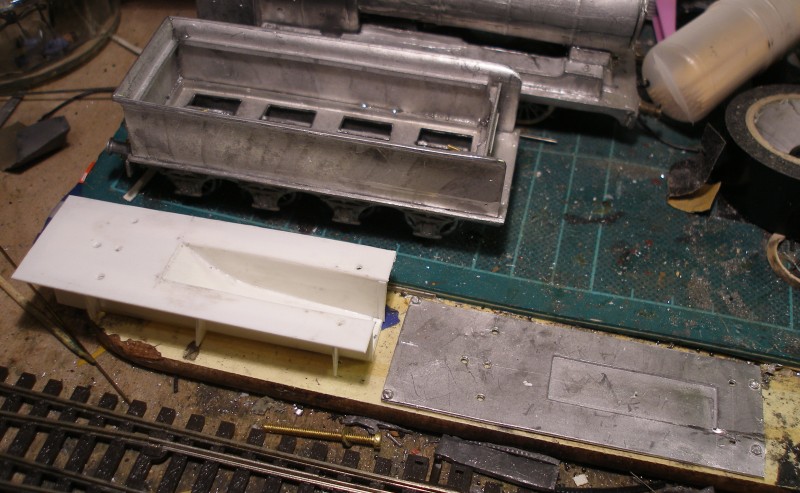
...and now fitted into the tender.
5 April 2018
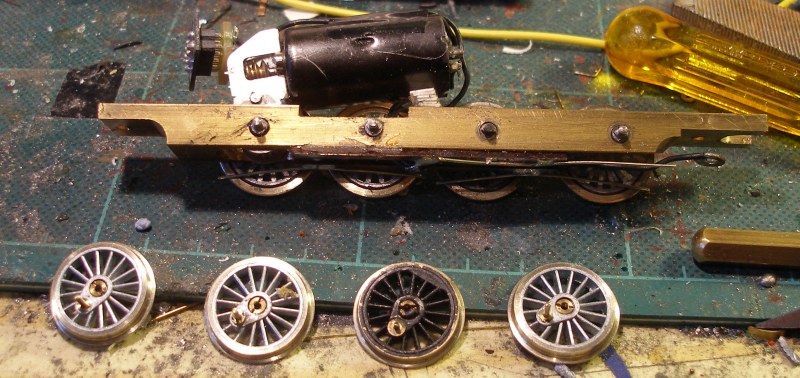
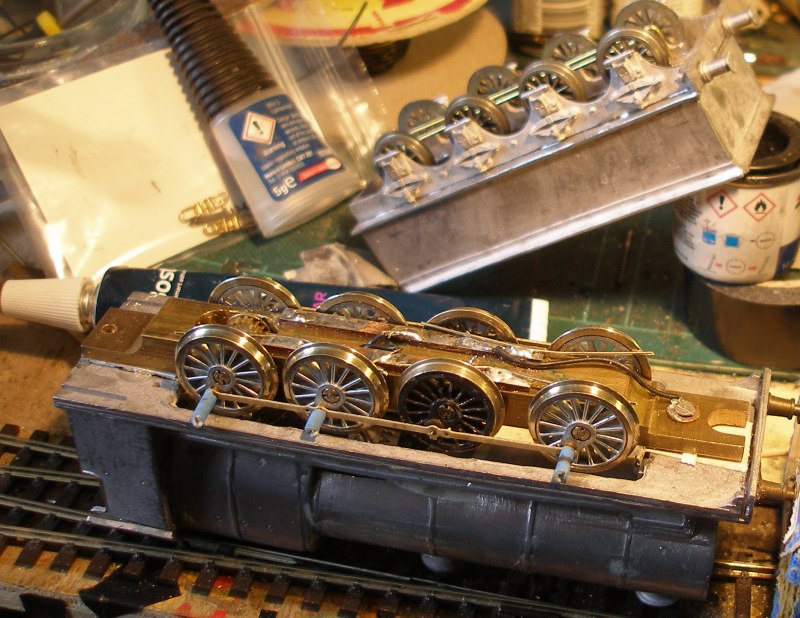
As previously noted, phosphorous bronze wipers had been used to make the pick-ups.However, it was become apparent, with running confined to the test track on the bench, that these were not going to survive in front-line service, as the photo below shows. Not previously noted, I had wanted to make use of the natural electrical path created by having uninsulated wheels on one side. I haven;t figured this out yet, given the solid nature of the chassis block, so for now have created a link from the front body securing screw to the pick-up strip.
 .
.
Fortunately a bent piece of springy wire was provided with the kit: ostensibly to create hand rails from, but it seemed ideal for a set of new pick-ups. I couldn't resist this shot of the new wipers fitted and the loco powered up on the bench. A pick-up has been fitted on the non-insulated side, as the job lot of Romfords I acquired off eBay had non-plated non-insulted wheels, and I favoured plated, so have an insulated wheel on the notionally non-insulated side. Also worth noting are the pieces of plasticard between the chassis and body. Something is connecting inside, but the raising of the body by 1mm has cured the problem.
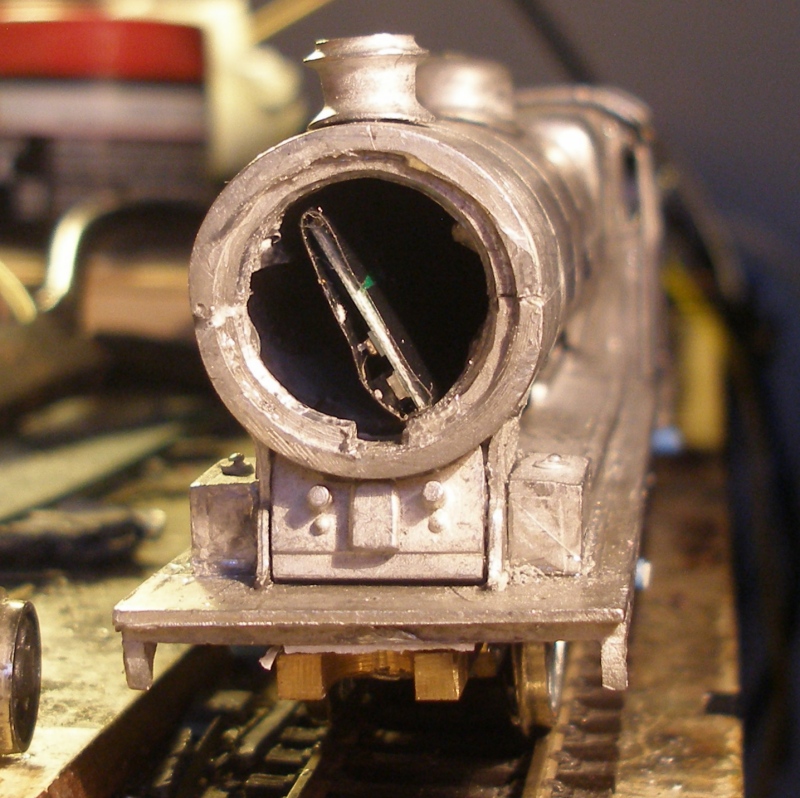
The smokebox door was sitting awkwardly inside the smokebox ring, and so was going to have t come off. Because there is an internal support inside the boiler, it is not possible to feed the DCC decoder down the inside of the barrel from the firebox end, so with the door off, the decoder has been inserted from the other end, and so is effectively being built into the loco. A critical look at the chimney shows it is not fitted very well but more critically it looks too fat, the real thing having a thinner, flower-pot shaped base.
Final job tonight was to connect the loco and tender using the nuts and bolts provided.

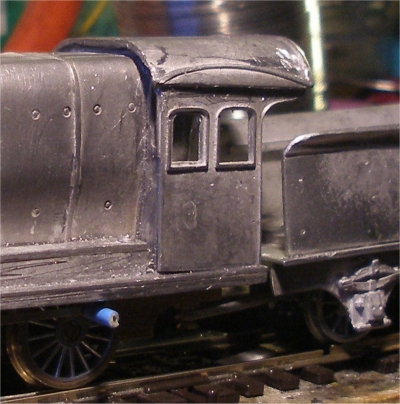
Bit of a spoiler for tomorrow, but I am not at all happy with that cab. To my eyes, it looks too chunky (one of the disadvantages of castings as opposed to etchings), the cab roof is sloping backwards despite my best efforts, and I rather think the windows are too low. The last survivor had this type of cab (so marginally closer to the supposed time period of the layout) but according to Lane and Essery/Jenkinson the original cab type was dominant right to the end, so I am minded to try the alternative side and roof castings tomorrow.
4 April 2018
Today the focus has been on the tender. The top fitted together nicely, although the chassis was problematical in that one of the inner axles didn't look parallel with its fellows. A bit of filing and giggling and the underframe has gone together - for now.
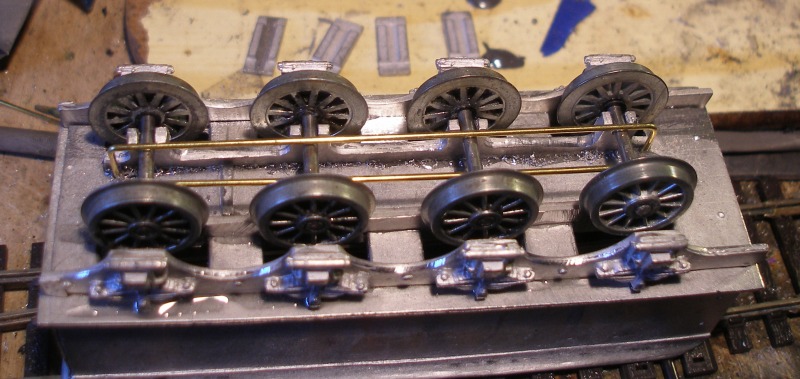
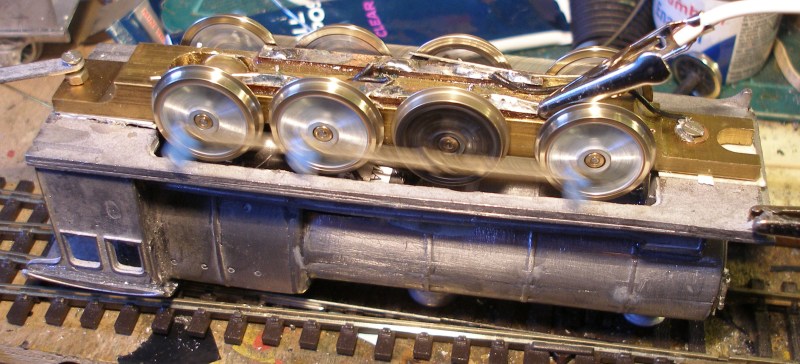
I have secured the axles with a pair of bars formed from straight .9mm brass wire. The kit provided 4 individual keeper plates which were to be glued into place on the bottom of the axle boxes, but I couldn't see how this would work without a high risk of gluing an axle or two solid. The plates are laid out on the bench behind the tender. The image below shows how the retaining rods have been bent over on the upper side, so that the wheels can still be removed. Despite a fair bit of fettling, I am not convinced the tender is going to be a smooth runner, and so being able to fettle the chassis when the running trials start is important. The plan at the this stage is to replace the whitemetal tank top with plasticard to reduce the weight.
With the body largely assembled, it was time to try fitting the chassis. The shaving behind the wheel splashers is evident and this area will need tidying up in due course. It is also apparent that the smokebox door is not flush and will have to be refitted. The idea of taking photographs of models 'in progress' to spot faults not obvious to the eye was recently aired by Martin Nield in the 'Model Railway Journal', and here is a case study!
The model has been tilted in the image below, and this shows an awkward gap under the cab, and again that smokebox door doesn't look any less attractive from this angle either. The footplate looks bent, but I think this is the camera lens.
3 April 2018
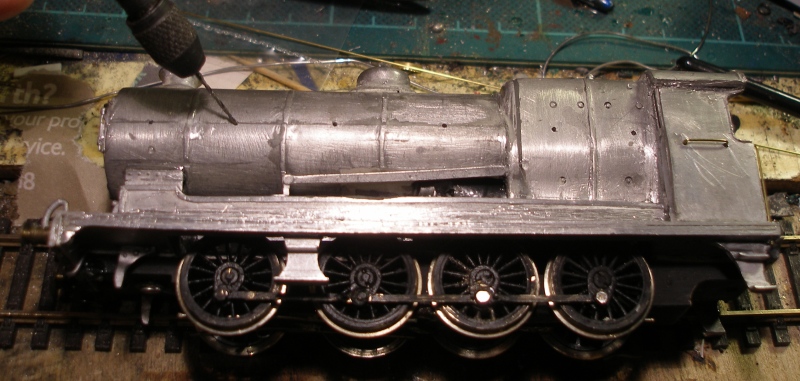
A fair bit of wet-and-dry was required to create a smooth surface on each joint and in particular on the horizontal joint along the boiler barrel. It was also apparent that the cab end of the assembly was higher than the smokebox end, and a fair bit of filing was required to lower the cab.
The spashers were relatively clean castings and they were quickly fitted. The inside edge will have to be ground away to clear the motor, but it was thought that this would easier to do with the splashers in situ.
The most difficult part to fit so far proved to be the cab roof. This substantial casting has to sit on the tops of the relatively delicate cab side sheets. The cab roof was also twisted, and needed firm pressure applying before it would sit level on both sides.
Whilst the cab roof was setting, a start was made on the tender. A rummage in the spare wheels box found a suitable set of Romford 14mm spoked wheels. One side and the rear have been fixed in the photo below. This is going to be one heck of a beast, and some weight reduction may be needed. Certainly, the tender tank top needs a recess creating for the coal to be funnelled down to footplate level, and this could be formed from plasticard.
2 April 2018
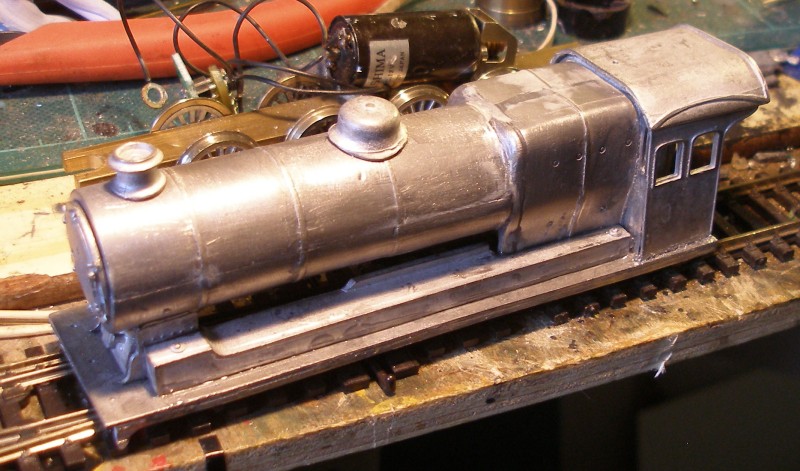
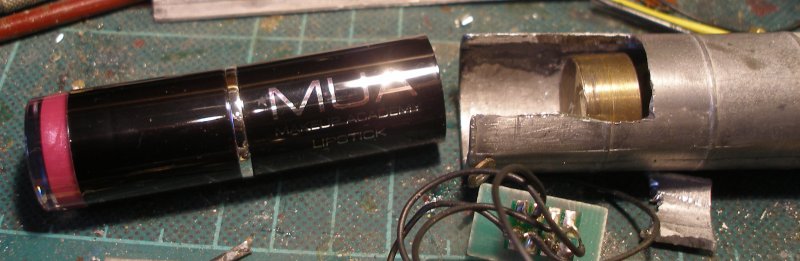
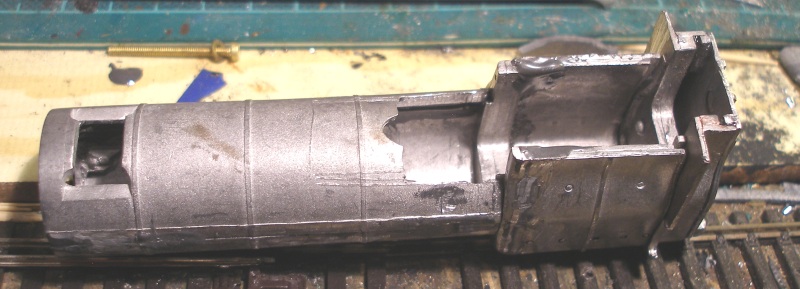
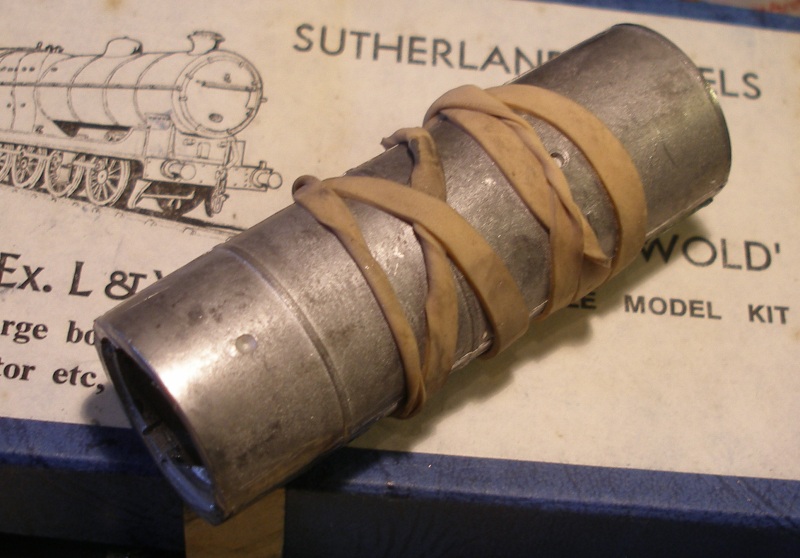
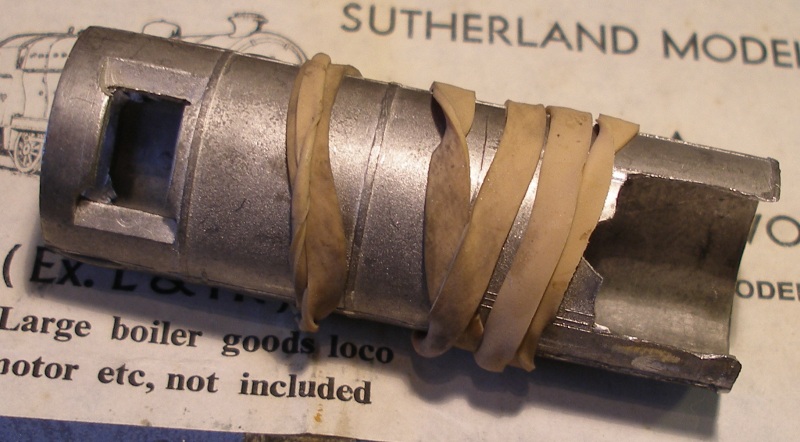
Not everything necessarily goes to plan! The flywheel had led to noticeable improvement in running, and I was keen to retain it. However, having cut out a section of the boiler barrel, it was apparent that it was going to foul the boiler casting, so the only option was to remove the flywheel and rebuild the underside of the boiler. The photo below shows the hole cut in the underside of the barrel, but after the flywheel has now been cut from the armature shaft with the trusty Dremel.
To rebuild the underside of the boiler needed a suitably sized tube which could be slid into the boiler barrel to create a firm base was required. The best fit appeared to be a lipstick container, and a quick visit to Superdrug identified the cheapest available at the princely sum of a £1.
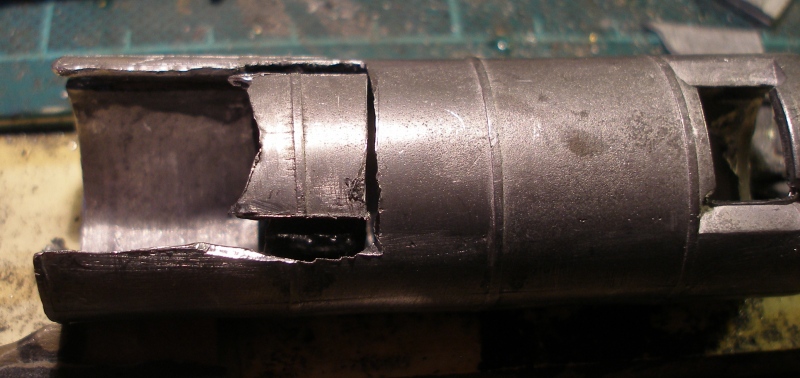
It was now possible to glue back into place the section of the boiler barrel that had been cut out, using JB Weld. Clearly some filling and sanding is going to be required.
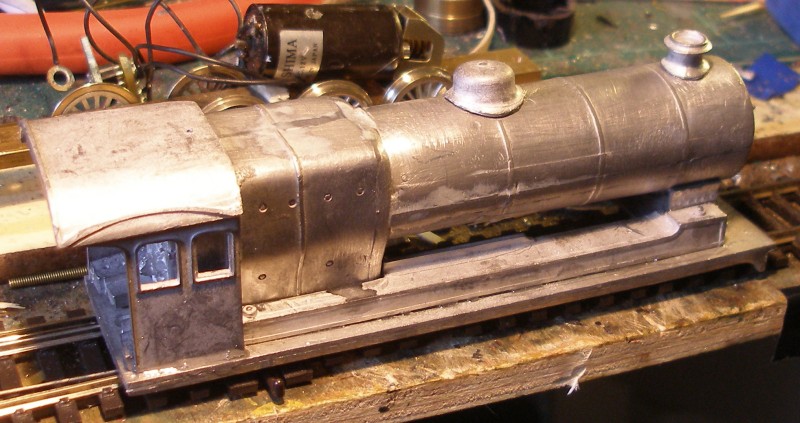
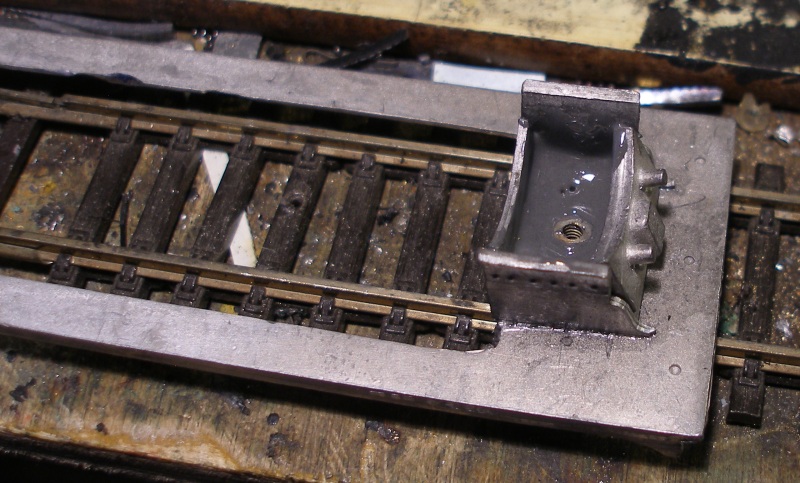
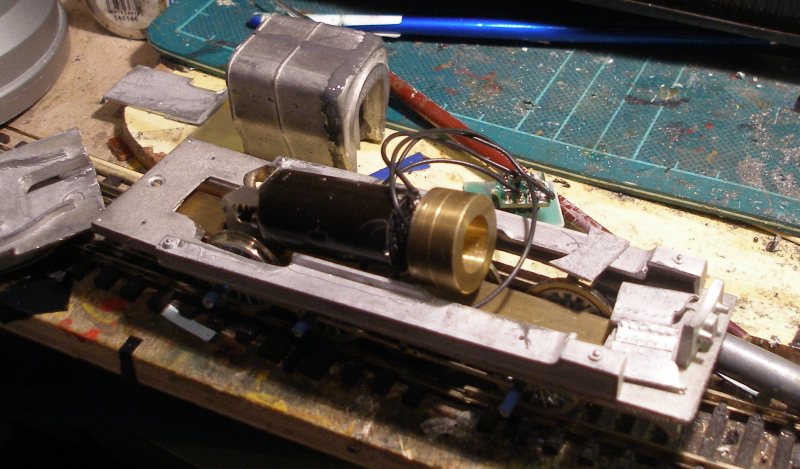
Whilst the barrel was drying, the smokebox saddle was addressed. This is a box assembled around a block formed in the footplate casting. The four 'sides' were glued in place with Superglue, the nut inserted in its recess and then the cavity gentle filled with JB Weld up to the top of the nut.
Meanwhile the backhead, firebox and boiler barrel assembled using Araldite, and temporarily mounted on the footplate with the fireman's side splasher.
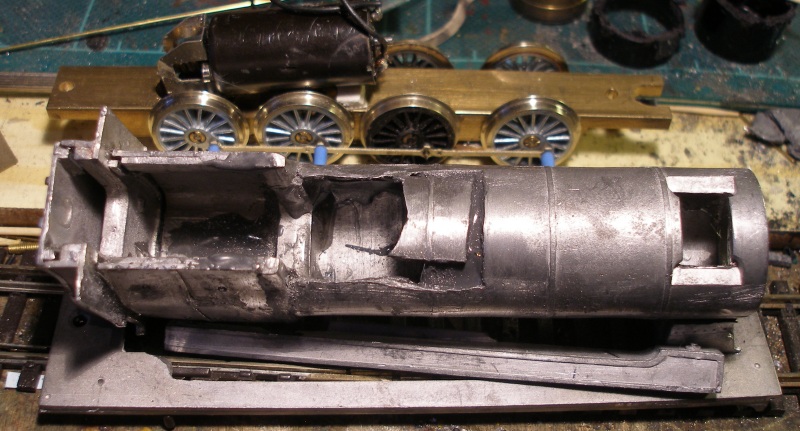
The underside of the boiler showing the awkward hole still awaiting the filler treatment. The comparing the motor-sized hole in the bolier shows how much is going to have to be ground out of the rear tubeplate to accommodate the motor.
30 March 2018
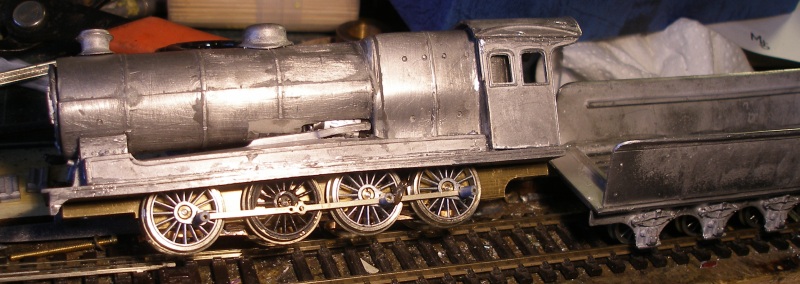
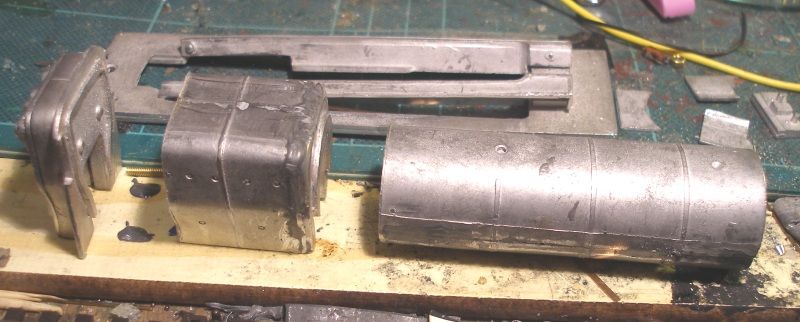
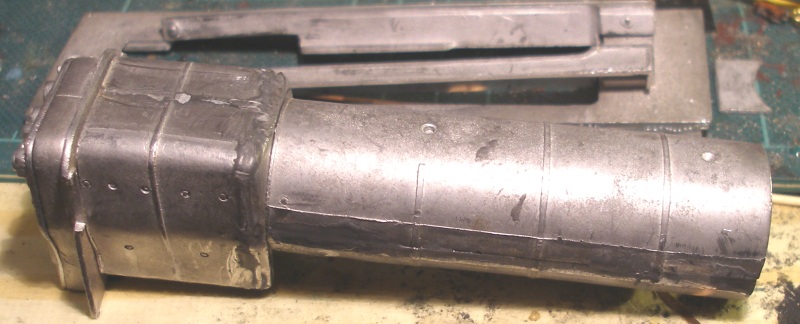
Various other projects pushed ahead today, but there was time to apply the files to the boiler barrel and firebox to achieve a reasonable fit. Although the various elements are nicely cast and relatively free from flash, getting the sections to fit correctly required so sliming down of the interfaces, as seen below.
In this shot of the three elements have been trial fitted together. The flywheel is a close fit inside the large boiler barrel, and the possible area that may need to be cut away is marked up on the underside of the boiler.
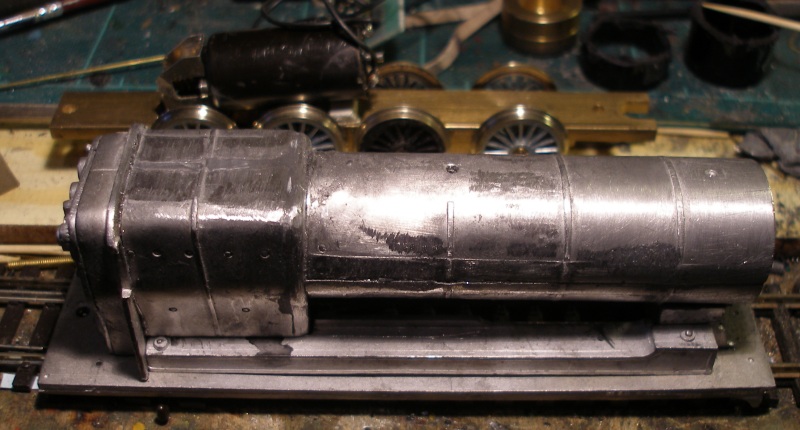
The whole assembly is now looking parallel to the footplate, although some filing and sanding will be required to remove flash and hide the joins.
29 March 2018
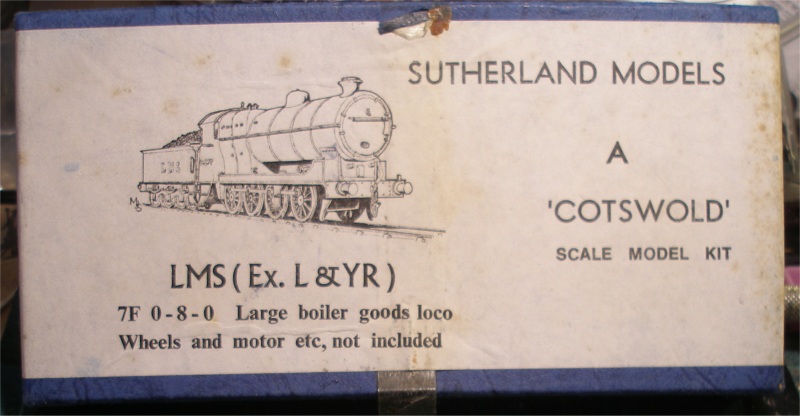
The layout has a time line of c. 1962 - 1966, although there's a bit a slippage into 1968 with the trains. That said, it is a Lanky layout, and there should be something to mark the fact. There is already a Dapol 'Pug' (notionally the last one saved by the L&Y Trust) and the last Radial (50850) and a Bachmann example. And then on eBay an unmade Cotswold kit of a Class 31 0-8-0 heavy goods came up. Now there is a better kit currently available, but what I wanted was a representative model - a layout loco in Tony Wright's thinking - and the price was right. Like all good unmade kits, it has sat on the shelf for a good four years, and then rediscovered. Notes on possibly prototypes are here.
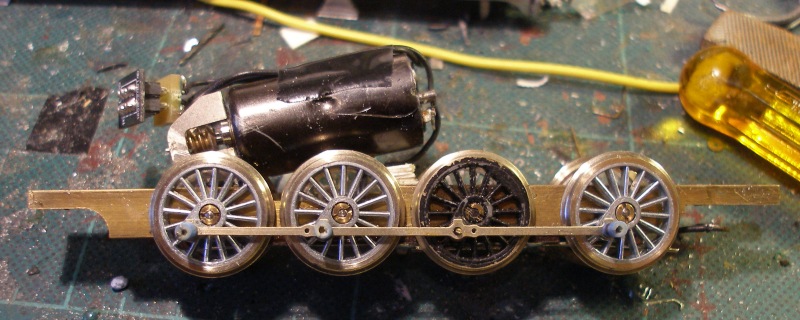
To modern eyes it is relatively crude with a solid brass chassis and chunky castings. I would have photographed the chassis in its component parts but the initial opening of the box and some test fitting saw it erected in about 30 minutes. For those who bemoan the rapidly rising cost of modern locos and components, the wheels and axles also came off eBay (hence why two wheels are pre-painted). The Mashima motor and flywheel date back to 1989 and were bought from the old W & H shop in Marylebone to originally power an Airfix 4MT 2-6-0 motorising project, with the motor fitted in the tender The gear box is a High Level one, and was assembled last year as part of a proving project.
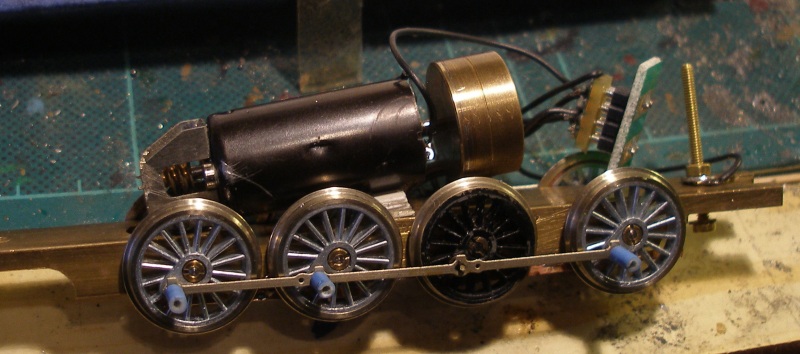
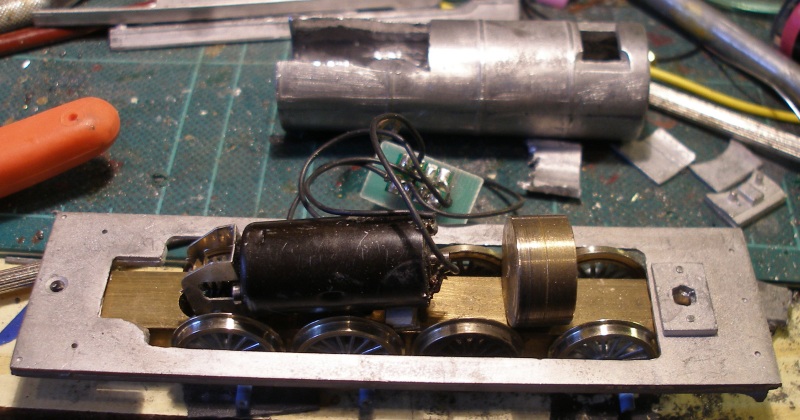
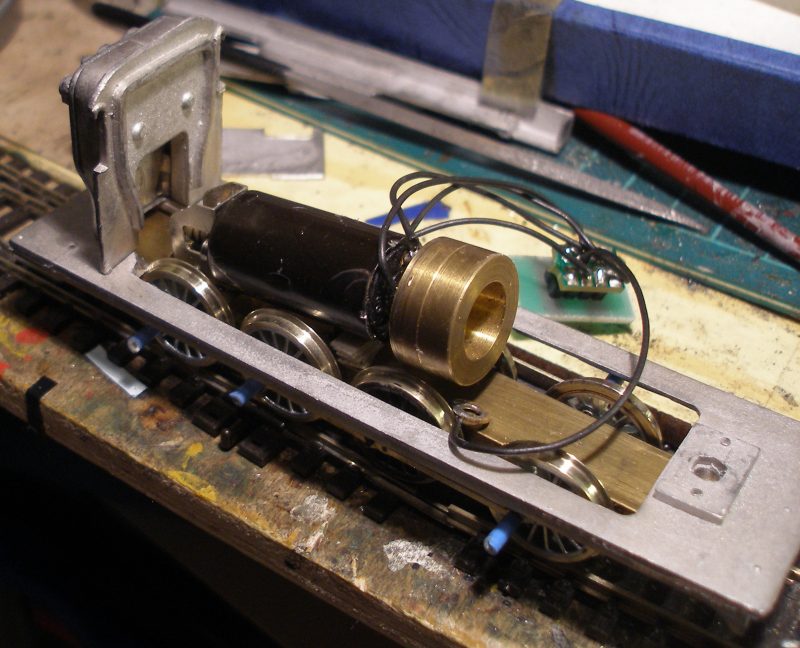
Even at this stage, a Gaugemaster DCC socket has been installed to allow it to be test run on the layout.
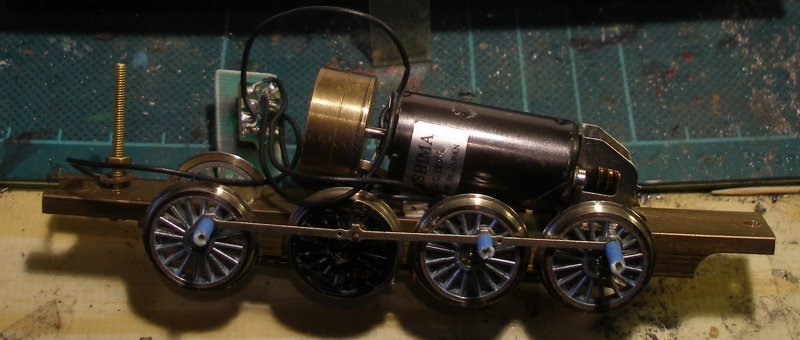
The pick-ups have been formed from paxolin copper strips Araldited to the bottom of the chassis block. Cotswold have handily provided a hole which I assumed to be for the pick-up wires. However, on reading the instructions, it is apparent that this was for the motor mounting block screw, but this is not required as the motor is secured via the gearbox. It is apparent that one of the wipers is not bearing on the back of one of the wheels, but this doesn't seem to affect performance.
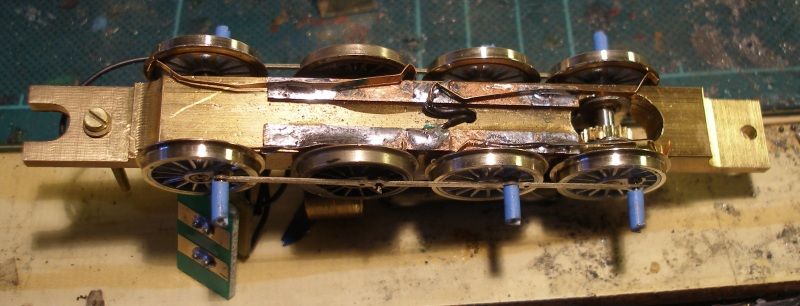
Note how the coupling rods are held in place with insulation stripped off mains wiring. This allows adjustments to made easily, and will also allow the wheels to be taken off when the chassis block is painted. It was apparent that there was some stiffness as the wheels were rotated by hand. It seemed this related to the rear axle, and the coupling rod hole was gentle eased with a file. This cured the problem.
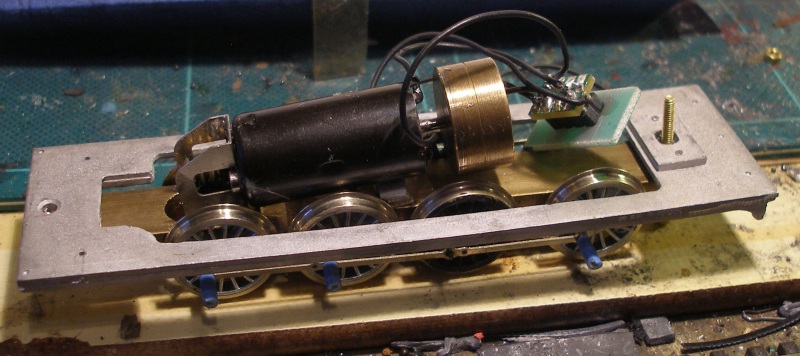
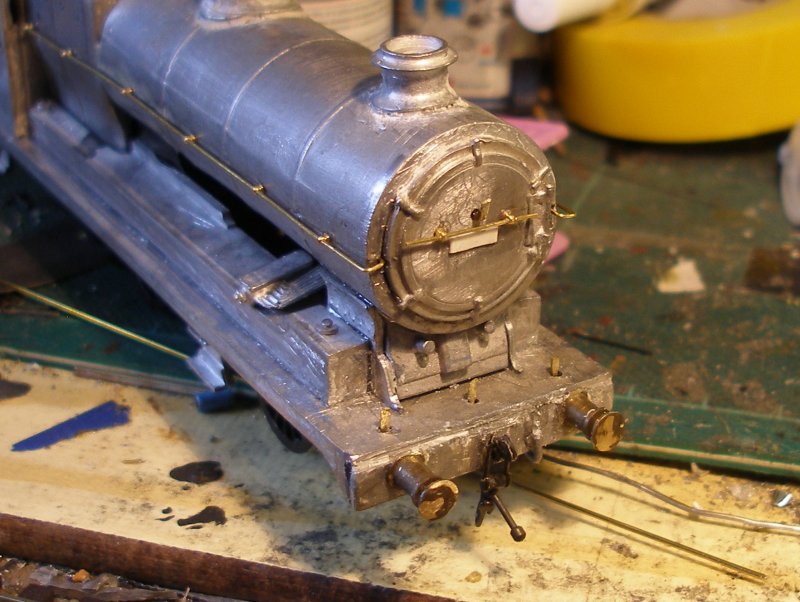
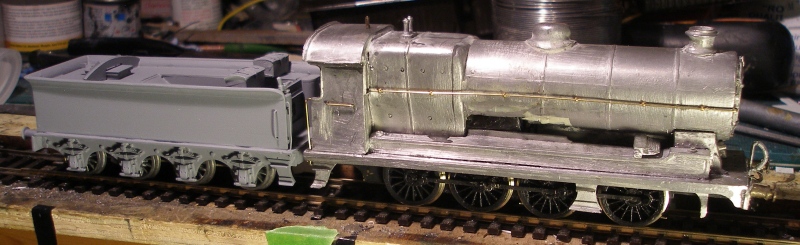
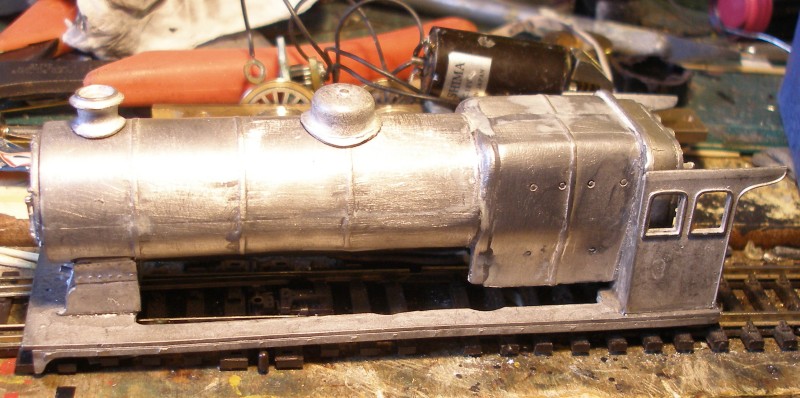
With the chassis assembled and running, the footplate was placed on it. The boiler comes in two halves, and it was glued together after carefully filing the mating services to ensure a good fit. I have used Loctite, re-infoced on the inside with J D Weld.
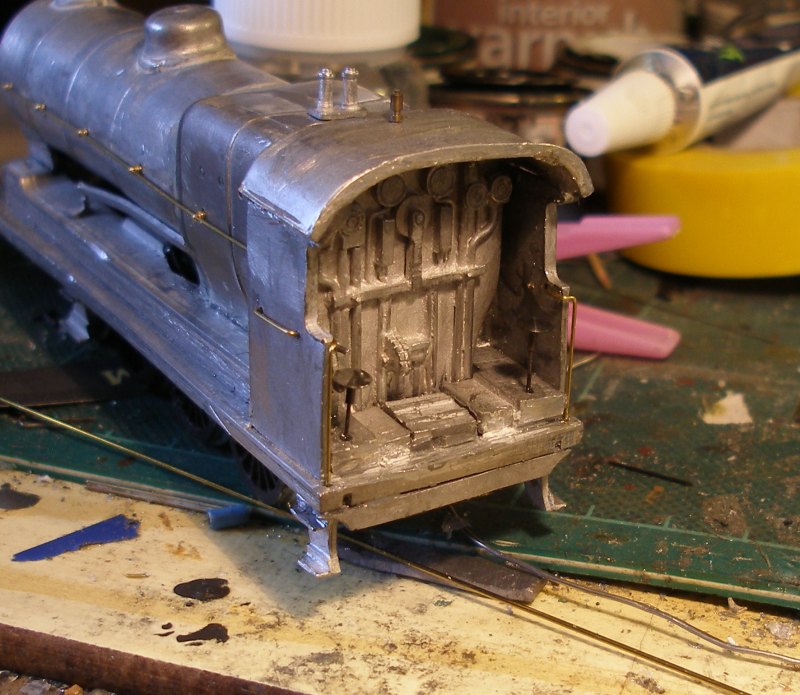
Next the backplate was glued into the cab spectacle sheet. The model illustrates the shear bulk of these locos.
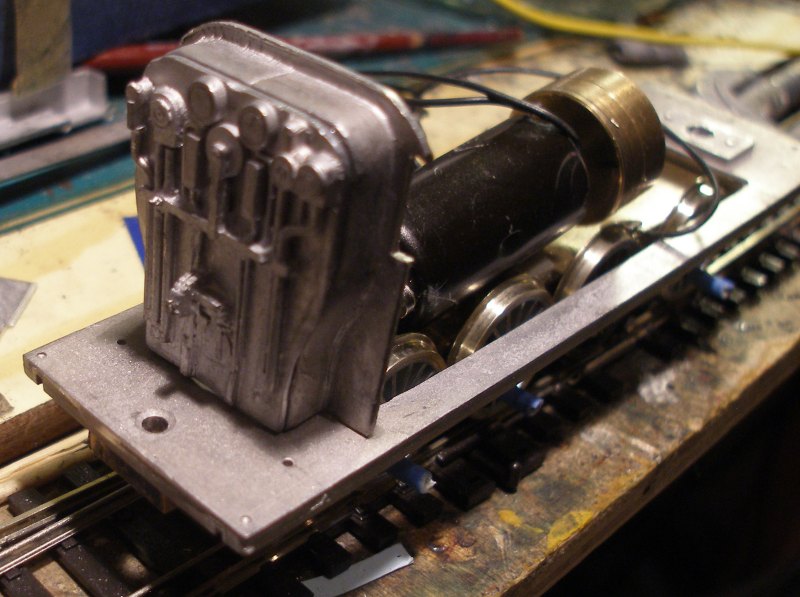
The fire box was also assembled. The mating services needed a fair bit of cleaning-up to get a good fit, and then J D Weld was used to strengthen the joints on the inside, and as filler on the public side.
29 March 2018

Copyright J K Wallace, t/a 'Hall Royd Junction' 2013-2023 email: Hall Royd Junction
7 Portobello Close, Chesham, Bucks. HP5 2PL, UK
tel: +44 (0)7513 412880